Plan Symbols. Line
A Line is a symbolic element you can add to your floor plan to highlight zones, add explanations, or mark key elements. It does not affect project calculations and is used only for visual purposes — such as indicating boundaries, marking utilities, or adding notes.
How to draw a line
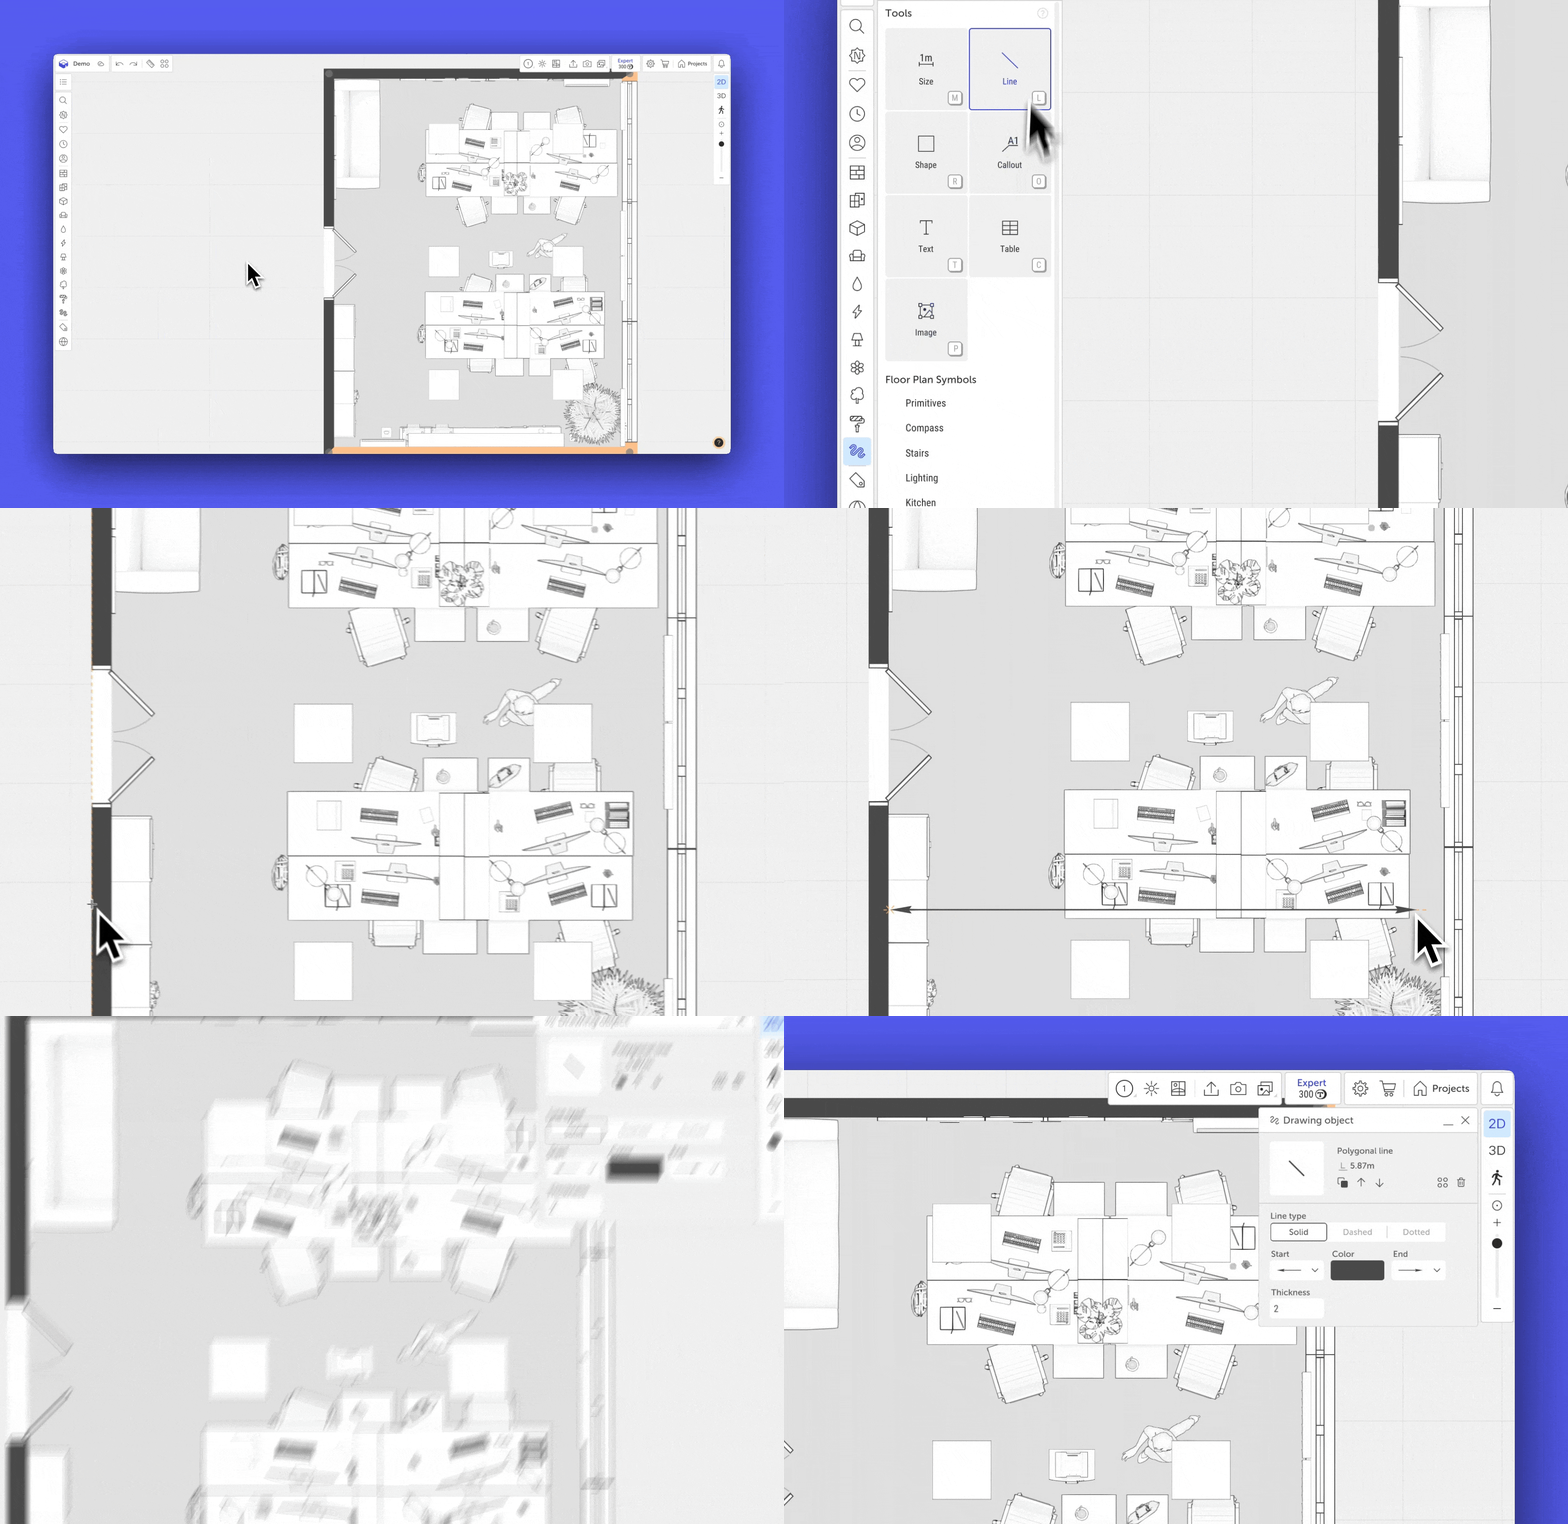
- Select the «Line» tool from the toolbar.
- A prompt will appear asking you to choose the starting point.
- Click on the desired spot — this sets the start of the line.
- Click the second point — a line will be created between the two.
Once the second point is set, the line will become selected, and a «Drawing Object: Polygonal line» menu will appear in the top right corner.
Editing the line
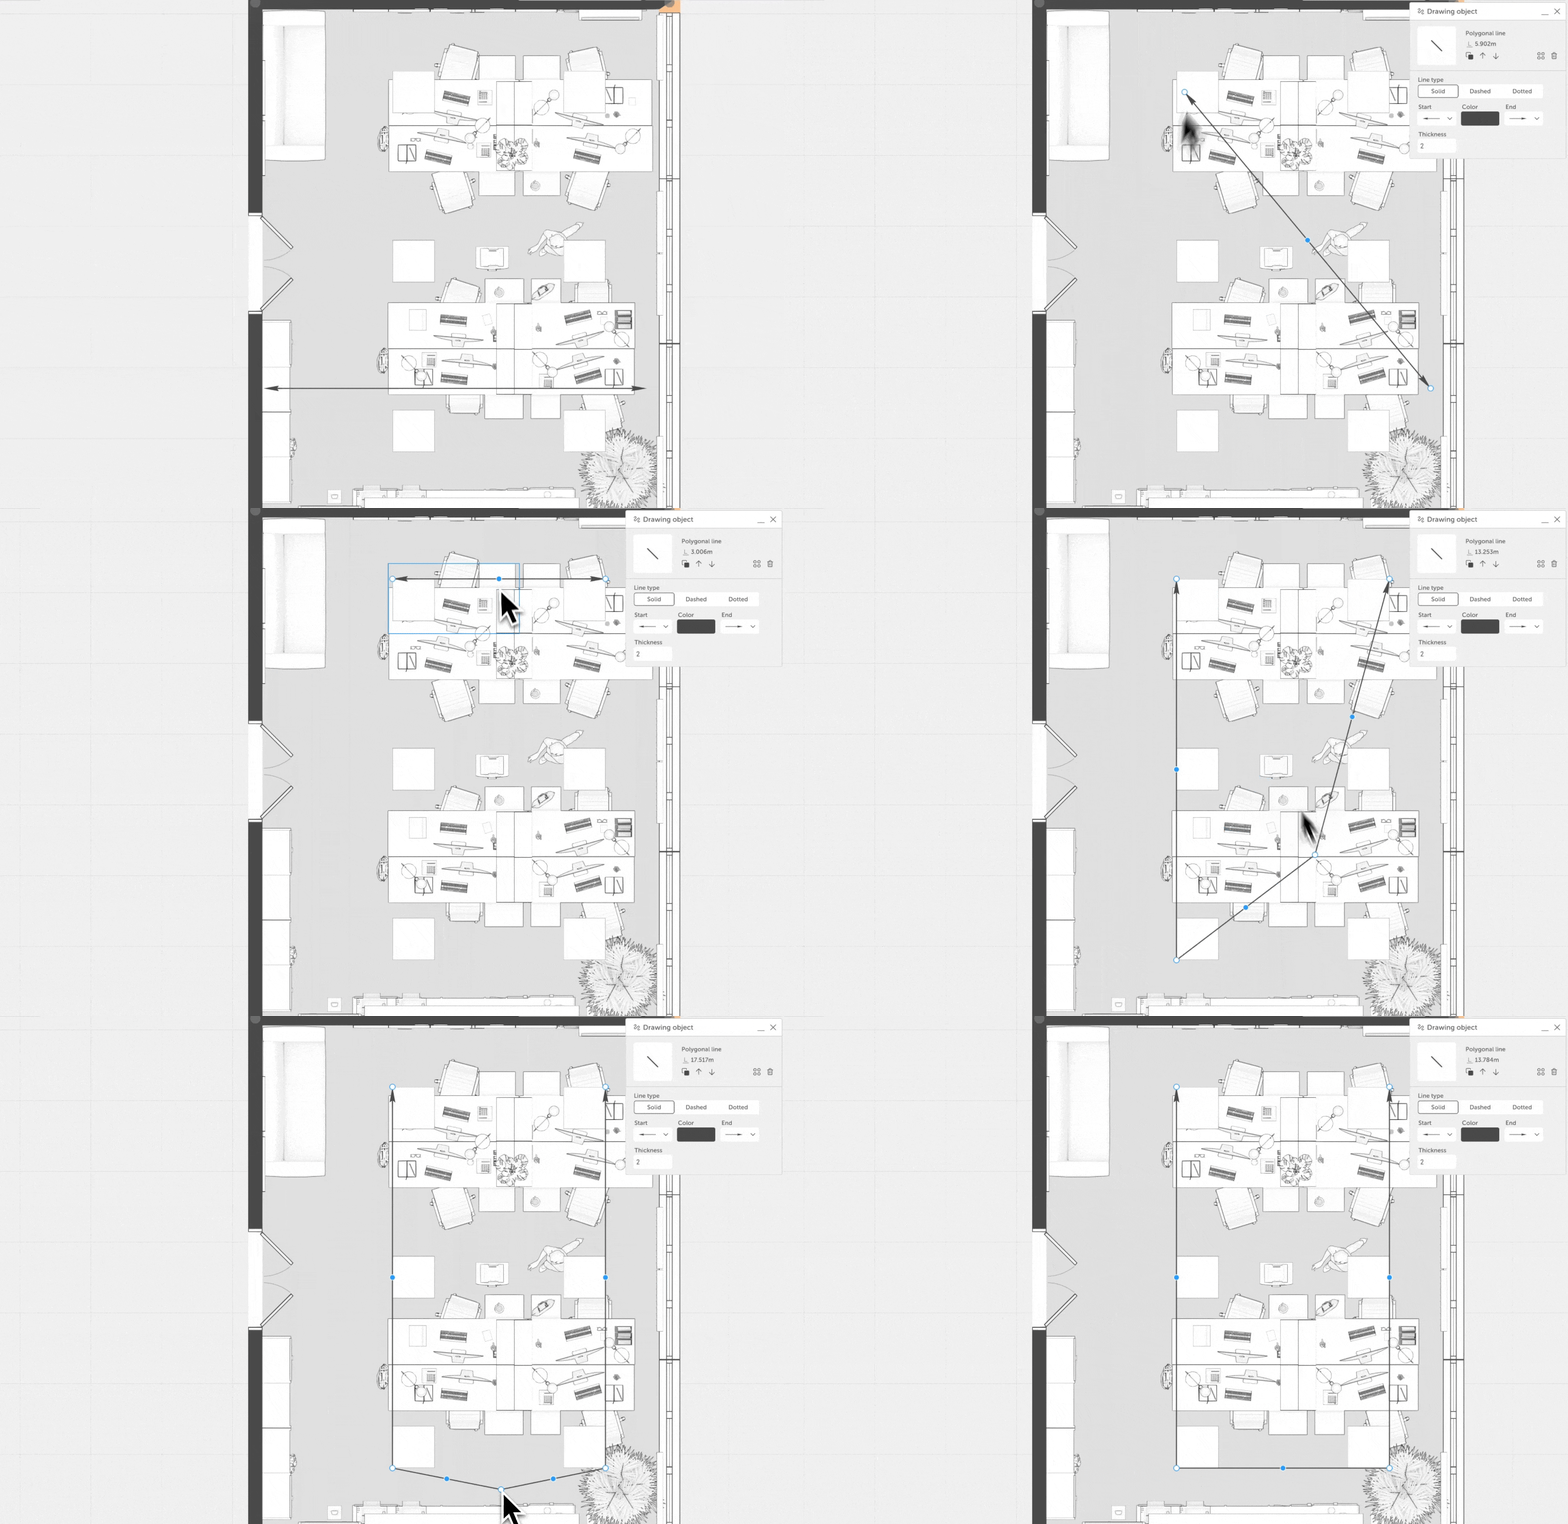
Moving the line. To move the entire line, drag it with the left mouse button.
To move the endpoints, drag the white circles at either end.
To bend the line drag the blue circle at the center — the line will bend at that point while the ends stay fixed. After the first bend, new blue points appear on other segments — you can drag them to add more bends.
To delete an added point, double-click the left mouse button on the point twice or combine the points.
Line settings panel
Position block:
- Copy (two squares icon) — creates a duplicate of the selected line. You can also use
Ctrl + CandCtrl + V(on Mac:Cmd ⌘ + C,Cmd ⌘ + V) or holdAlt(Mac:Option ⌥) and drag the line to copy it. To duplicate the line again, useCtrl + D(Mac:Cmd ⌘ + D). - Above all (up arrow) — moves the line above all other conditional objects.
- Under all (down arrow) — places the line beneath all other objects.
- Delete (trash icon) — removes the line. You can also press the
Deletekey. - [Image]: Position panel interface with labeled buttons: «Copy», «Above all», «Under all», «Delete».
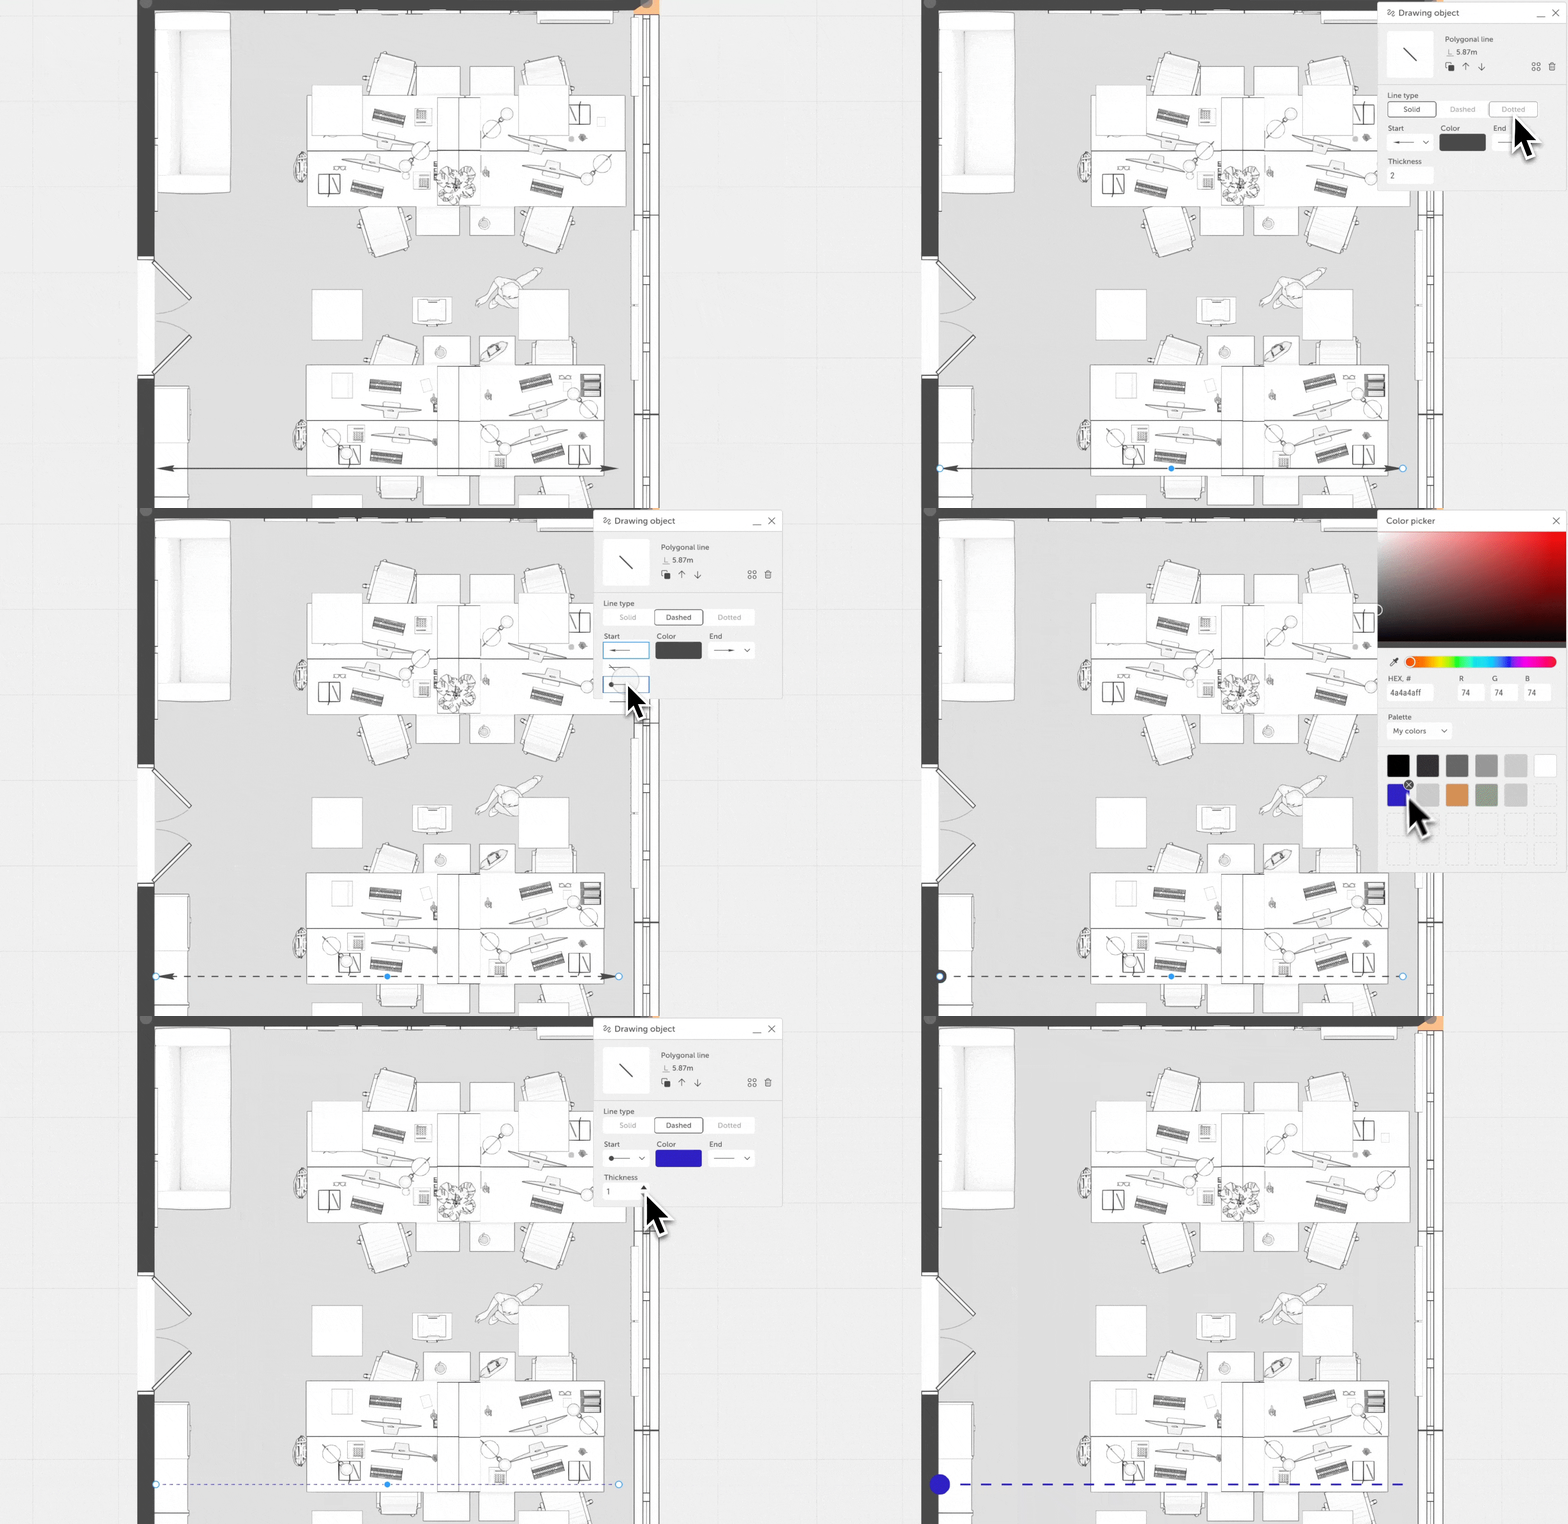
«Line type» block. Choose from three preset styles:
- Solid
- Dashed
- Dotted
«Start / End / Color» block:
- Start — choose from 4 predefined line start styles.
- End — same options as «Start».
- Color — open the Color Picker and select a color.
«Thickness» block. You can adjust thickness by moving the slider, typing a value, using up/down arrow buttons.
Minimum thickness is 1.
If you have any questions, found an error, or couldn't find the information you need, please contact us at support@planoplan.com, use the built-in support on the website or in th app (icon in the bottom right corner).