Plan Notation: Text
4 min
14
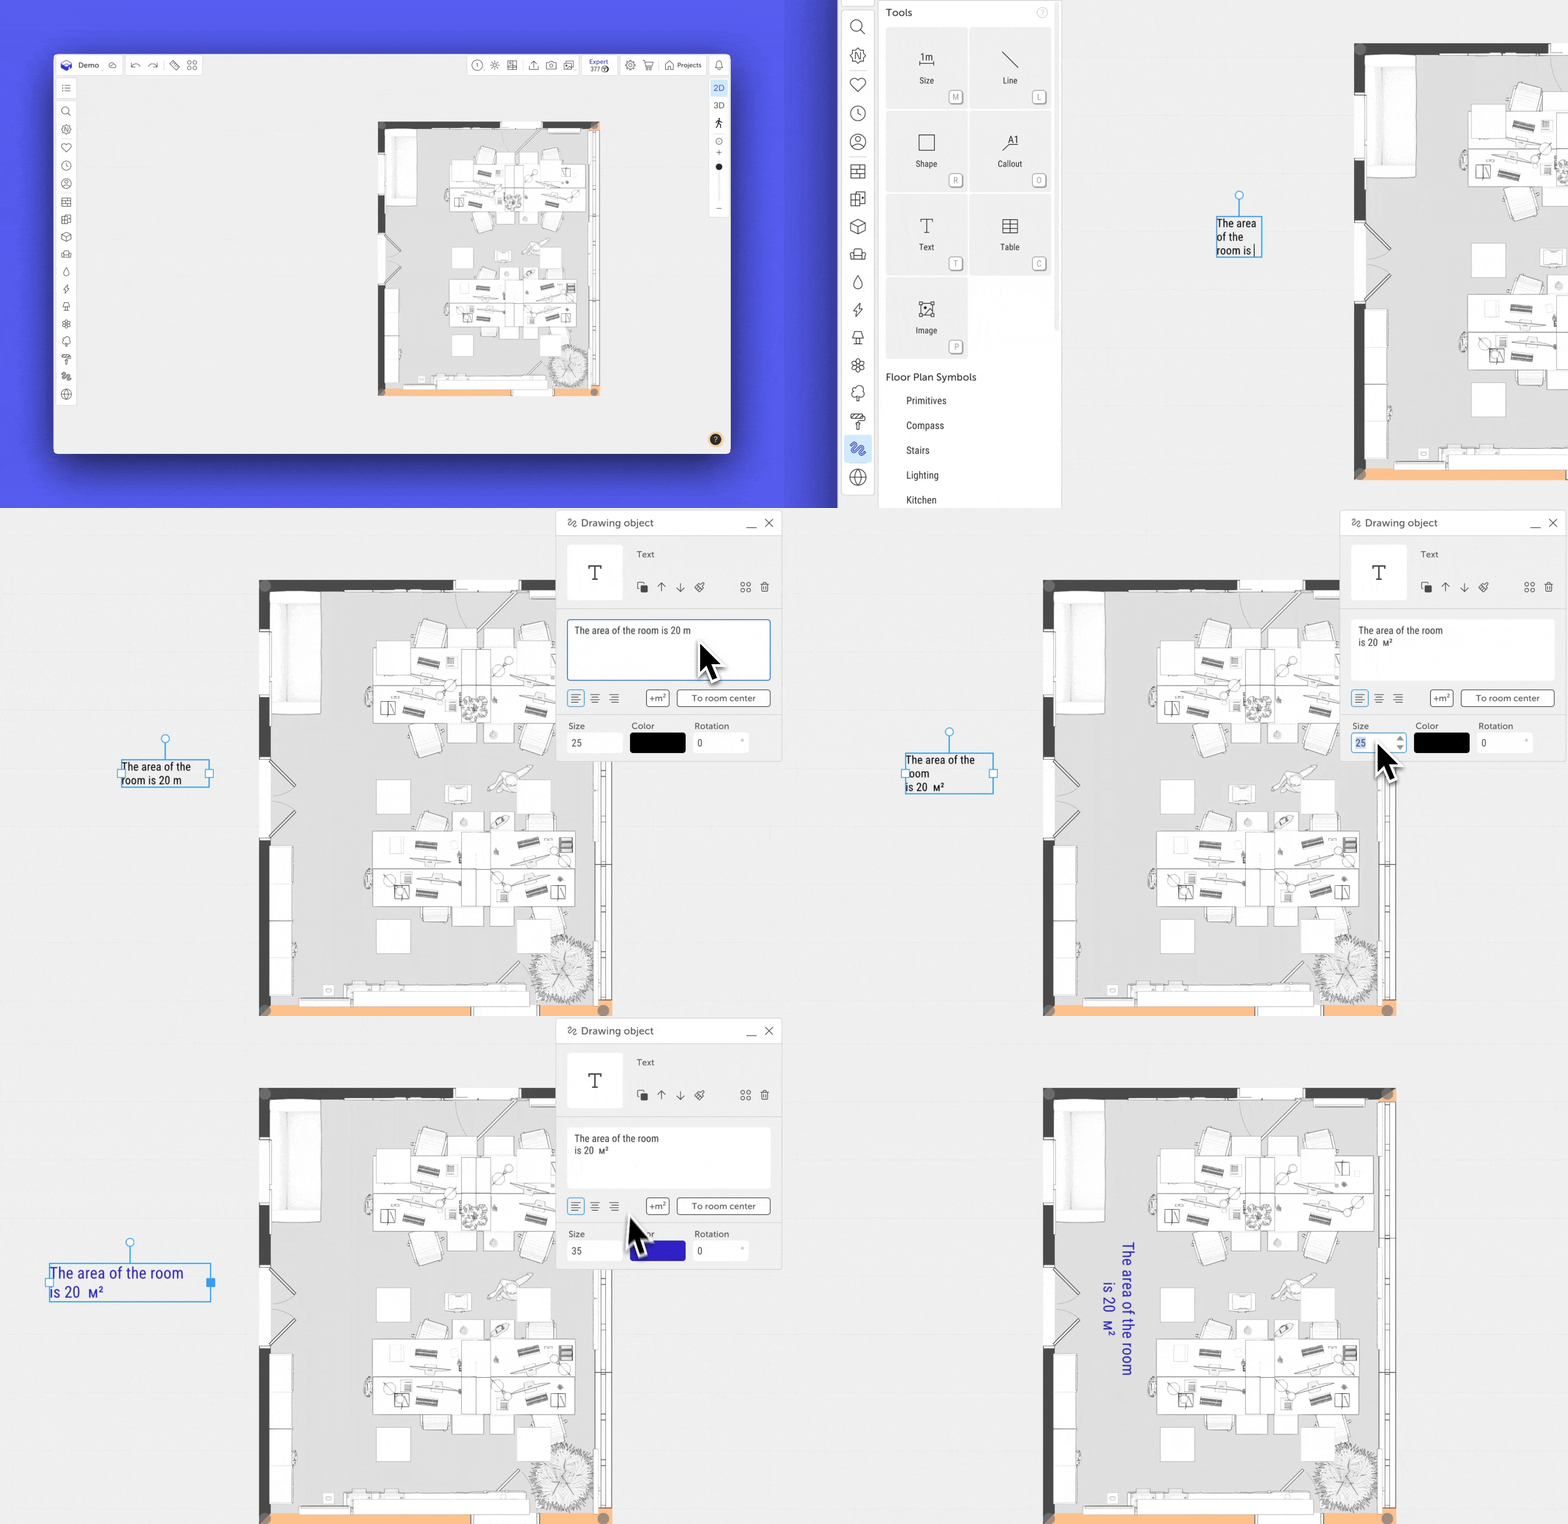
The «Text» tool allows you to add explanatory labels to the 2D floor plan. This can include room names, area measurements, technical notes, or project-specific comments. Text annotations do not affect geometry and are used solely for visual reference or labeling.
How to Add Text to the Plan
- Select the «Text» tool from the conditional objects panel.
- Click on the plan where you want the text to appear — a frame with a text input field will appear.
- A text object settings menu will open in the top right corner.
Managing the Text Object
Moving and Resizing
After placing the text, a frame with control handles will appear:
- Resize handles are located in the center of each frame side. Hover the cursor over a handle, hold the left mouse button, and drag to adjust the size.
- Rotation handle is located at the top of the frame — allows you to set the text angle.
- Move the text by clicking and dragging it to a new location.
Text Control Panel
When a text object is selected, a panel with several setting blocks appears on the right:
Copy and Position Tools
- Copy (two squares icon) — creates a duplicate of the selected text. You can also use
Ctrl + CandCtrl + V(on Mac:Cmd ⌘ + C,Cmd ⌘ + V) or holdAlt(Mac:Option ⌥) and drag the texte to copy it. To duplicate the line again, useCtrl + D(Mac:Cmd ⌘ + D). - Above all (up arrow) — places the text above all other conditional objects.
- Under all (down arrow) — places the text below all conditional objects.
- Apply to All (brush icon) — applies the selected text style to all visible texts on the current floor.
- Delete (trash bin icon) — deletes the text object. You can also press Delete on the keyboard.
Text Input and Positioning
- Input field — where you enter the text. You can write multiple lines using Enter to break the lines.
- Text alignment — aligns the text within the frame: left, center, or right.
- Add area symbol («m²» icon) — inserts the «m²» symbol at the end of the text.
- To room center — moves the text to the center of the nearest room. If the text is not placed inside a room, nothing will happen.
Appearance Settings
- Text size — can be set from 8 to 72 points. Adjustable via slider, direct number input, up/down arrow buttons. If an invalid value is entered (<8 or >72), the program will automatically apply the nearest valid value (8 or 72).
- Text color — selected using the Color picker.
- Text rotation — can be set using the slider, manual value entry, a preset angle.
If you have any questions, found an error, or couldn't find the information you need, please contact us at support@planoplan.com, use the built-in support on the website or in th app (icon in the bottom right corner).