Plan Annotations. Callout
A callout is a type of annotation used to display text notes directly on the floor plan. Callouts help provide additional information about specific elements without cluttering the layout. For example, you can use a callout to label dimensions, materials, zones, or functional areas.
How to add a callout to the plan
- Activate the «Callout» tool in the toolbar.
- A prompt will appear on the screen asking you to select the starting point. Click the desired location on the plan with the left mouse button.
- Next, set the position of the callout text. It will be connected to the starting point by a line.
- After selecting the second point, the «Drawing Object» Callout menu will appear in the top-right corner, allowing you to configure settings.
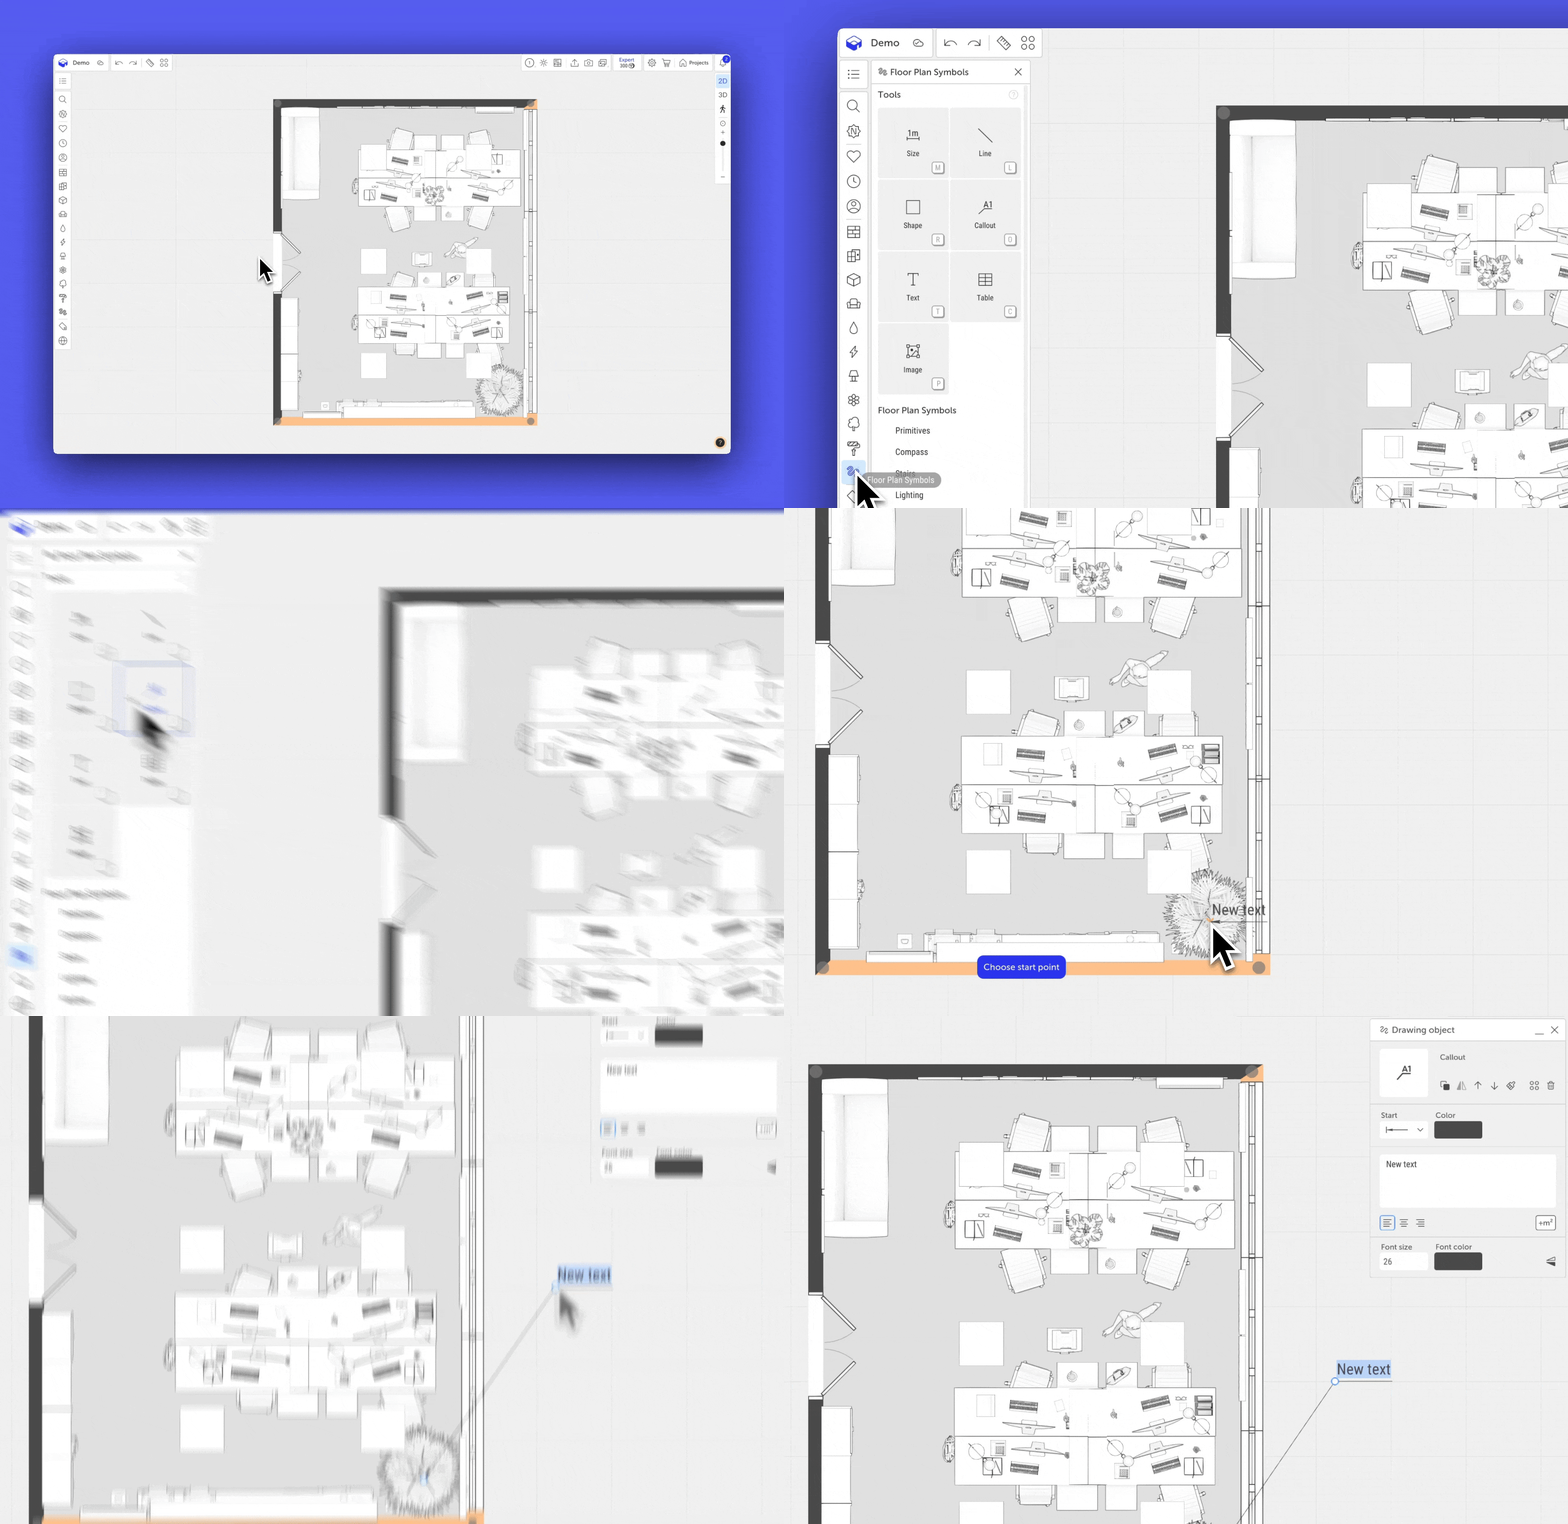
How to edit a callout
When you hover over a non-selected callout, it is highlighted with a frame.
Click on the callout to select it — the «Drawing Object» menu will open, and two control points will appear: one for adjusting the start of the callout line and another for moving the text block (annotation).
To move these points:
- hover over the desired point;
- press and hold the left mouse button;
- drag the point to a new location.
To move the entire callout:
- hover over the callout line;
- press and hold the left mouse button;
- drag it to the desired location.
[GIF]: Moving a callout and editing its control points using the mouse.
Callout settings menu
Position control block. Located at the top of the menu:
- Above all (up arrow) — moves the callout above all other conditional objects.
- Under all (down arrow) — places the callout behind all other conditional objects.
- Apply to all (brush icon) — applies the style of the selected callout to all visible callouts on the current floor.
- Delete (trash bin icon) — removes the selected callout.
Callout line style settings:
- Start — choose from three predefined options for how the callout line begins.
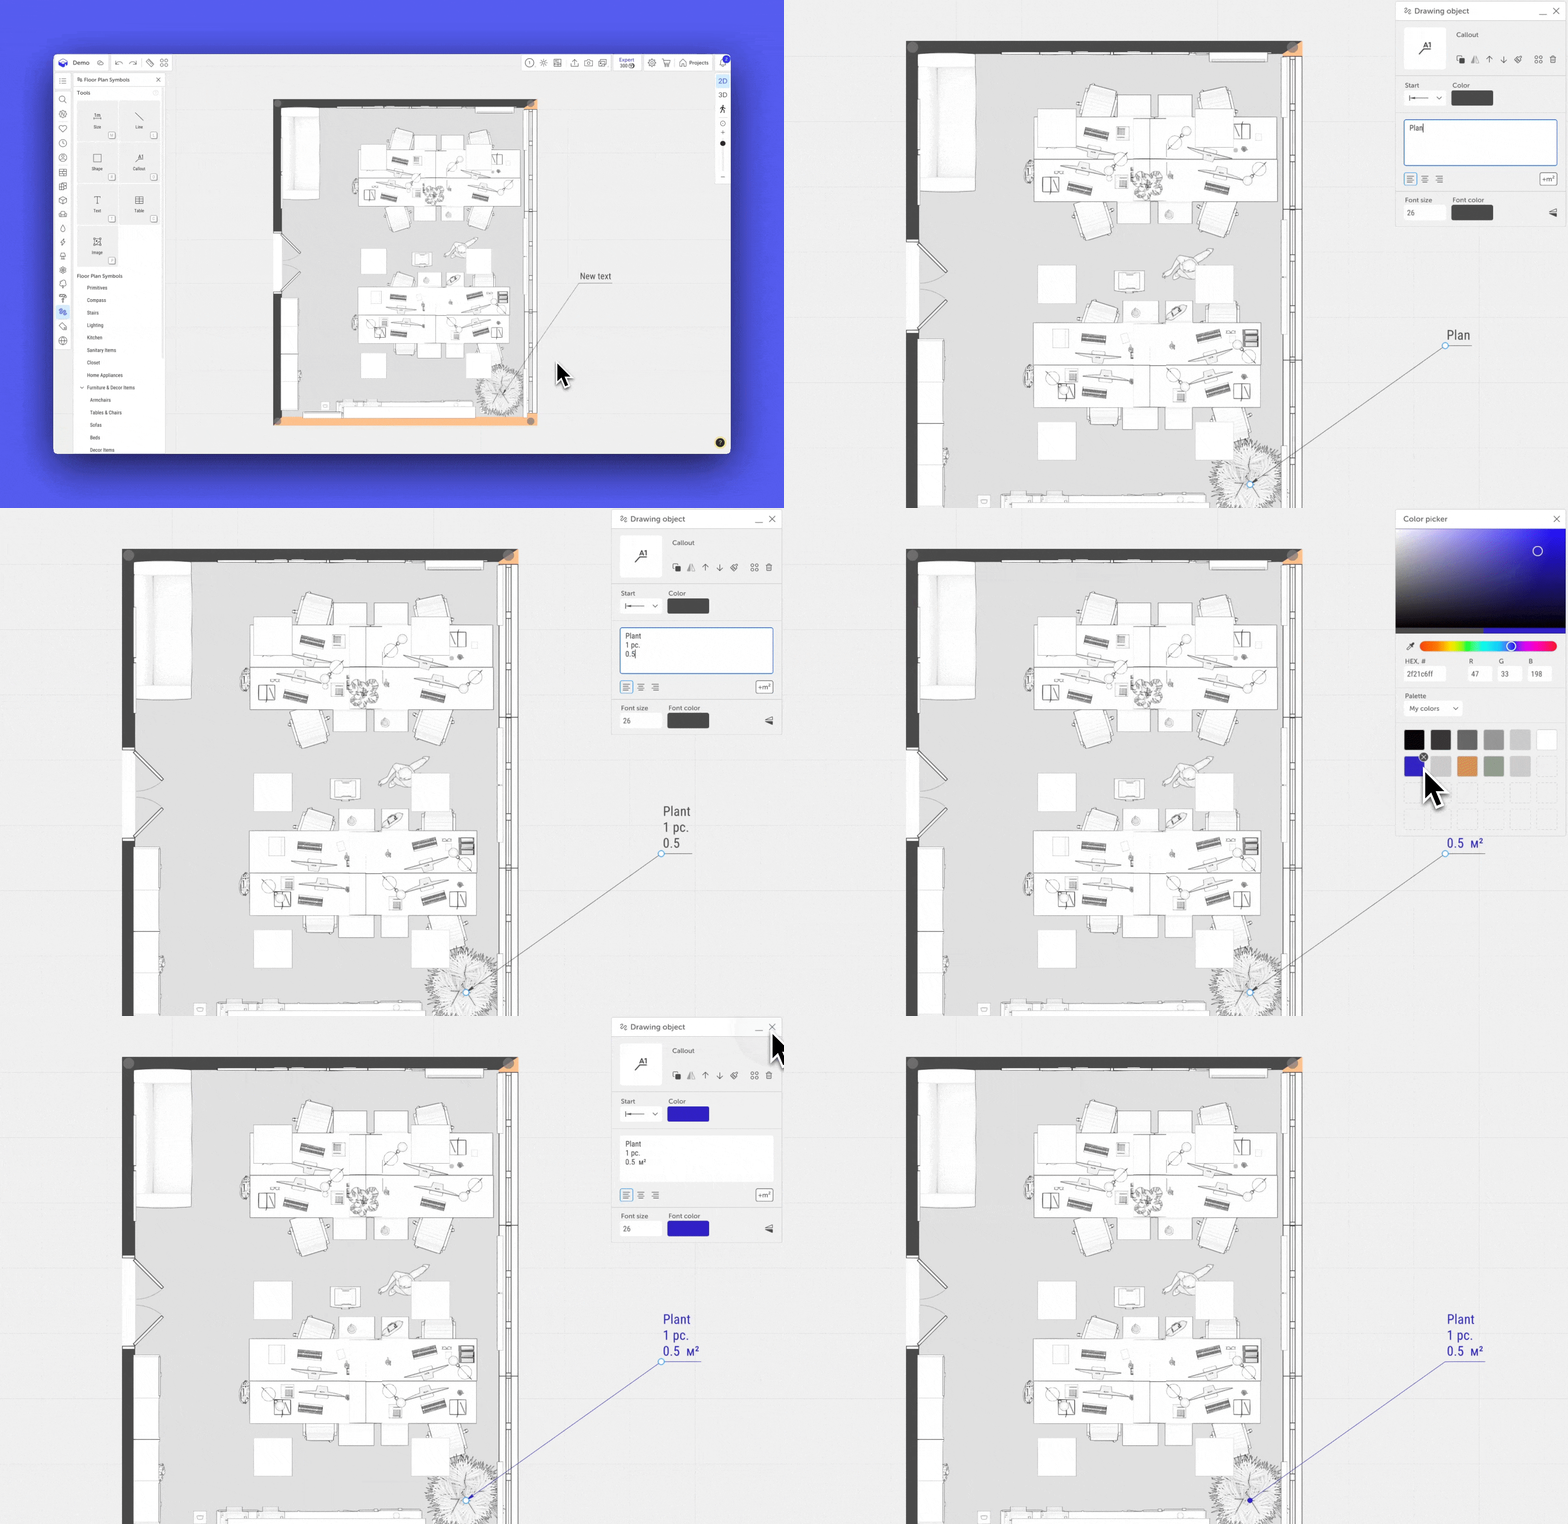
- Color — select the line color using the Color Picker.
Text input and alignment:
- Text field — enter the text to display on the annotation line. Multi-line input is supported. Use the Enter key to add line breaks.
- Text alignment — aligns the text vertically: left, center, or right.
- Add area symbol — this button automatically adds the «m²» symbol to the end of the text.
Text appearance settings:
- Font size — can be set from 8 to 72 points. You can use the slider, enter the value manually, or use the ↑/↓ arrows. If you enter an invalid value, the system will automatically apply the minimum (8) or maximum (72).
- Font color — selected using the Color Picker.
- Flip — switches the position of the text relative to the annotation line (above or below).
If you have any questions, found an error, or couldn't find the information you need, please contact us at support@planoplan.com, use the built-in support on the website or in th app (icon in the bottom right corner).