Creating Renders
In Planoplan you can produce photorealistic renders.
Open the dedicated rendering mode by clicking the camera icon in the top toolbar.
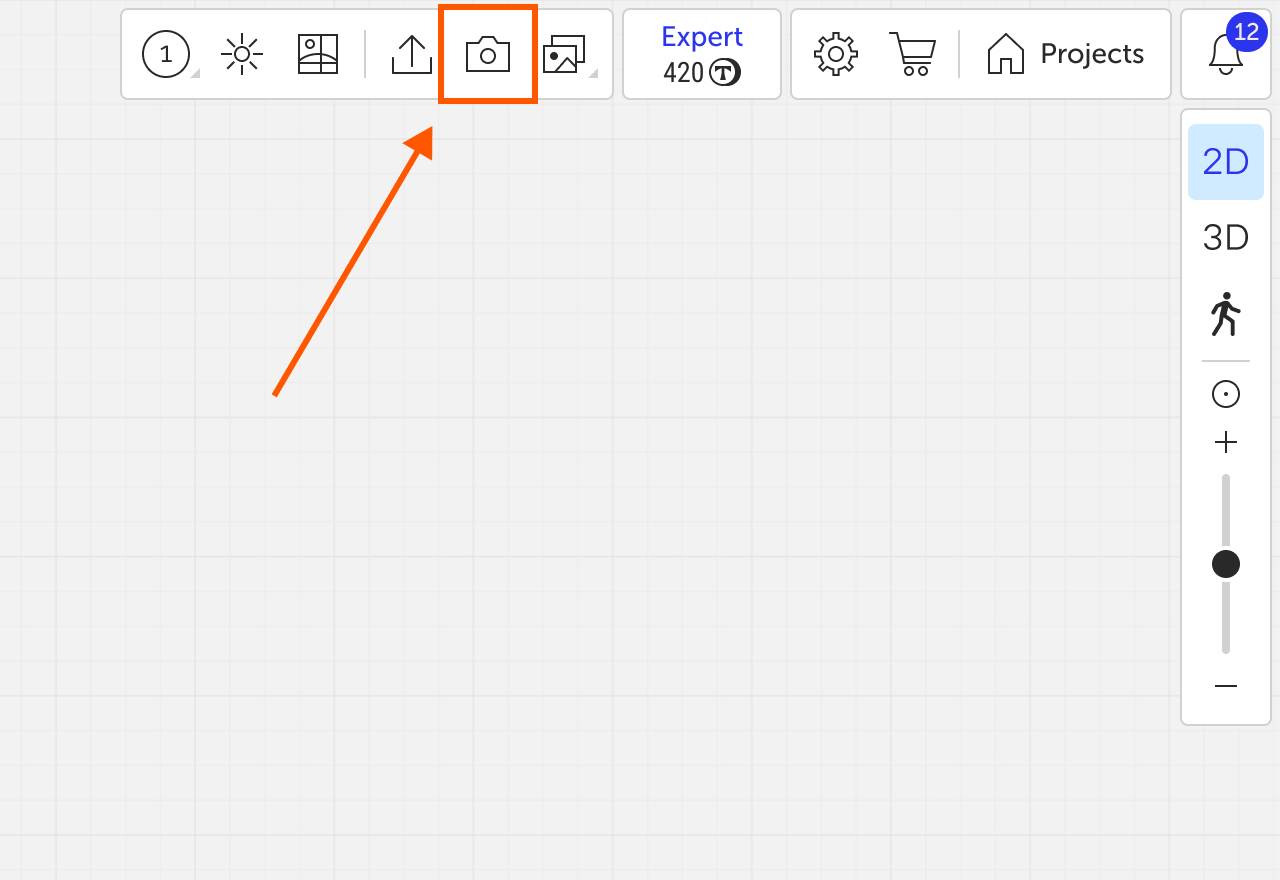
What is a render?
Render — a photorealistic image generated on a cloud render farm using specialized algorithms and AI.
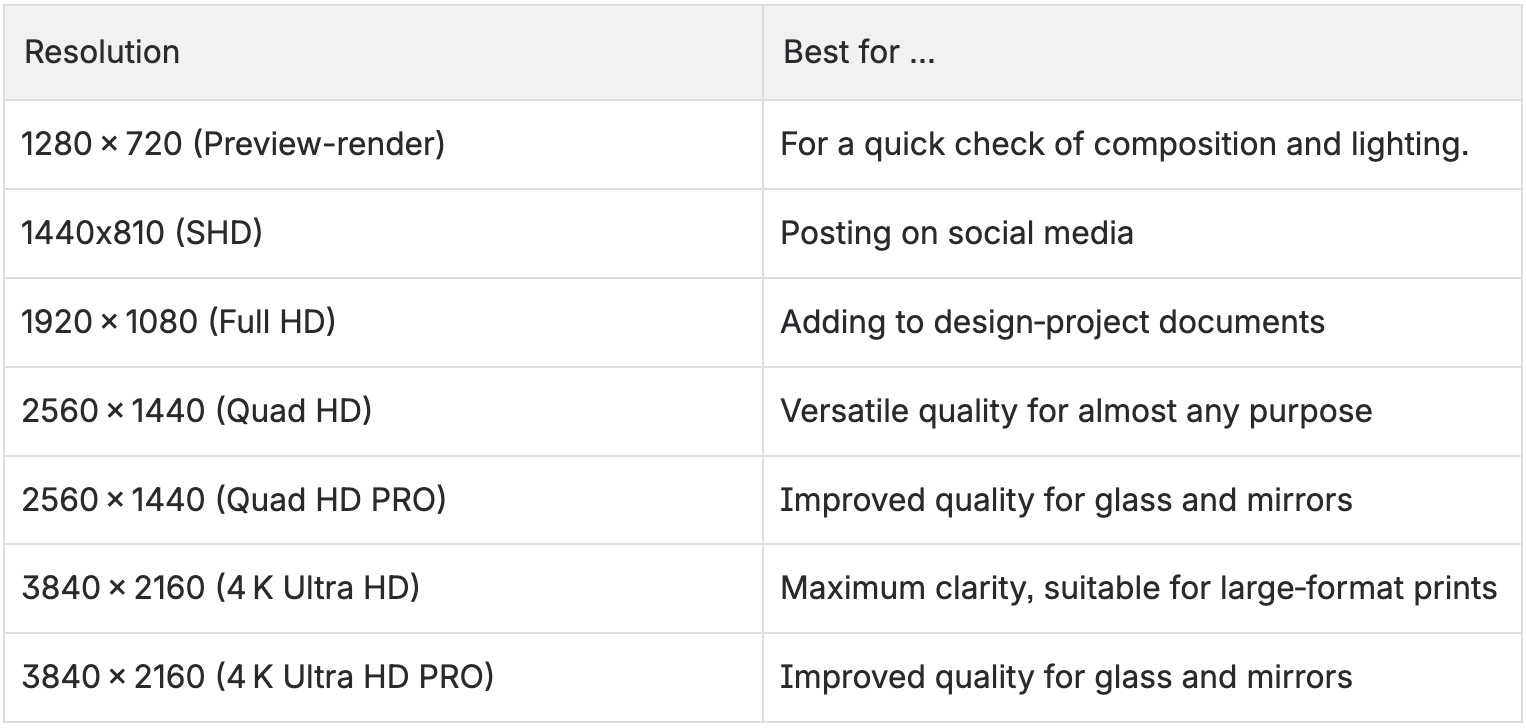
Render resolutions
Planoplan supports several resolutions, from HD to 4 K. Resolution affects image quality and where you can use the file.
Scene settings before rendering
Before you start a render, adjust lighting, camera position, and composition.
Light and background view
- lighting — duplicates natural‑light settings from the main toolbar.
(See the article «Sunlight».);
- background view — sets the panorama or image displayed outside the room.
(See the article «Background View».).
Navigation mode
Toggle between «3D» and «Walk» modes.
- Move — arrow keys.
- Rotate camera — hold the left mouse button and move the mouse.
- Pan pivot point — hold the right mouse button and move the mouse.
- On macOS, use cmd ⌘ instead of ctrl, and option ⌥ instead of alt.
Frame orientation
- album — long side horizontal (default);
- book — long side vertical;
- square (1 × 1) — equal width and height.
Camera position
- over floor — defaults to 1.7 m (eye level of an adult);
- angle vert. — set to 0 ° for straight vertical lines;
- angle hor. — in Walk mode this is relative; for precise angles switch to 3D mode;
- field of view — 30 ° – 120 °. If it’s too narrow, use Clipping.
Focus
- focusing — blurs foreground/background to highlight the subject;
- aperture size — f‑numbers 1 – 22 (lower = stronger blur);
- focus distance — type a value or click a point in the scene.
Use classic f‑stops 1.4, 2.8, 4, 5.6. Values above 8 (11, 16, 22) have less visual impact.
Clipping
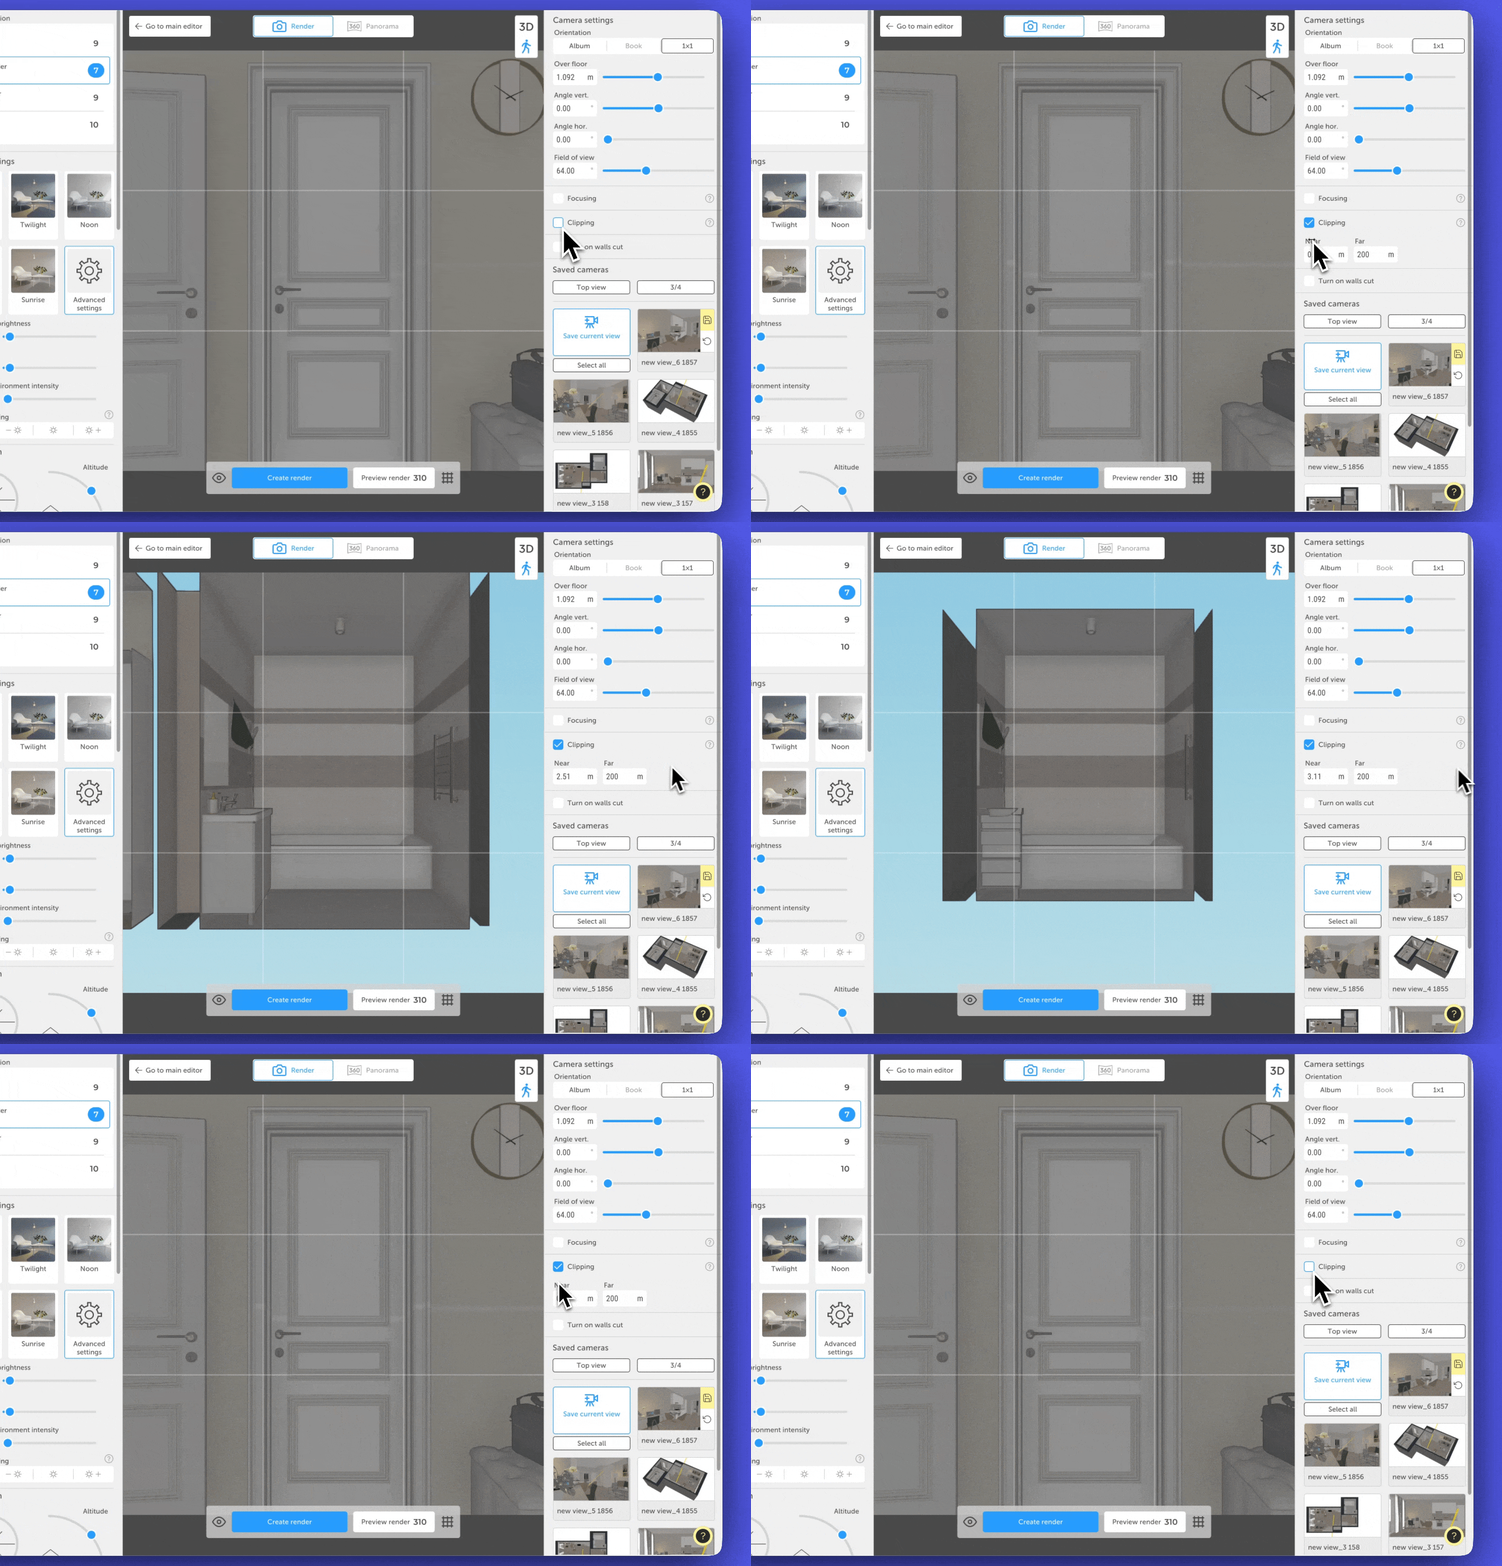
Hides everything beyond a specified distance, including the window panorama if it lies outside the limit.
Place the camera outside a tiny room, set a wide field of view, and clip away what’s in front of the lens to get spacious shots.
Turn on walls cut
Visually hides walls, doors, and windows at 1.4 m height and above. Lighting is not affected: sunlight and artificial lights still behave as if the walls exist.
Preset and saved cameras
Preset views
- top view — straight down, entire project;
- 3/4 — isometric overview of the whole project.
Saved cameras
- Save current view — stores position plus Focus, Clipping, and Turn on walls cut.
- Click a saved camera to activate it.
- Rename, clone, or delete with the buttons beside the name.
- If you tweak a saved camera, Planoplan will ask to save or revert changes.

Rendering
- Click «Create render» to send the current frame or selected cameras to the cloud.

Extra tools:
- Hide UI — fine‑tune the shot without interface elements.
- Toggle grid — align objects precisely.
3D Plan
The 3D Top View (orthographic render) provides a clear visualization of a project without perspective distortion. This mode is ideal for presenting layout solutions, furniture placement, and interior finishes, as well as preparing presentation materials where maintaining accurate object proportions is important.
When creating an orthographic render, background panoramas are disabled, and the background color depends on the environment brightness. Saving cameras is not available in this mode; however, you can position the camera to match a previous render from the Gallery.
To ensure correct scene rendering, Top View Lighting is enabled at the minimum level (-🔅) by default. This helps prevent dark areas from appearing on furniture and other objects located close to the ceiling. You can disable the additional lighting or adjust its brightness in the Advanced Natural Light Settings.
Render statuses
After you start rendering, check progress in the gallery:
- in line — waiting for its turn (depends on your pricing plan);
- considered — processing;
- error — something went wrong, contact Support.
If you have any questions, found an error, or couldn't find the information you need, please contact us at support@planoplan.com, use the built-in support on the website or in th app (icon in the bottom right corner).