Floors
The «Floors» feature allows you to create and manage multiple levels in your project: add floors and roofs, set their height, rename, reorder, and configure their display in 2D and 3D modes. This is useful when designing multi-story houses, cottages, or buildings with complex architecture.
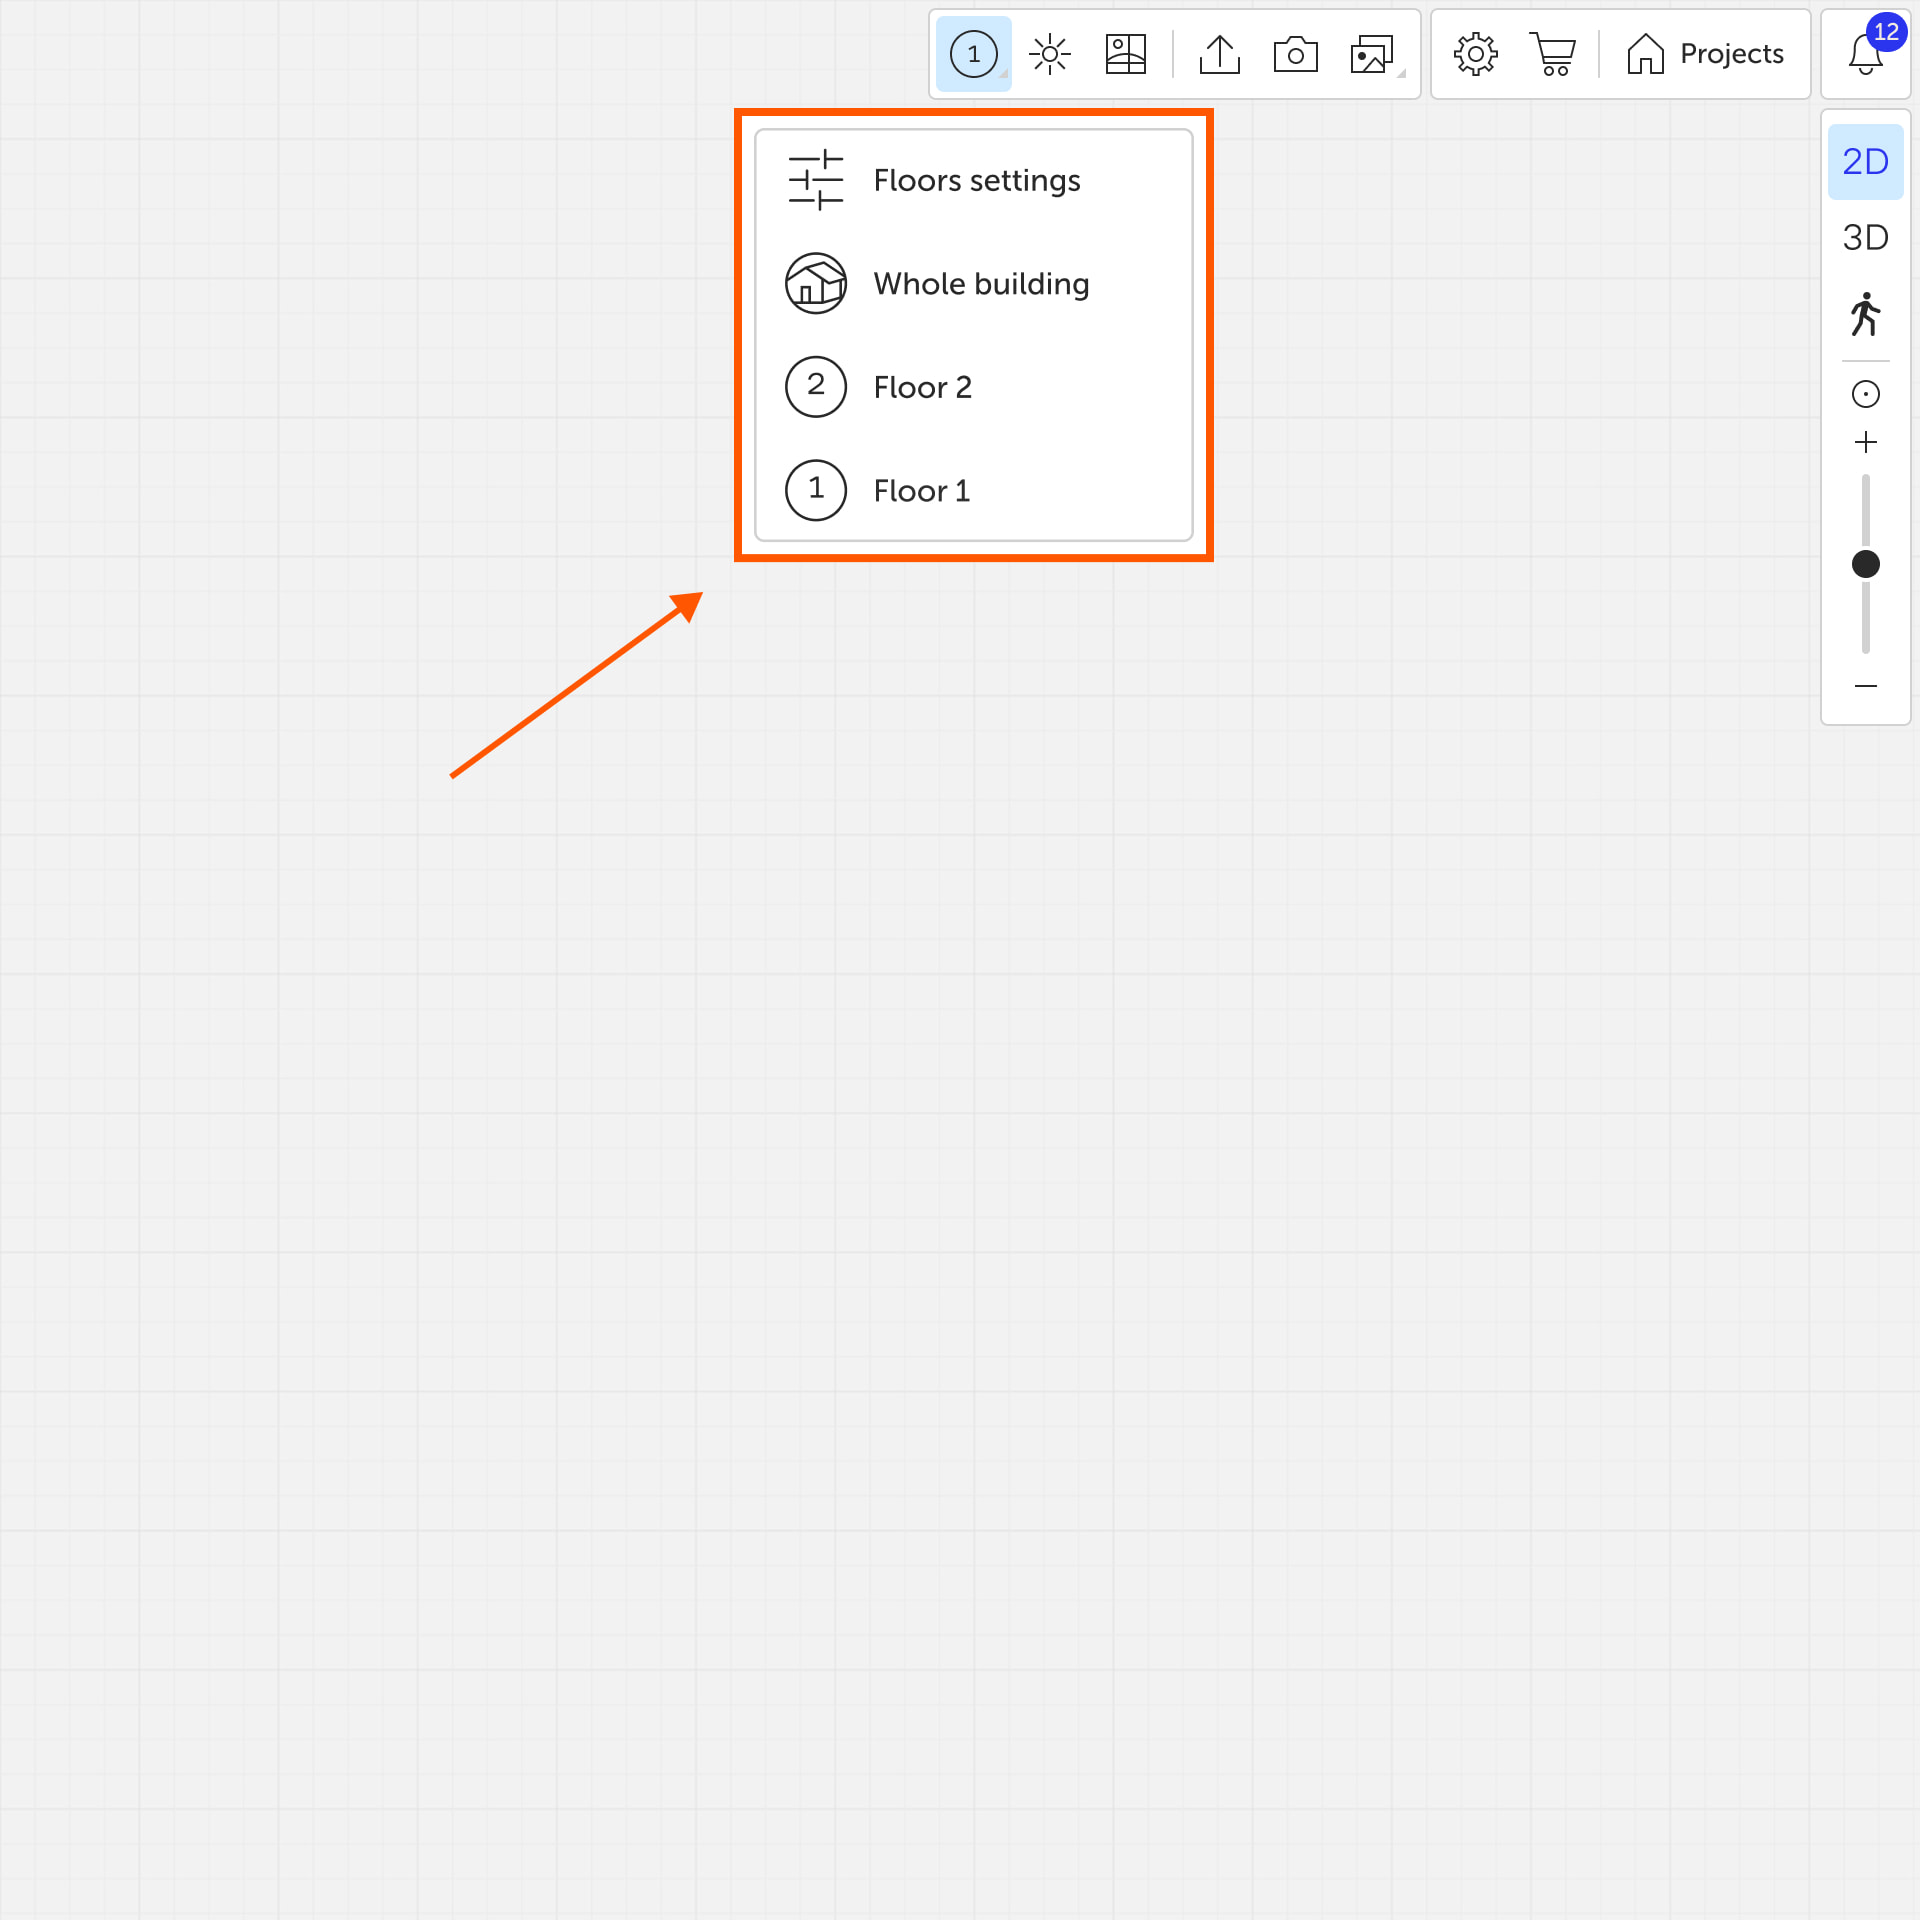
You can manage floors in 2D mode using the dropdown menu at the top of the screen.
Viewing Floors
In the dropdown menu, you can choose:
- a specific floor to work with;
- the «Whole building» mode – shows all floors together;
- the «Floors settings» option – opens the floor management panel.
In 3D mode, the roof of the currently active floor is hidden by default so it doesn’t obstruct the interior view. Only the roofs of the floors below are visible. To view the roof on the top floor, switch to the «Whole building» mode.
Floors Settings
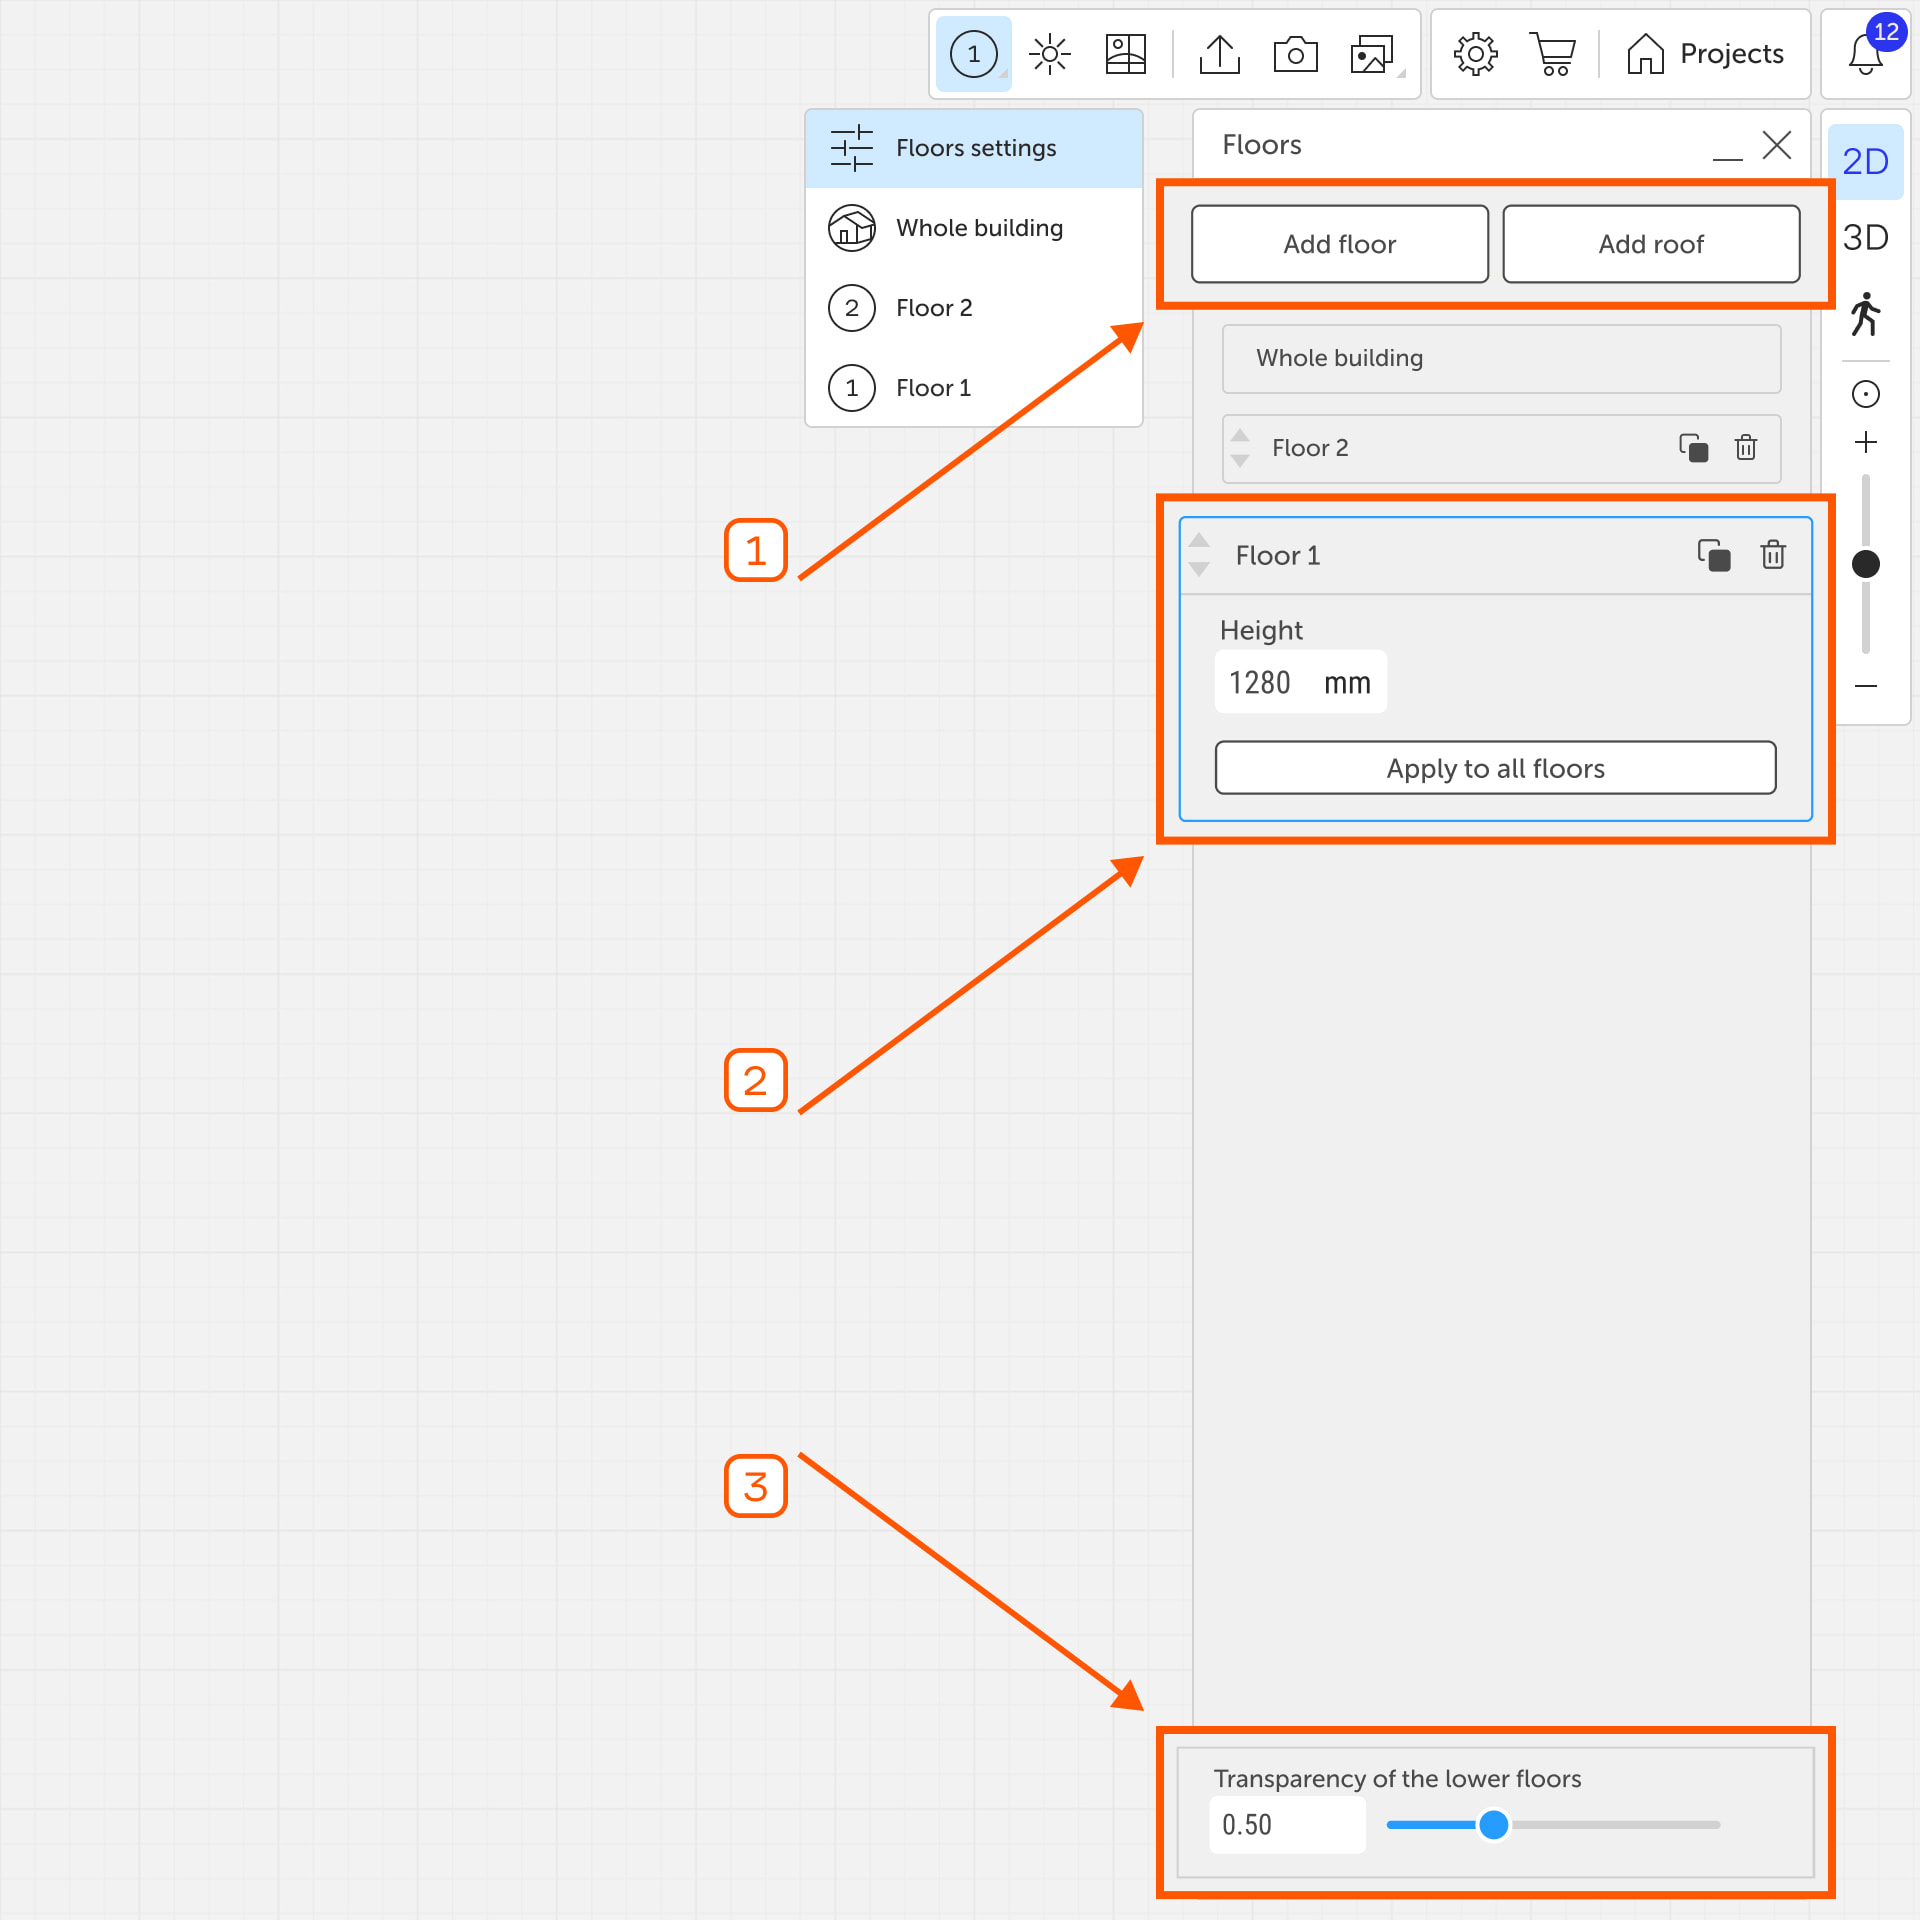
The «Floors settings» panel allows you to:
- add a new floor;
- add a roof;
- duplicate or delete a floor;
- rename a floor;
- set floor height;
- apply height to all floors;
- adjust transparency of the lower floor outlines in 2D.
Add Floor
The «Add floor» button creates a new floor at the top of the project.
Add Roof
The «Add roof» button opens the roof catalog, where you can choose a roof and add it to the top floor.
Transparency of the lower floors
The «Transparency of the lower floors» slider adjusts the visibility of outlines of the floors below the active level on the 2D plan.
Individual Floor Settings
Each floor in the list has its own settings block. You can:
- rename the floor;
- move it up or down;
- set the floor height;
- apply the height to all floors;
- duplicate or delete the floor.
Renaming
Click the floor name to activate the input field. Enter a new name and press Enter to save.
Floor Order
The up and down arrows let you change the floor's position relative to others. This affects the display order and roof placement.
Floor Height
Enter a value in the «Height» field to set a custom height for the current floor. The «Apply to all floors» button sets the same height for all floors in the project.
The thickness of inter-floor slabs is fixed at 10 cm and cannot be changed.
Copying and Deleting
- «Copy» – creates a duplicate of the current floor, added to the top of the list.
- «Delete» – removes the selected floor.
How to create a basement floor in Planoplan?
In Planoplan, you can work with multiple floors in a single project. This is useful if you need to design a house with a basement or underground floor.
The basement floor is created in the same way as other floors, but with an extra step to change their order.
Duplicate an existing floor
If you already have the first floor built, it’s easiest to use it as a base for the basement:
- Switch to 2D mode.
- In the floor panel, click «Copy» on the required floor.
Adjust the floor height
- Select the duplicated floor.
- Set the required height in the settings of the new floor.
Move the floor down
To place the basement below the first floor:
- In the floor panel, use the arrows next to the floor name.
- Move the new floor below the first one.

Now you have a fully functional basement floor that can be edited and filled with walls, furniture, and other objects just like any other floor in the project.
If you have any questions, found an error, or couldn't find the information you need, please contact us at support@planoplan.com, use the built-in support on the website or in th app (icon in the bottom right corner).