Layouts
In this section, you can create and edit projects and folders, manage their statuses, add notes, and configure sorting and display options.
Creating Projects and Folders
- Create a project – Click the Create Project button. A new project will appear with the default name "New Project".
- Create a folder – Click Create Folder, enter a name in the popup window (even a single character is allowed), and click Create Folder.
Search and Filter
- Search – Click the search icon at the top panel and enter a project name or ID.
- Item types filter – Use the dropdown menu to select:
- All types – shows both projects and folders;
- Projects – shows only projects;
- Folders – shows only folders;
- No status – shows items without a status;
- Statuses – shows only items with selected statuses.
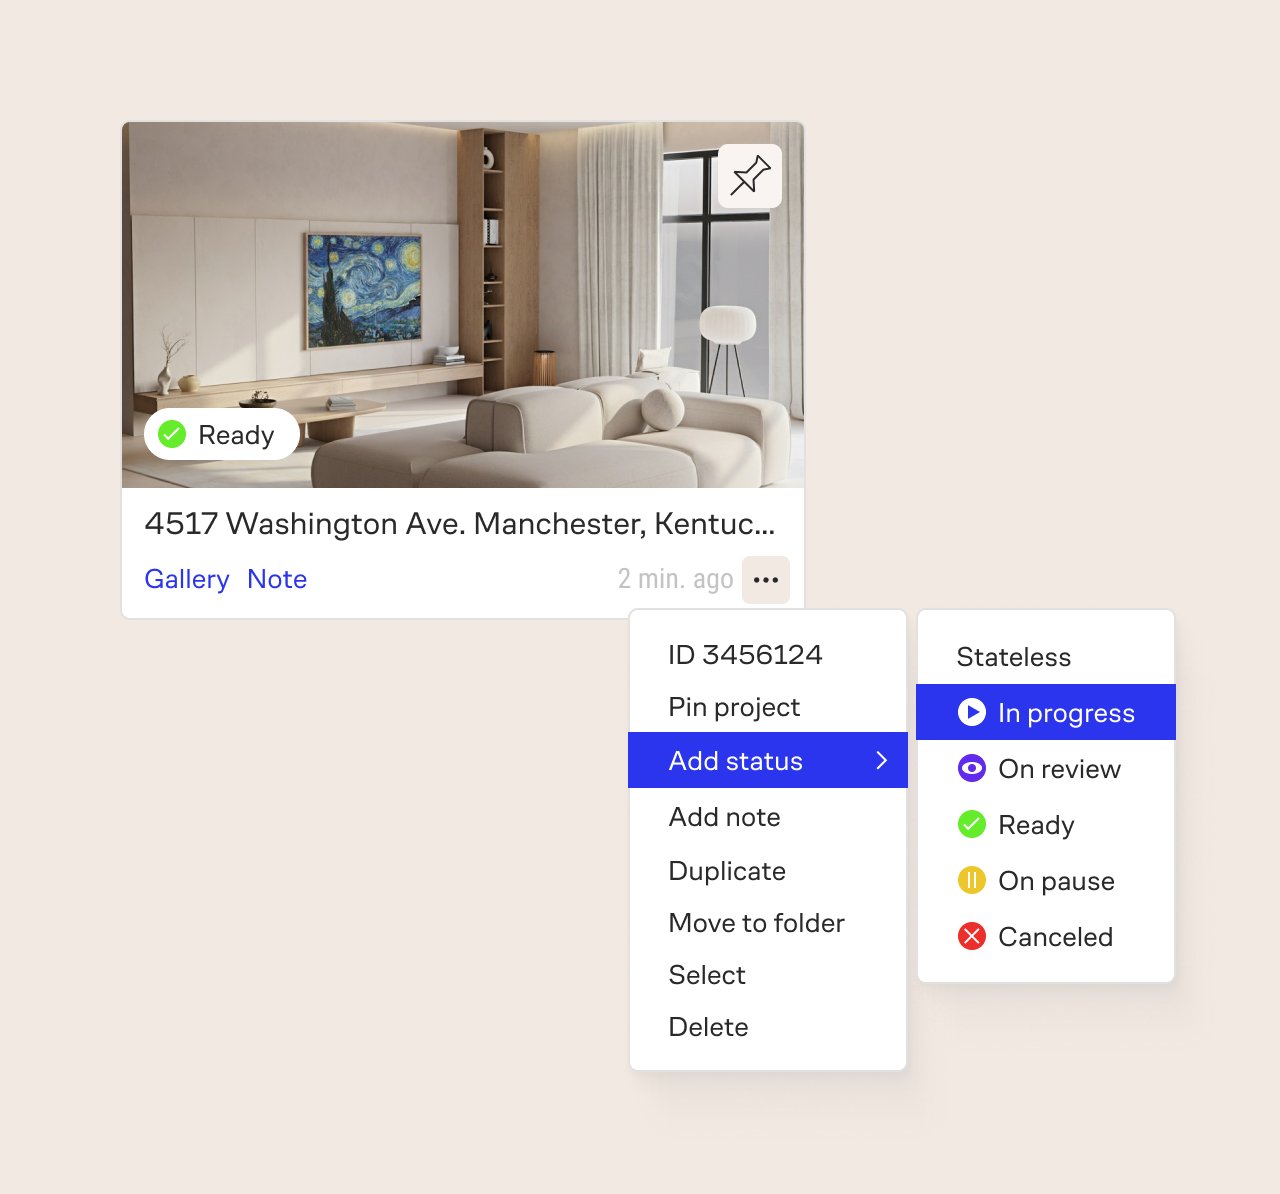
Project and Folder Statuses
You can assign a status to any project or folder:
- Click the three dots in the bottom right corner of the card.
- Select Add Status.
- Choose a status from the list.
Available statuses:
- In progress
- On review
- On pause
- Ready
- Canceled
- No status
You can also sort items by status. They are displayed in the following order:
In progress → On review → On pause→ Ready → Canceled → No status
Notes for Projects and Folders
This feature is available in selected plans.
To add a note:
- Click the three dots on the project or folder card.
- Select Add Note.
- Enter the text and click Create.
After saving, a Note button will appear on the card. Clicking it will open the note text. You can edit the note by clicking its text or delete it entirely.
Sorting Projects and Folders
You can sort items using the dropdown menu at the top of the section:
- last modified – shows most recently changed items first;
- aphabetical – from A to Z;
- date created – from newest to oldest;
- by status – in the order listed above.
Selection Mode
Click the Select button to enable multi-select mode. Once you select one or more items, the following actions become available:
- move to folder;
- move to team;
- duplicate — if the Duplicate with content checkbox is enabled, all generated content will be copied: floor plans, renders, 360 panoramas, virtual tours, design projects;
- delete;
- select all / Clear selection;
- cancel – exits selection mode.
Additional Features
- Notifications – a notification icon appears when new messages or alerts are available.
- Return to project – the Return to Project button is displayed if you previously opened a project and then returned to the dashboard.
- Breadcrumbs – show the folder path, making it easy to navigate between nested folders.
Context Menu for Projects and Folders
Click the three dots in the bottom right corner of a project or folder card to open the context menu.
Project menu:
- Copy project ID (click on the number)
- Pin project
- Add status, note, and more (features described above)
Folder menu:
- Pin folder
- Add status, note, and more
Loading Additional Items
- Show more projects – loads the next portion of items if you have many.
- Show all projects – loads the entire list at once. Load time depends on the number of elements.
If you have any questions, found an error, or couldn't find the information you need, please contact us at support@planoplan.com, use the built-in support on the website or in th app (icon in the bottom right corner).