Setting up artificial lighting in Planoplan
Information about key features
- 4 august 2023
- 10954
We described in details all the processes of working with artificial lighting with the help of preview renders, because they give the opportunity to assess the most accurate and quick result that will be generated on the final render.
Artificial light in the interior is a multi-level system that solves both functional and aesthetic problems in design. It also plays an important role in creating an ergonomic space.
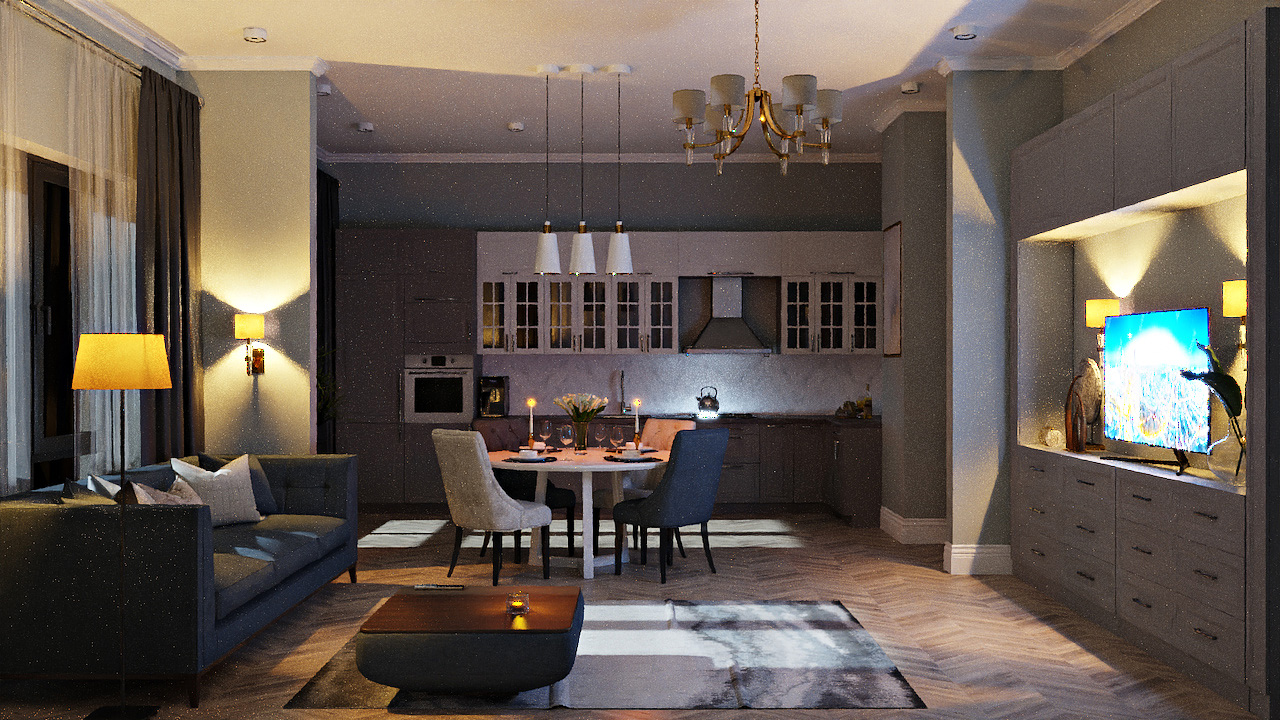
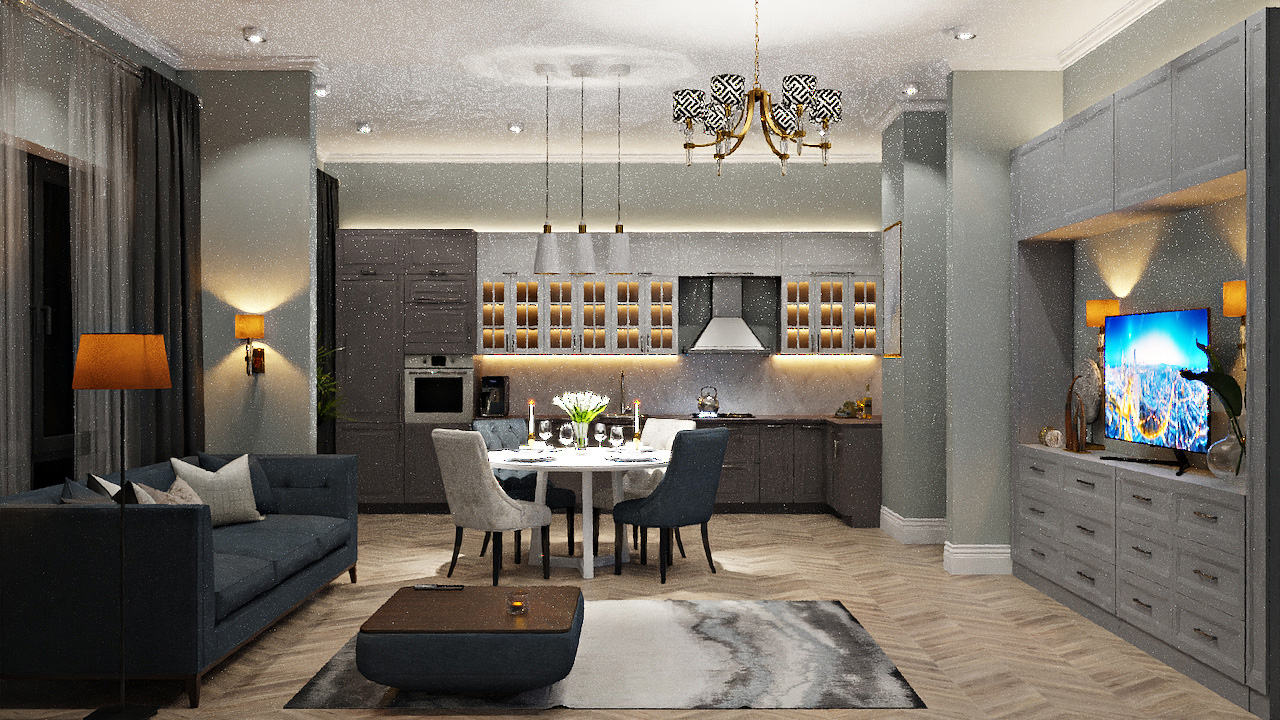
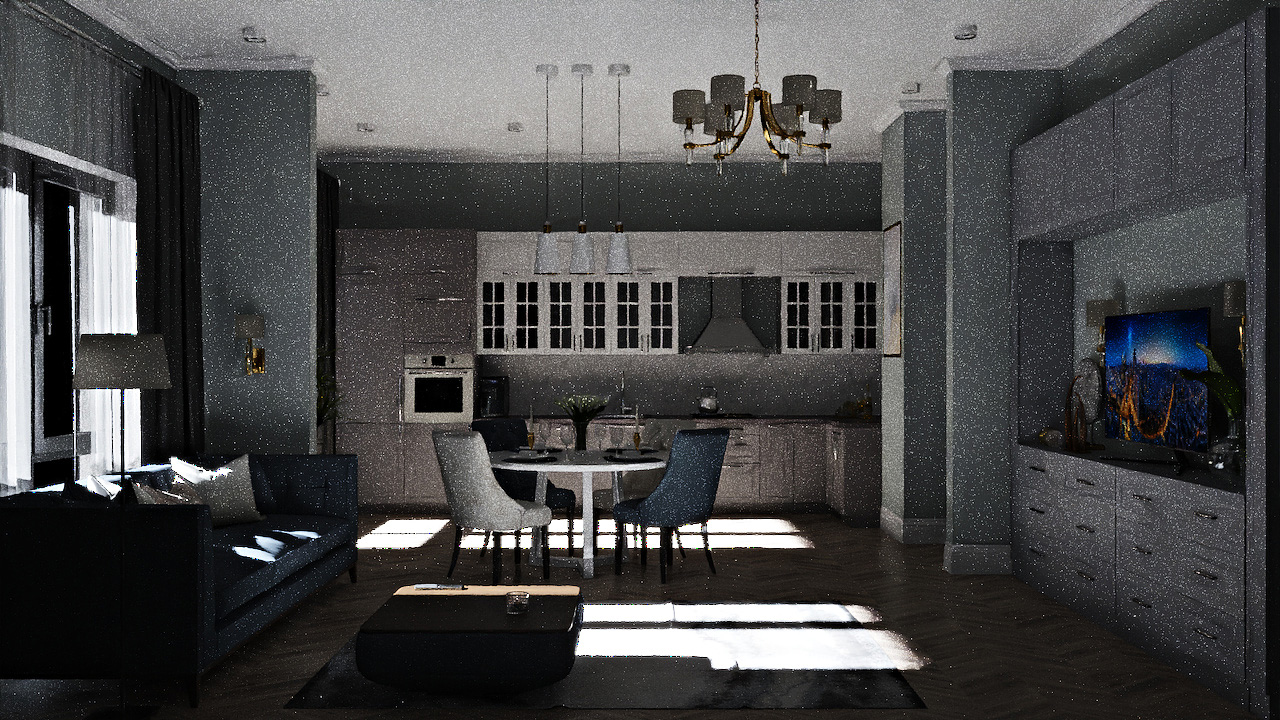 Render №1: no light sources
The picture has all the Ambience lights and brightnesses turned off. If you send it with these settings to the preview, you'll get total darkness. You need some kind of light source in the interior to see anything of it.
For example, you can add an exterior light fixture in the form of a simple rectangle that serves the function of a moon light.
If you send a preview to the checkout, you can see how the interior has been drawn.
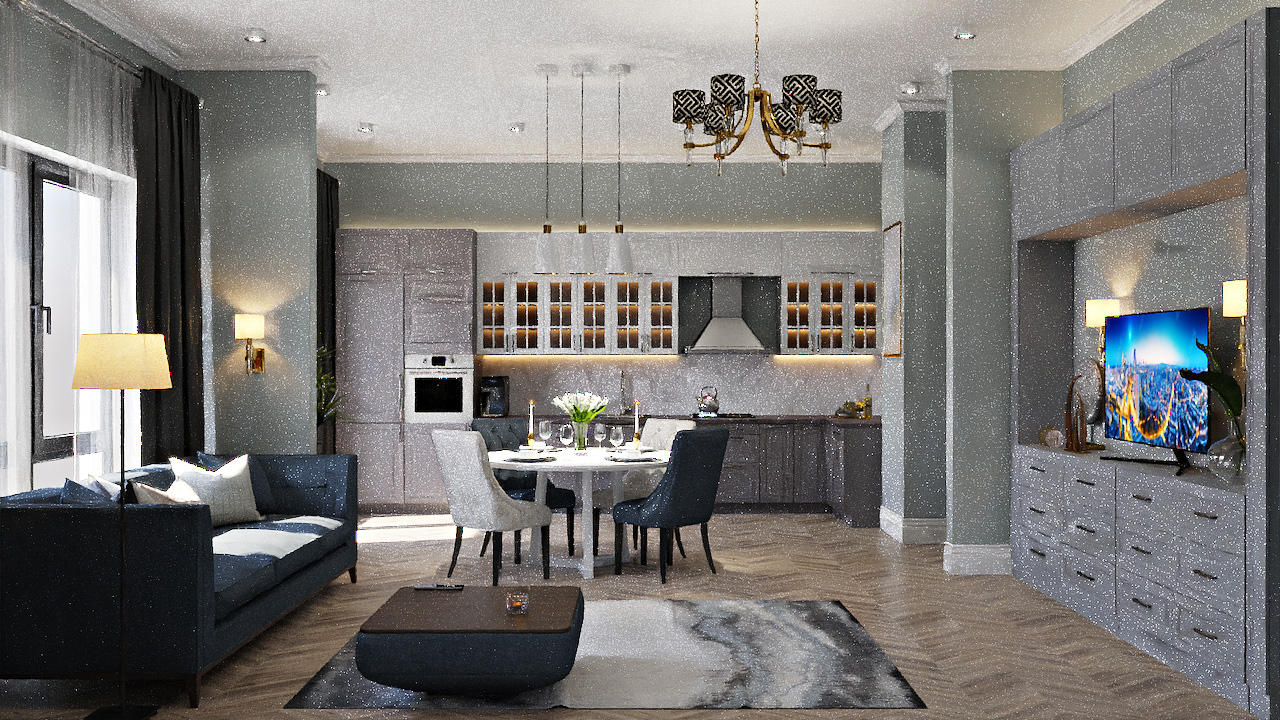
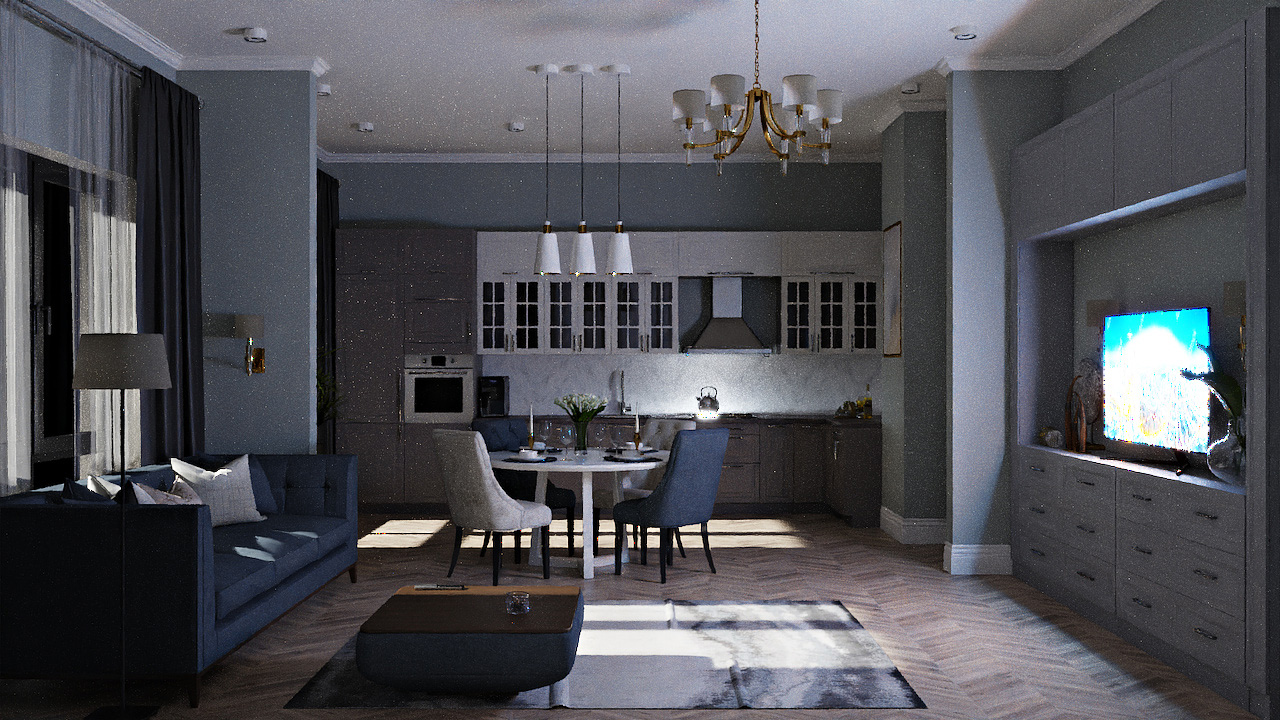 Render №2: added light source
The lighting of the interior is very contrasting because two large spots of light fall on the floor. The rest of the interior is residually lit after being re-reflected from the floor. The contrast can be removed with the gamma slider.
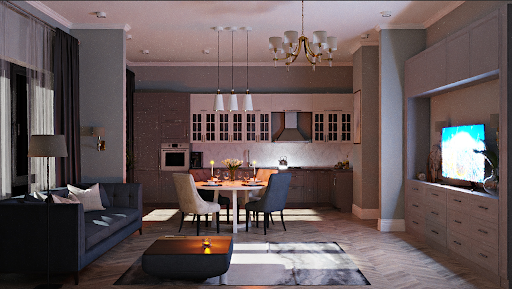
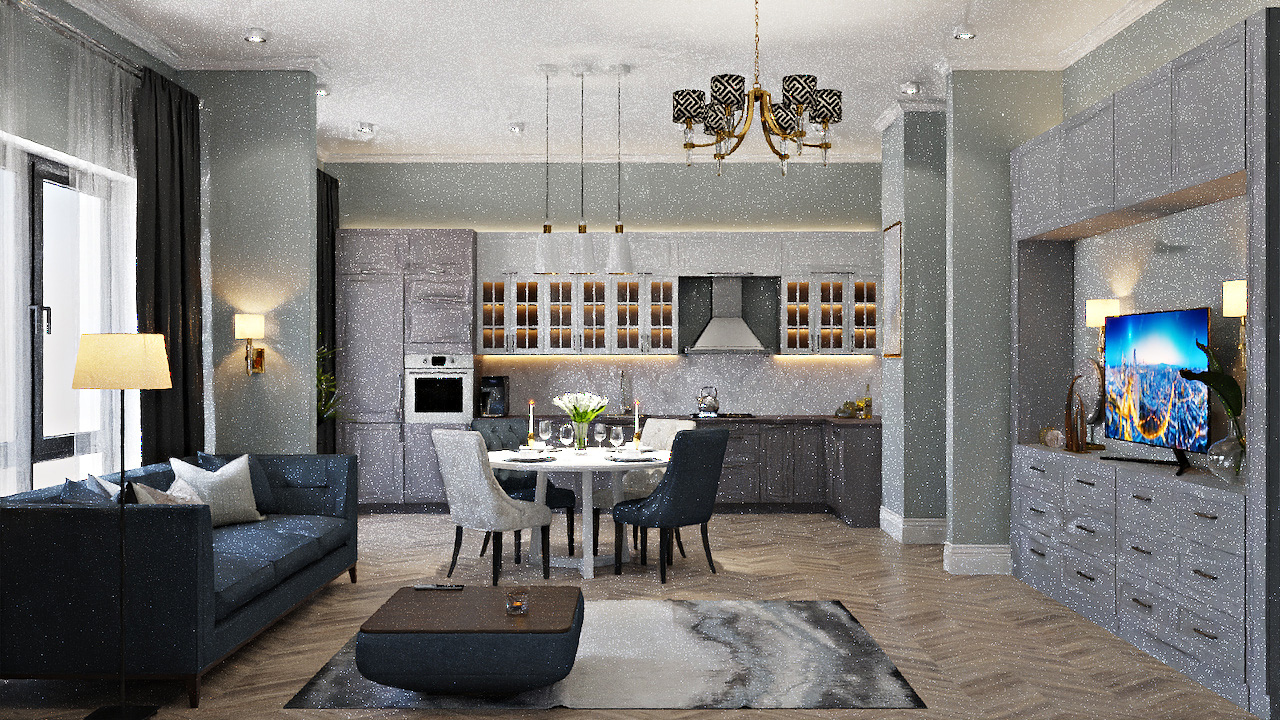
 Render №3: added two light sources
Two other non-directional light sources can also be connected.
The light from the gas burner and the TV screen. The result - there is no extra contrast in the picture. The lighting is softer. The moonlight has lost its original blueness and is less cold because the light from the gas burner and the TV has a more blue tint.
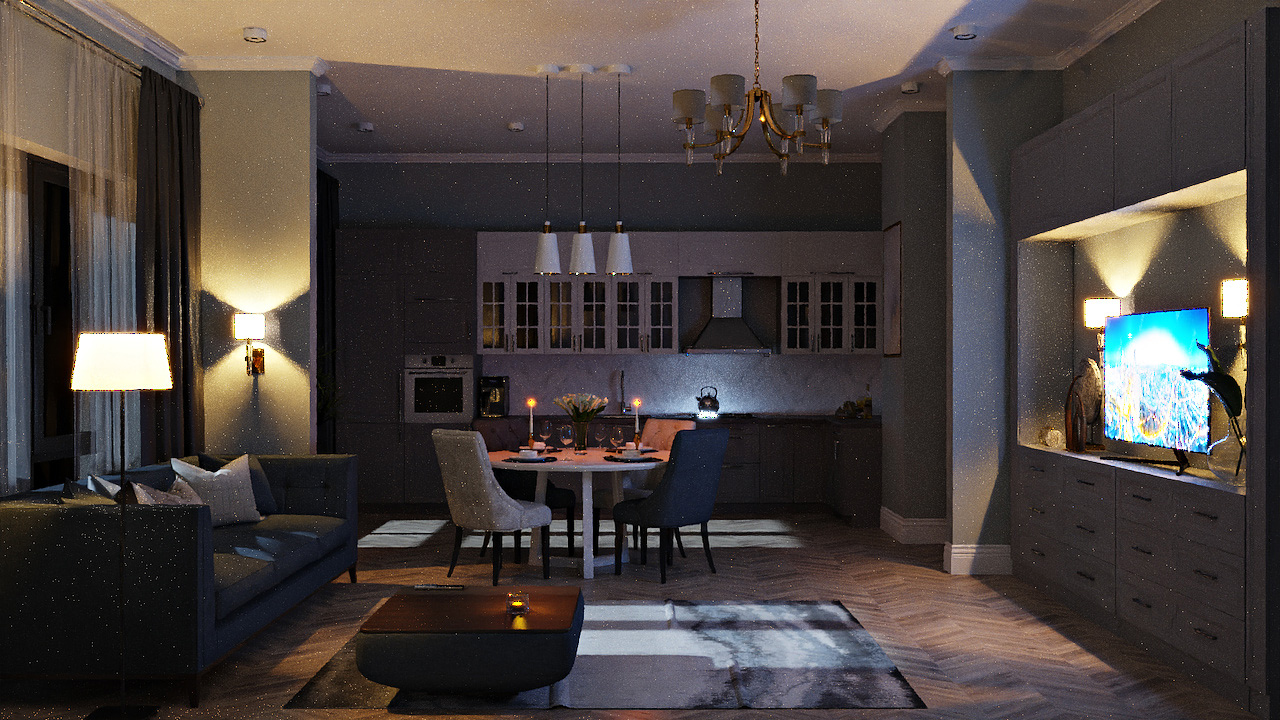
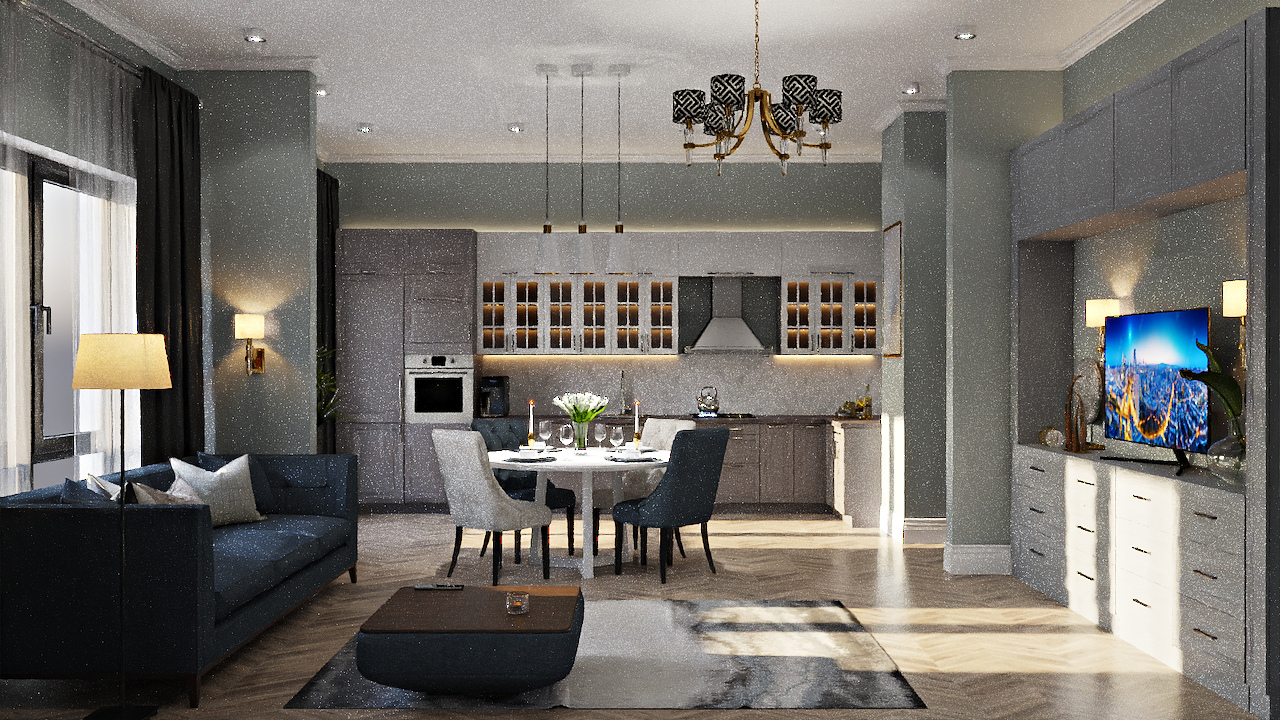
To add contrast, you can use candle light. In this case, the picture is filled with orange light.
 Render N4: Using candle light
In the render, you can notice the shadow border where the contrast of orange and blue is strongest. In general, the lighting has become very mixed, which is not always beautiful. Most often such lighting creates a kind of "mush" in perception. Contrasts need to be used very carefully.
 Render №5: with lighting from a floor lamp and sconces.
If you turn on the sconces and floor lamp, the picture will become darker than it was before. In fact, everything works correctly here because these lampshades have a new type of material called translucent.
To make the picture brighter, we have two options:
1) change the material to a matte color
2) make the texture on the lampshades less bright
We'll use the second option and darken the texture on all four lamps.
 Render №6: with brighter lighting
The result - a lighter rendering.
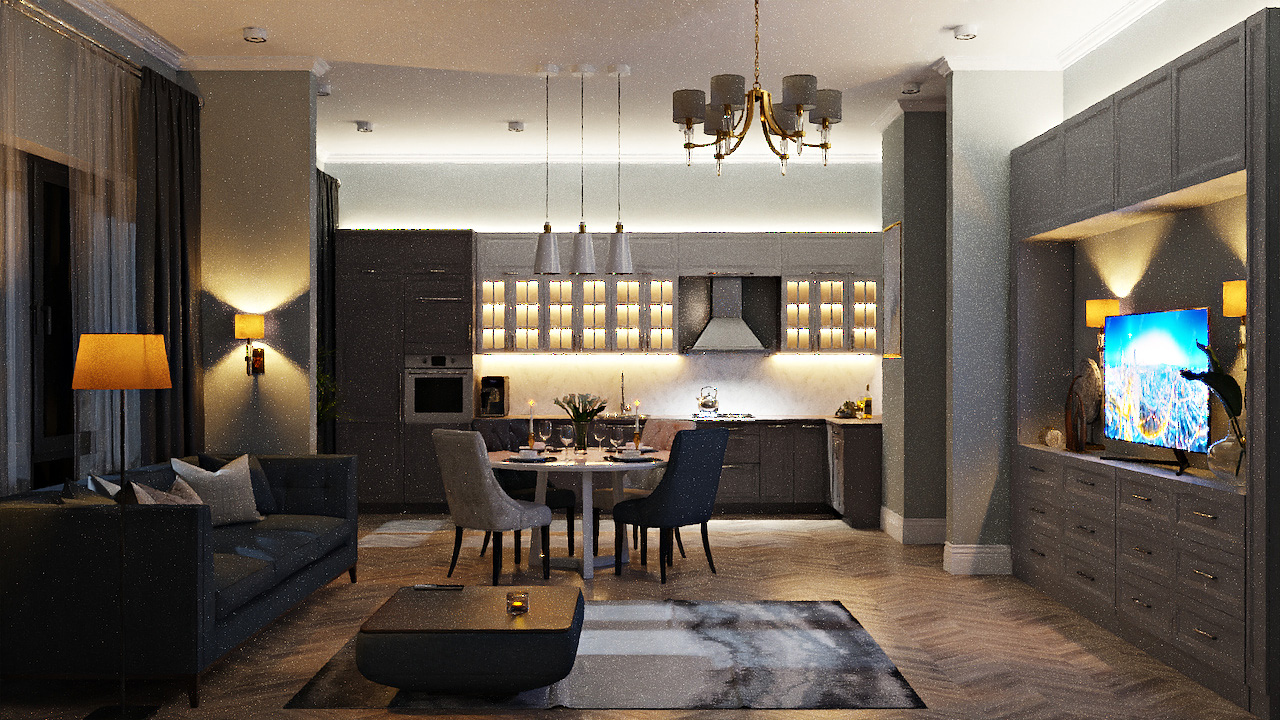 Render №7: with backlighting kitchen cabinets
If you turn on the backlighting of the kitchen cabinets, you can see how the foreground has darkened a lot. The reason for this is that the total luminance of all the lights around the cabinets is much higher than that of the floor lamp and sconces. To balance out the light, there are two ways: either increase the intensity of the sconces and floor lamp considerably, or lower the intensity of the lamps and cabinets, as well as the overhead lights, by a factor of about 2.
 Render №8: with more consistent light
If you add a new light source, like a chandelier, for example. Replace its texture with a contrasting texture, apply a translucent material and, in advance, reduce the contrast of the texture by 50 percent, the brightness will be high.
If you add a new light source, for example, a chandelier.
 Render №9: with light source - a chandelier
The result - the entire center area is filled with even light, localized areas will disappear, but the corners will be darker than behind the couch or ceiling. This is because the brightness of the chandelier is higher than that of all the other fixtures.
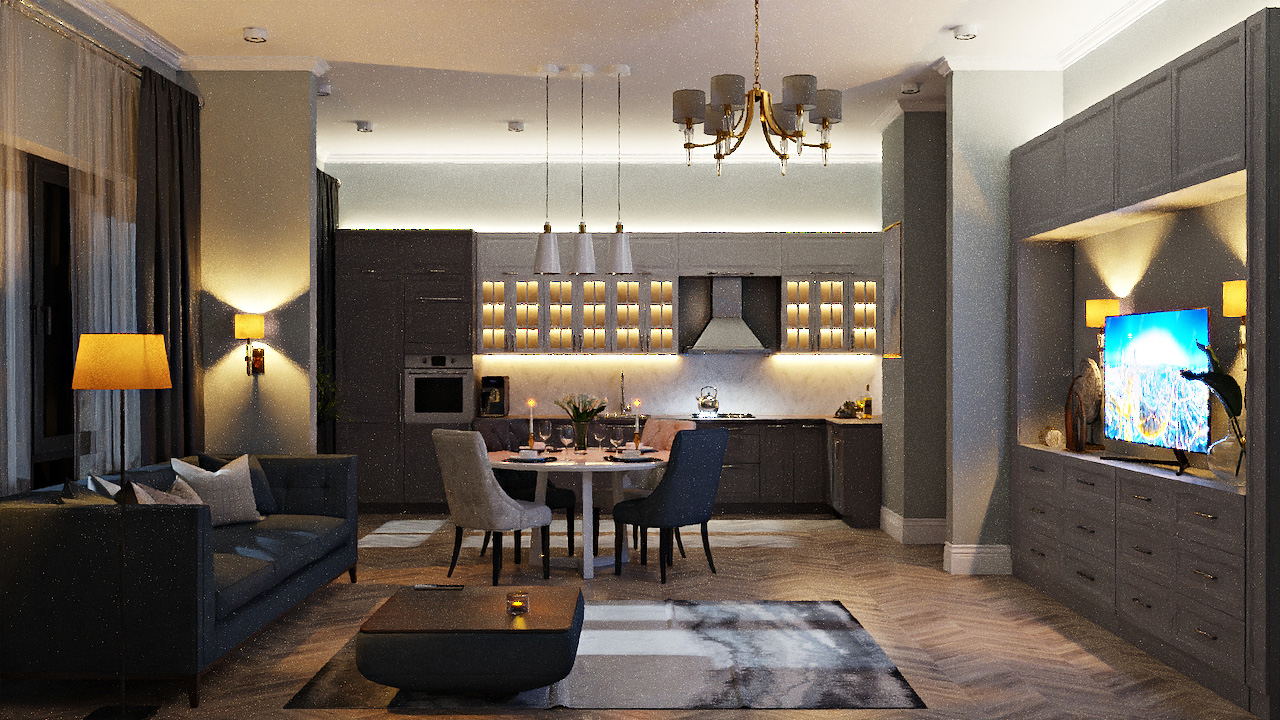
 Render N10: with consistent light
If you turn on the remaining lights, the lighting will be more consistent. A lot of shadows will disappear. The lampshades have become dark because of the light in the room. So the texture of the lampshades can be made light again.
 Render N11: got brighter with different groups of lights
If you lower the sun value, you will be able to show more of the interior light. The natural light will be reduced by a factor of 4 and the artificial light will show through again. If you add the natural light of the sun and surroundings, all the artificial light starts to fade before the natural light.
This way you can adjust the balance between different groups of lights and natural light.
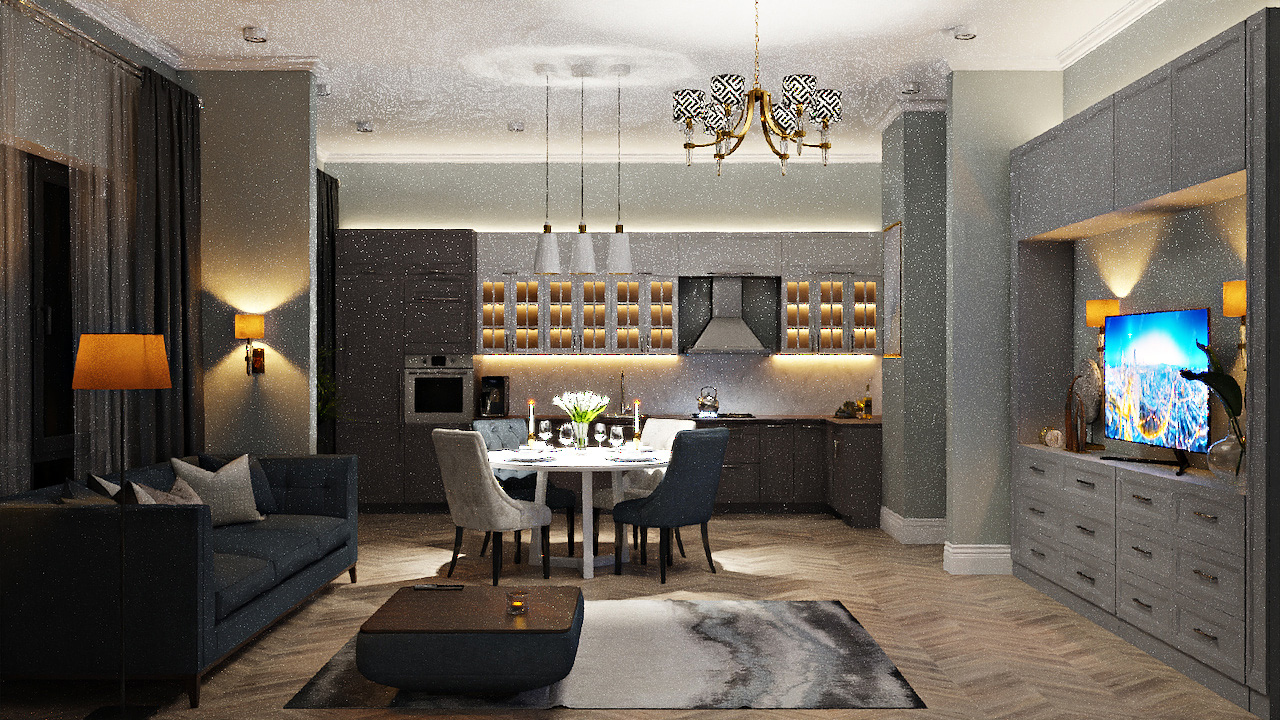
 Render №12: Render N12: example of "cold" lighting
If you want to make a very "cool" lighting shade, you need to move the sun to the zenith. Then the cabinets will have a more blue and cooler color.
 Render №13: warm sunlight effect
To create an evening feel, you need to make the effect of warm sunlight hitting a certain area. You need to lower the sun to the horizon, so that the spots of light fill a large part of the room. We can see how the atmosphere of the picture becomes more cozy.
Resume: if you don't have a single light source, your render will go black. A minimal light source, even if it is the only one, will be enough to light up the room.
If diffuse light sources appear, the room will begin to gradually fill with light. Light sources that are contrasting in temperature will be different. If their intensity is roughly equal, the light will be even. When adding a light source with translucent materials, the texture assigned to it should be replaced. Turning down bright light sources makes the picture balanced. The position of the sun above the horizon affects the interior lighting.
The right lighting plays a very important role in interior design by creating meaningful accents. Knowing how to work with artificial lighting in Planoplan can help to influence the character of your interiors and the quality of your renderings.
Actual lighting is essential for interior design, creating meaningful accents.