Creating Renders
In Planoplan you can produce photorealistic renders.
Open the dedicated rendering mode by clicking the camera icon in the top toolbar.

What is a render?
Render — a photorealistic image generated on a cloud render farm using specialized algorithms and AI.
Render resolutions
Planoplan supports several resolutions, from HD to 4 K. Resolution affects image quality and where you can use the file.
Scene settings before rendering
Before you start a render, adjust lighting, camera position, and composition.
Light and background view
- lighting — duplicates natural‑light settings from the main toolbar.
(See the article «Sunlight».);
- background view — sets the panorama or image displayed outside the room.
(See the article «Background View».).
Navigation mode
Toggle between «3D» and «Walk» modes.
- Move — arrow keys.
- Rotate camera — hold the left mouse button and move the mouse.
- Pan pivot point — hold the right mouse button and move the mouse.
- On macOS, use cmd ⌘ instead of ctrl, and option ⌥ instead of alt.
Frame orientation
- album — long side horizontal (default);
- book — long side vertical;
- square (1 × 1) — equal width and height.
Camera position
- over floor — defaults to 1.7 m (eye level of an adult);
- angle vert. — set to 0 ° for straight vertical lines;
- angle hor. — in Walk mode this is relative; for precise angles switch to 3D mode;
- field of view — 30 ° – 120 °. If it’s too narrow, use Clipping.
Focus
- focusing — blurs foreground/background to highlight the subject;
- aperture size — f‑numbers 1 – 22 (lower = stronger blur);
- focus distance — type a value or click a point in the scene.
Use classic f‑stops 1.4, 2.8, 4, 5.6. Values above 8 (11, 16, 22) have less visual impact.
Clipping
Hides everything beyond a specified distance, including the window panorama if it lies outside the limit.
Place the camera outside a tiny room, set a wide field of view, and clip away what’s in front of the lens to get spacious shots.
Turn on walls cut
Visually hides walls, doors, and windows at 1.4 m height and above. Lighting is not affected: sunlight and artificial lights still behave as if the walls exist.
Preset and saved cameras
Preset views
- top view — straight down, entire project;
- 3/4 — isometric overview of the whole project.
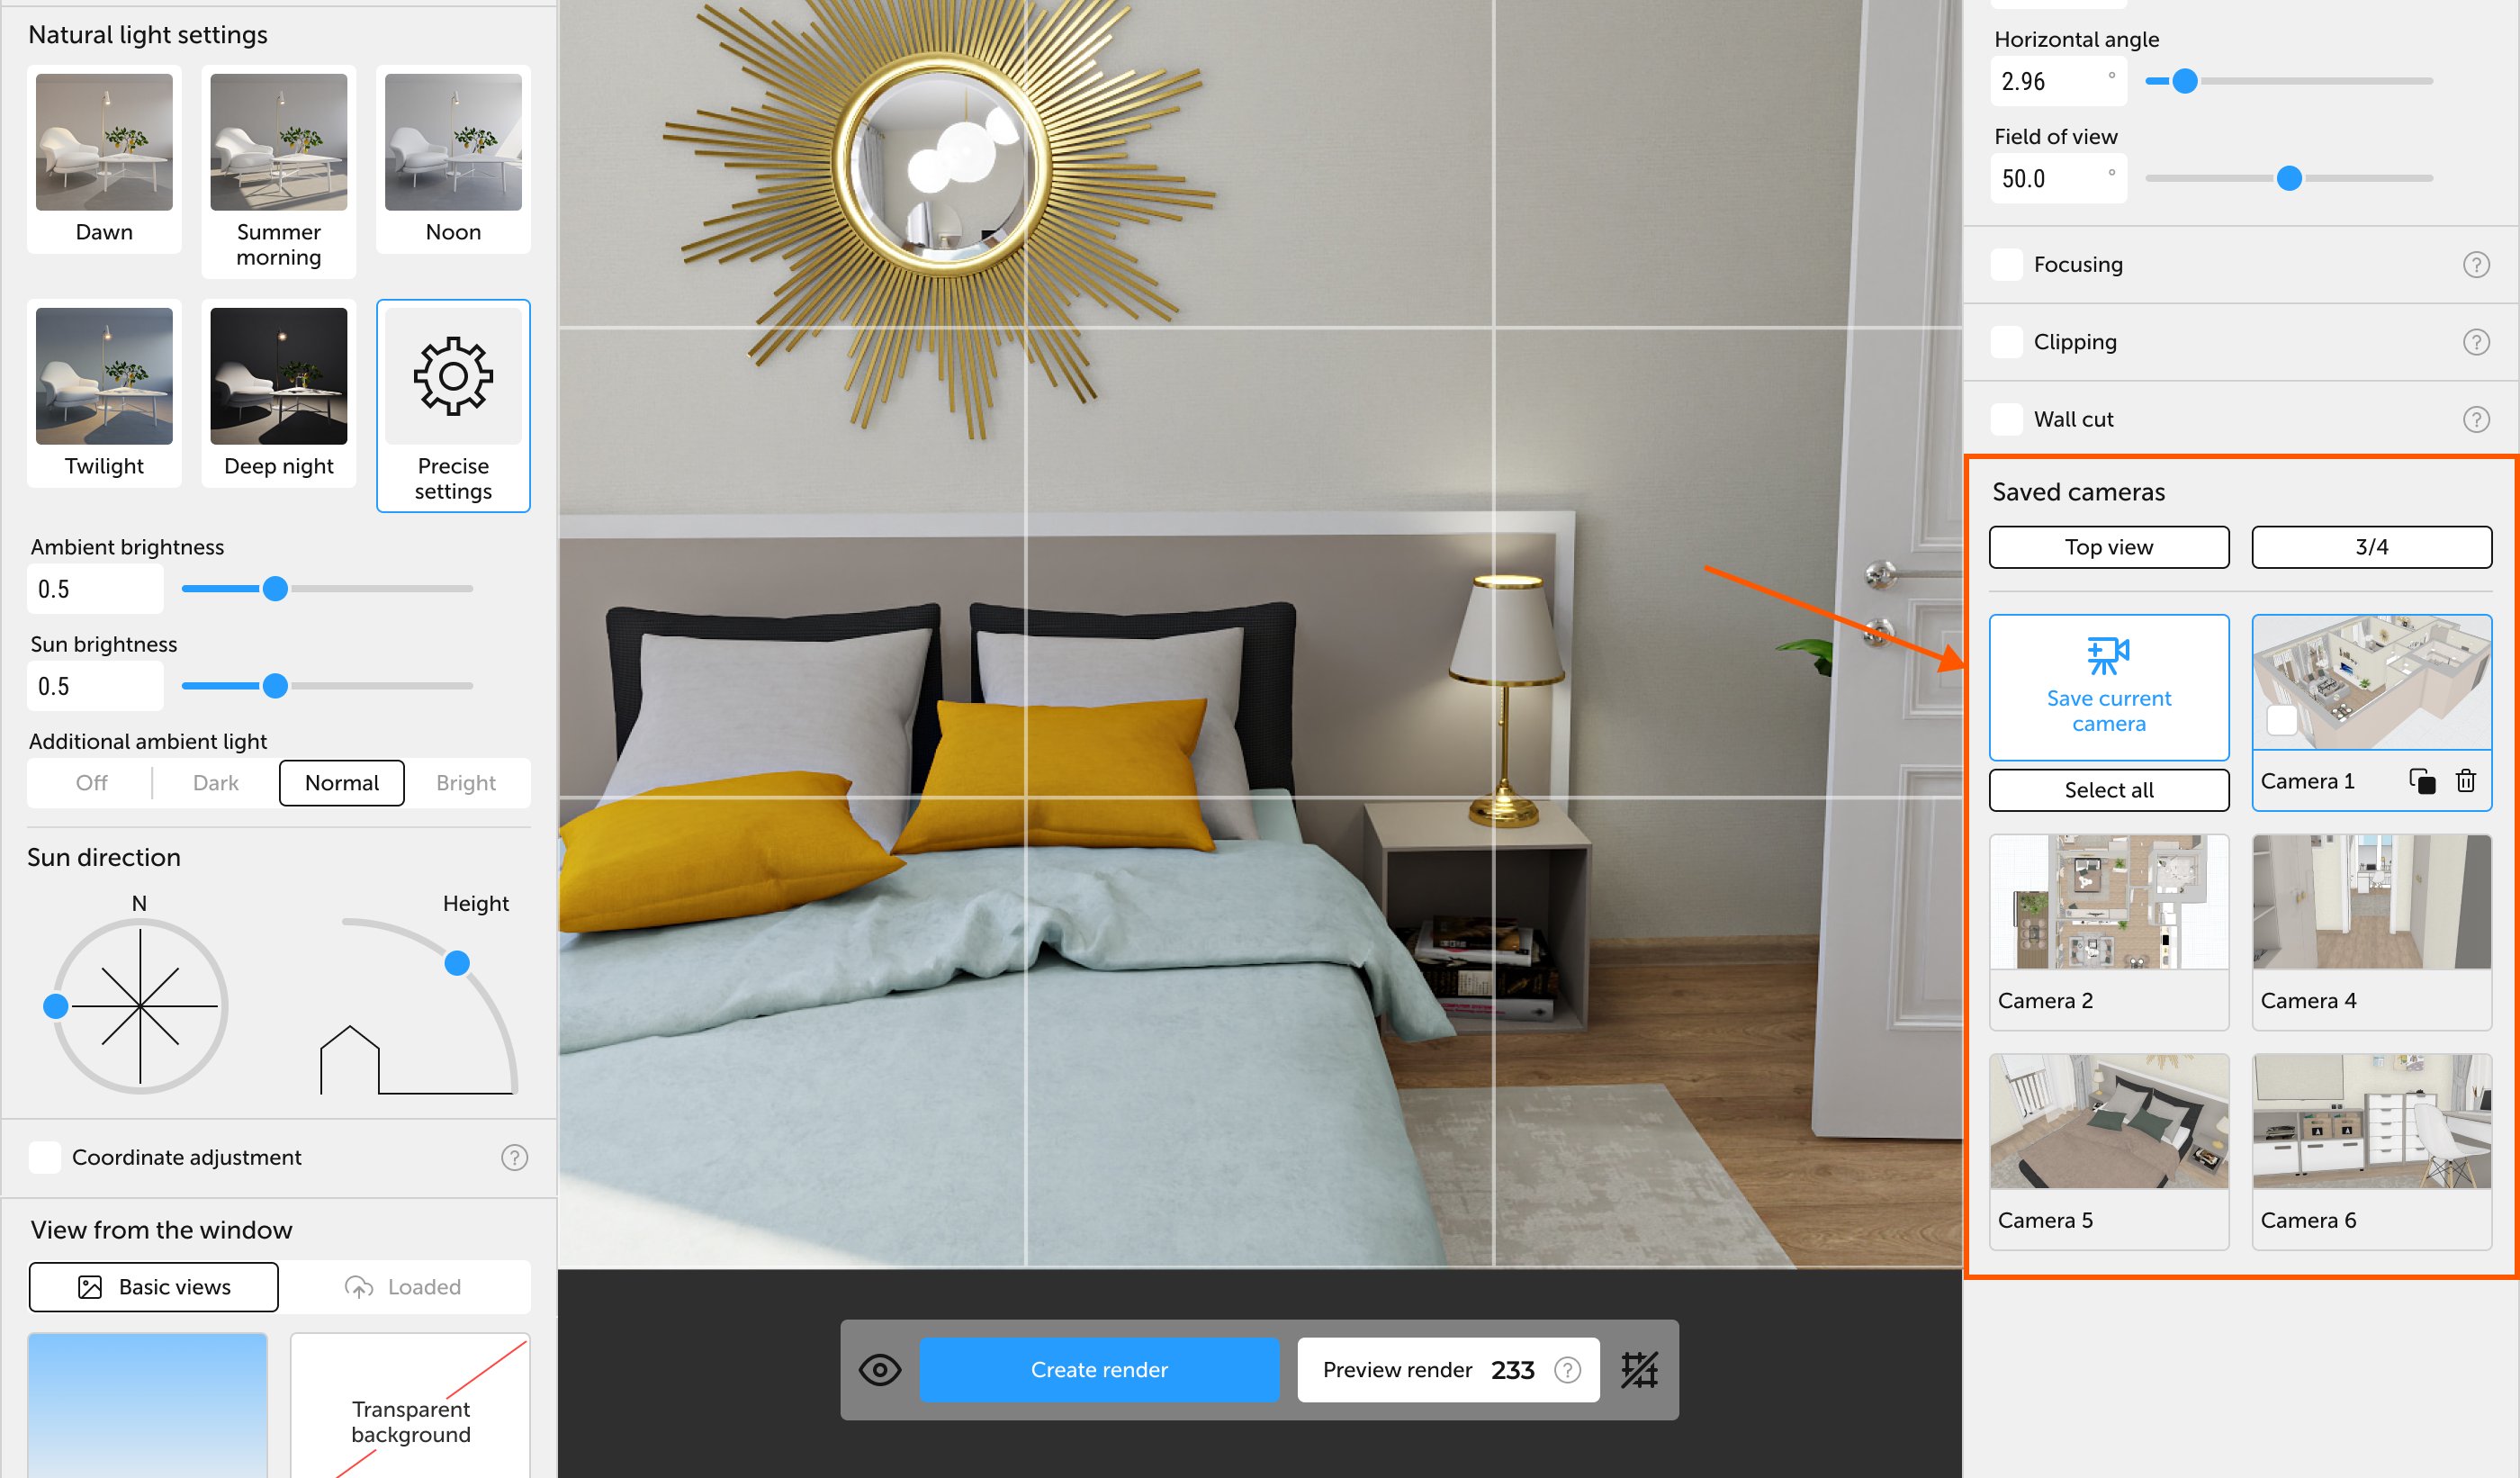
Saved cameras
- Save current view — stores position plus Focus, Clipping, and Turn on walls cut.
- Click a saved camera to activate it.
- Rename, clone, or delete with the buttons beside the name.
- If you tweak a saved camera, Planoplan will ask to save or revert changes.
Rendering
- Click «Create render» to send the current frame or selected cameras to the cloud.
- Preview render — faster, lower‑quality draft for checking composition and light.
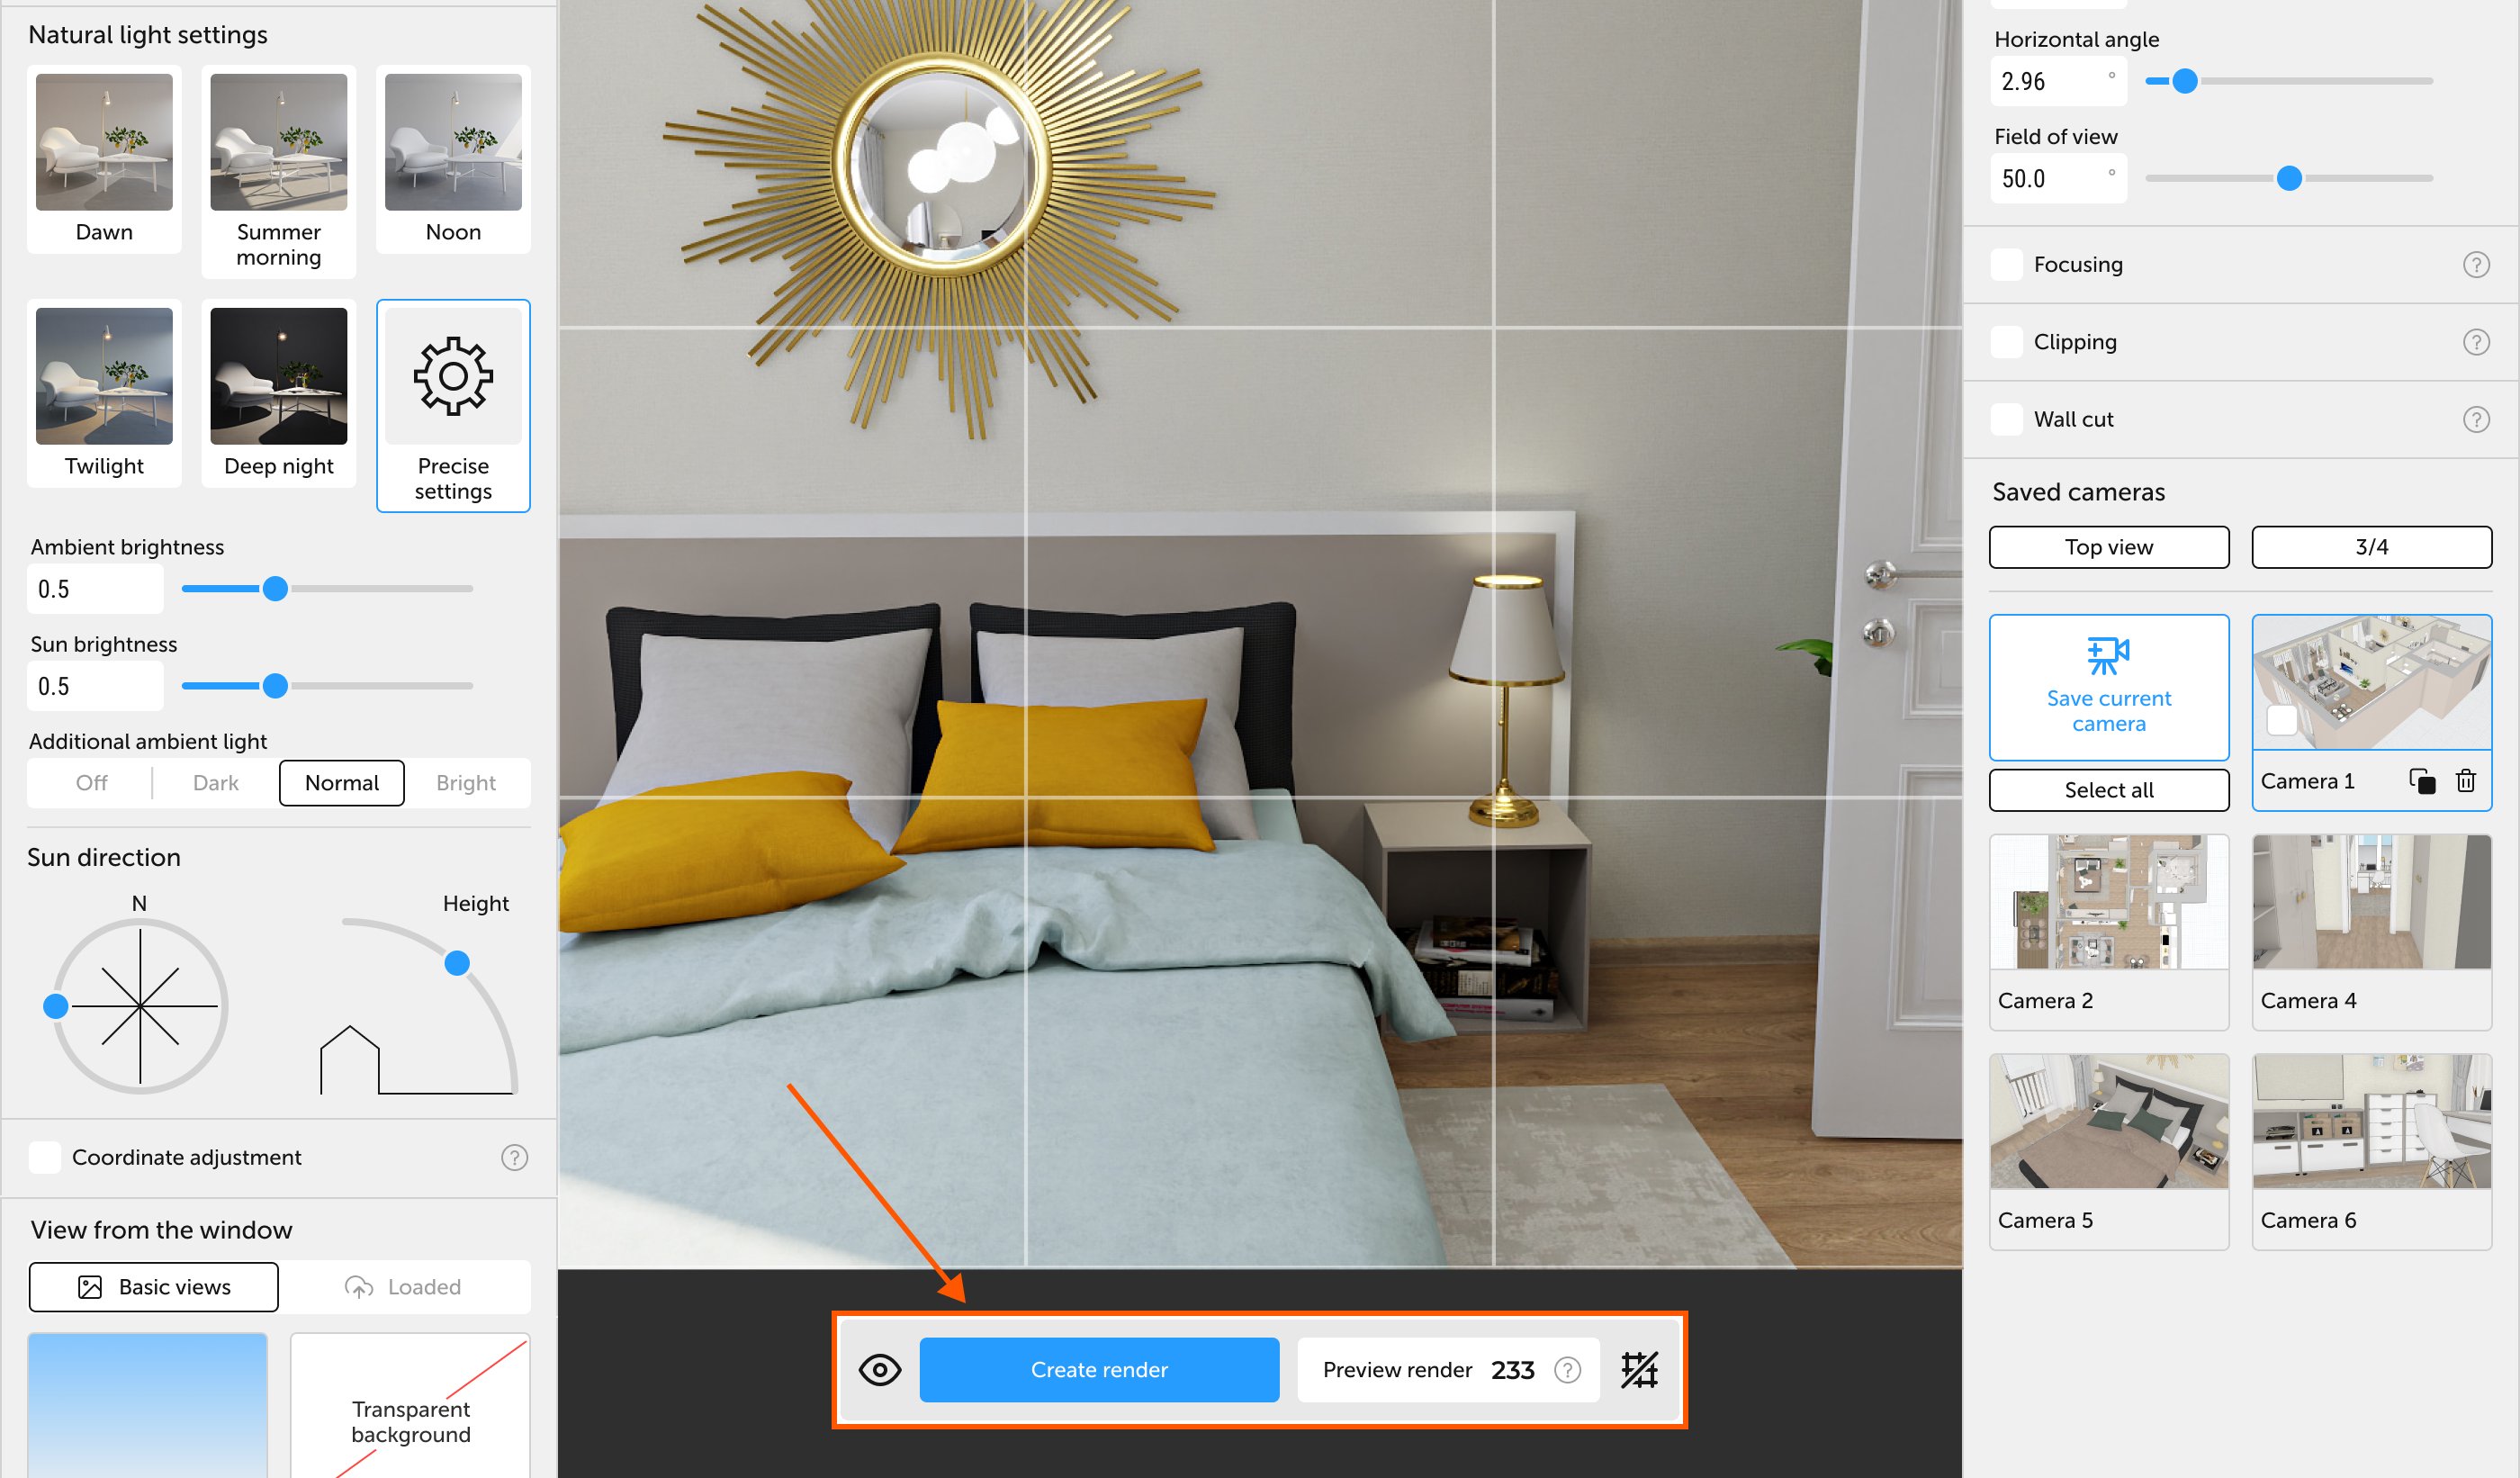
Extra tools:
- Hide UI — fine‑tune the shot without interface elements.
- Toggle grid — align objects precisely.
Render statuses
After you start rendering, check progress in the gallery:
- in line — waiting for its turn (depends on your pricing plan);
- considered — processing;
- error — something went wrong, contact Support.
If you have any questions, found an error, or couldn't find the information you need, please contact us at support@planoplan.com, use the built-in support on the website or in th app (icon in the bottom right corner).