Exporting a Plan
The plan export feature allows you to save your project layout as an image, which you can use in documentation, presentations, or printouts. You can choose the desired format, adjust the export area, orientation, scale, and the visibility of objects.
You can open the export window in two ways:
- click the «Export» button on the top toolbar;
- use the shortcut Shift + E.
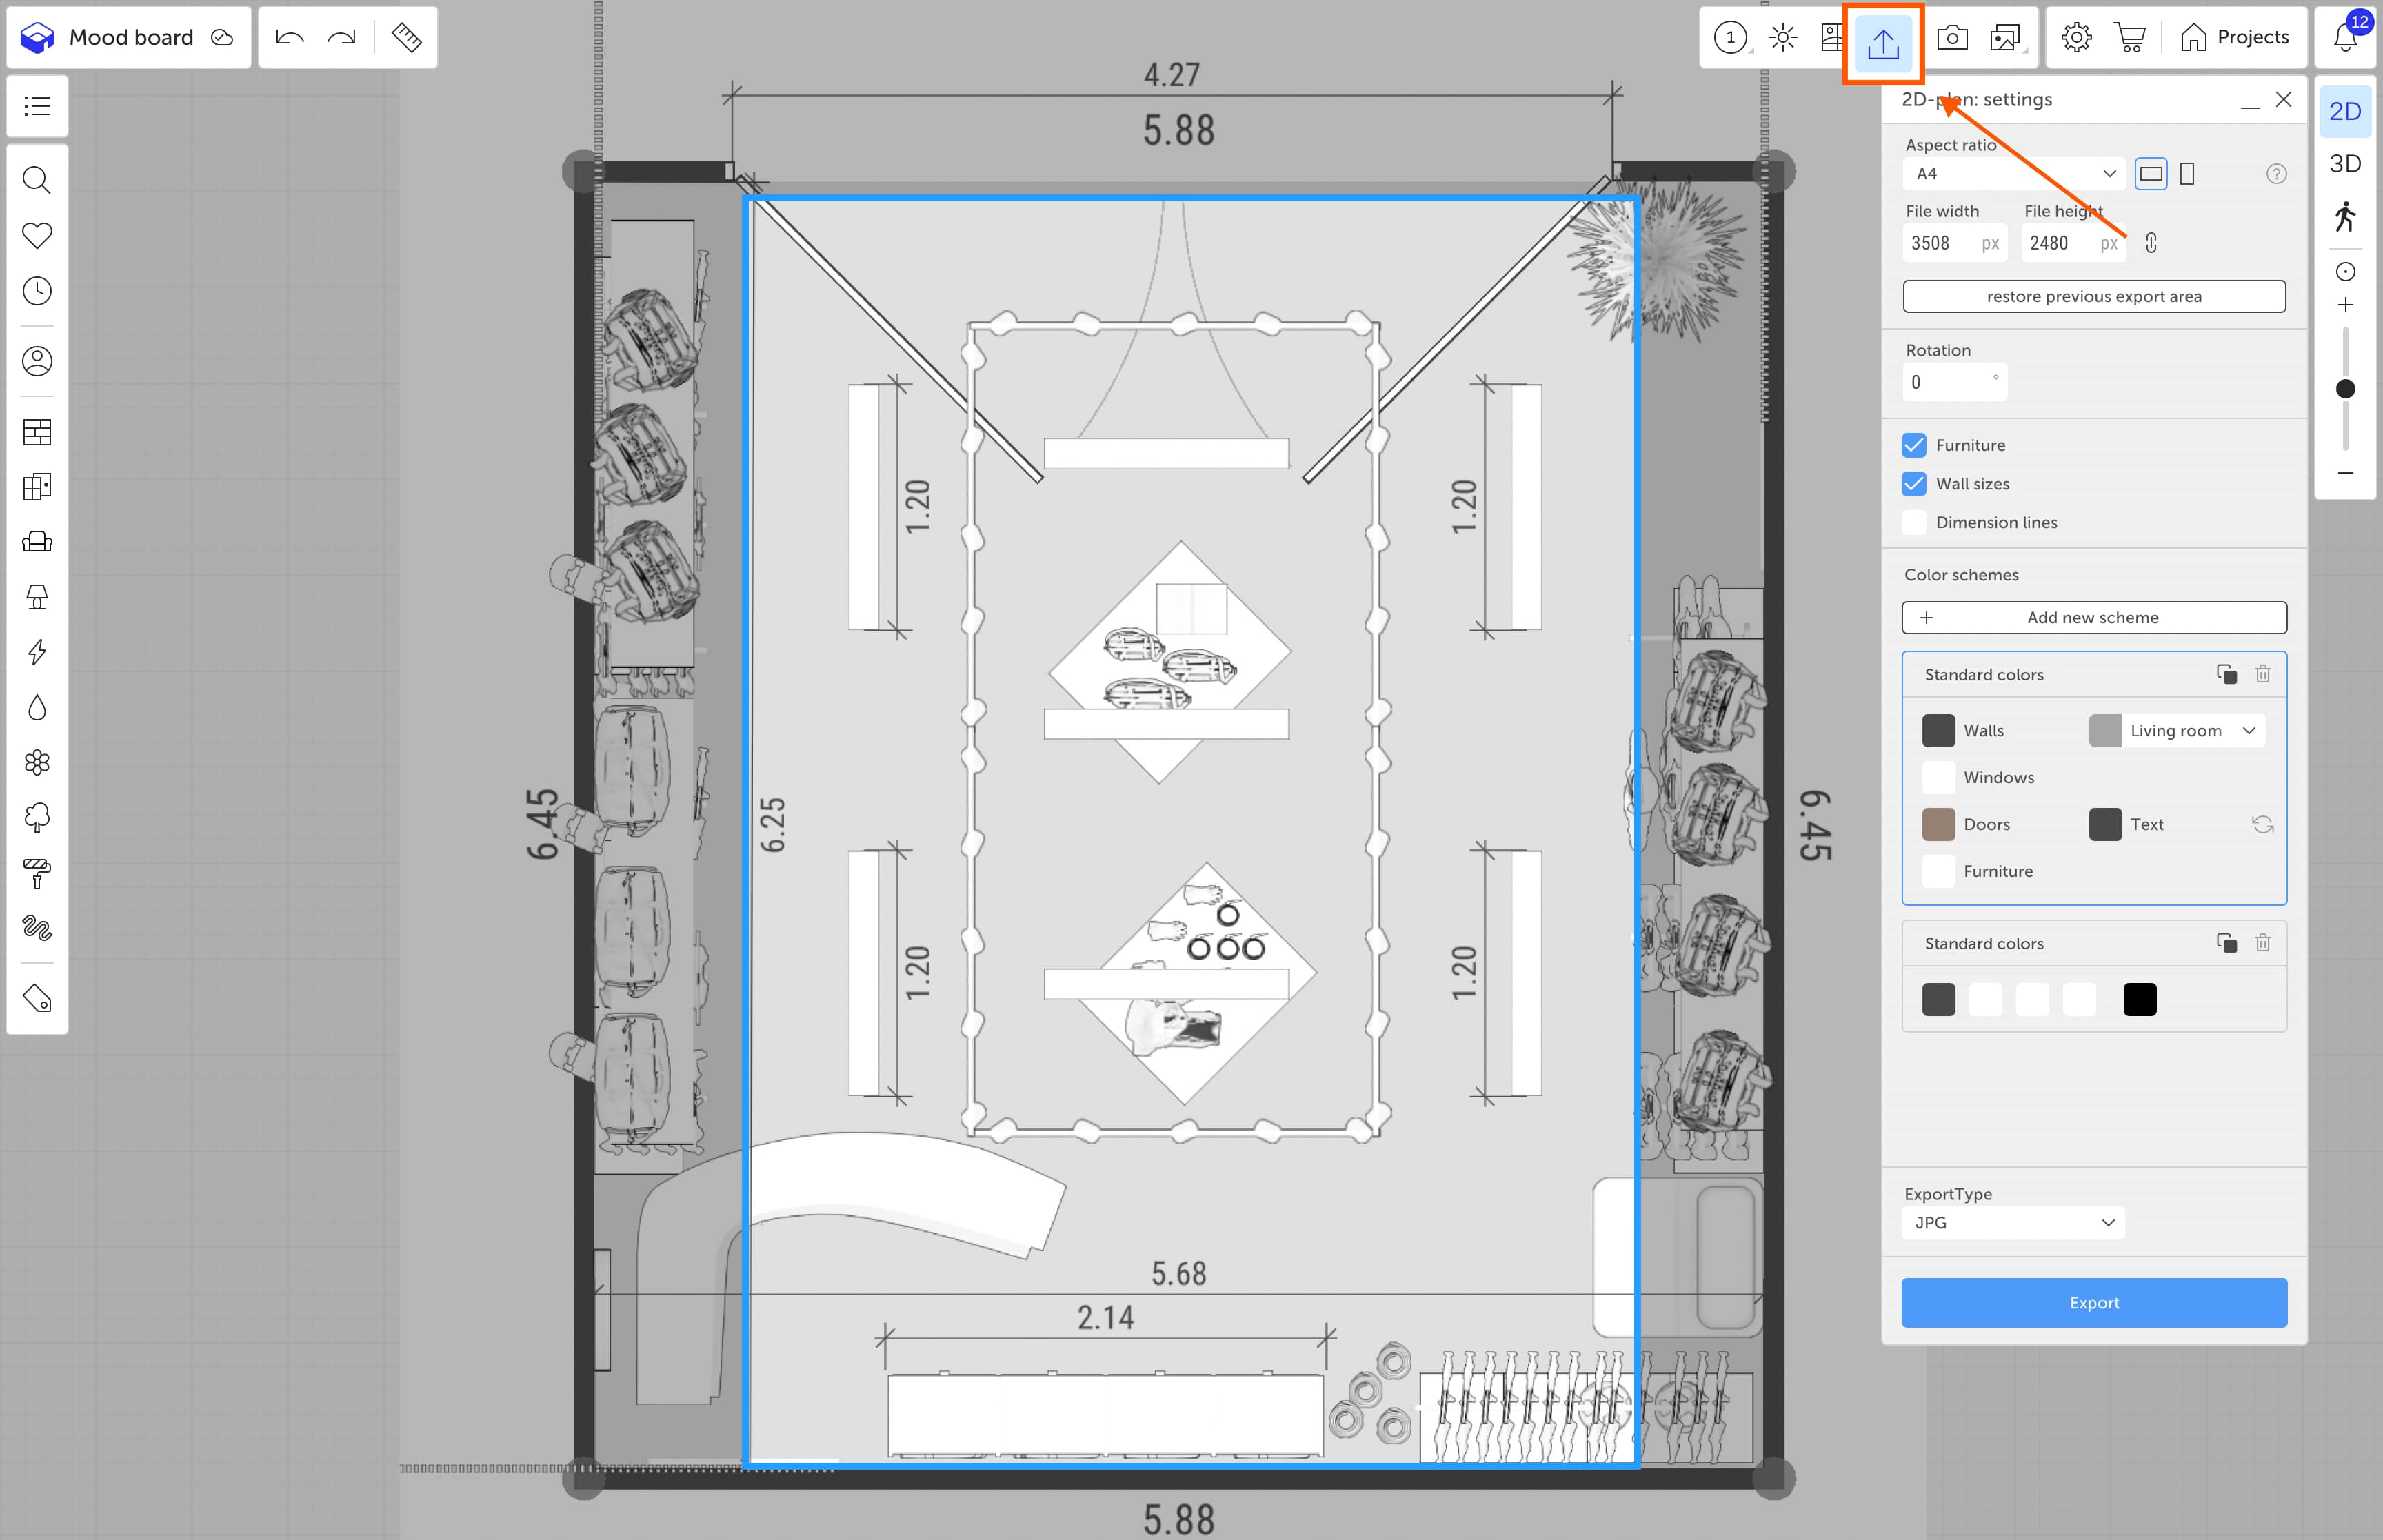
Export Area
A blue frame will appear on the screen indicating the area that will be saved as an image. By default, the frame is static, but you can move the plan beneath it:
- move — right-click and drag;
- zoom — scroll the mouse wheel.
When using the SVG format, the frame is ignored — the entire plan is exported.
Export Settings
The export menu consists of several sections:
1. Export Area
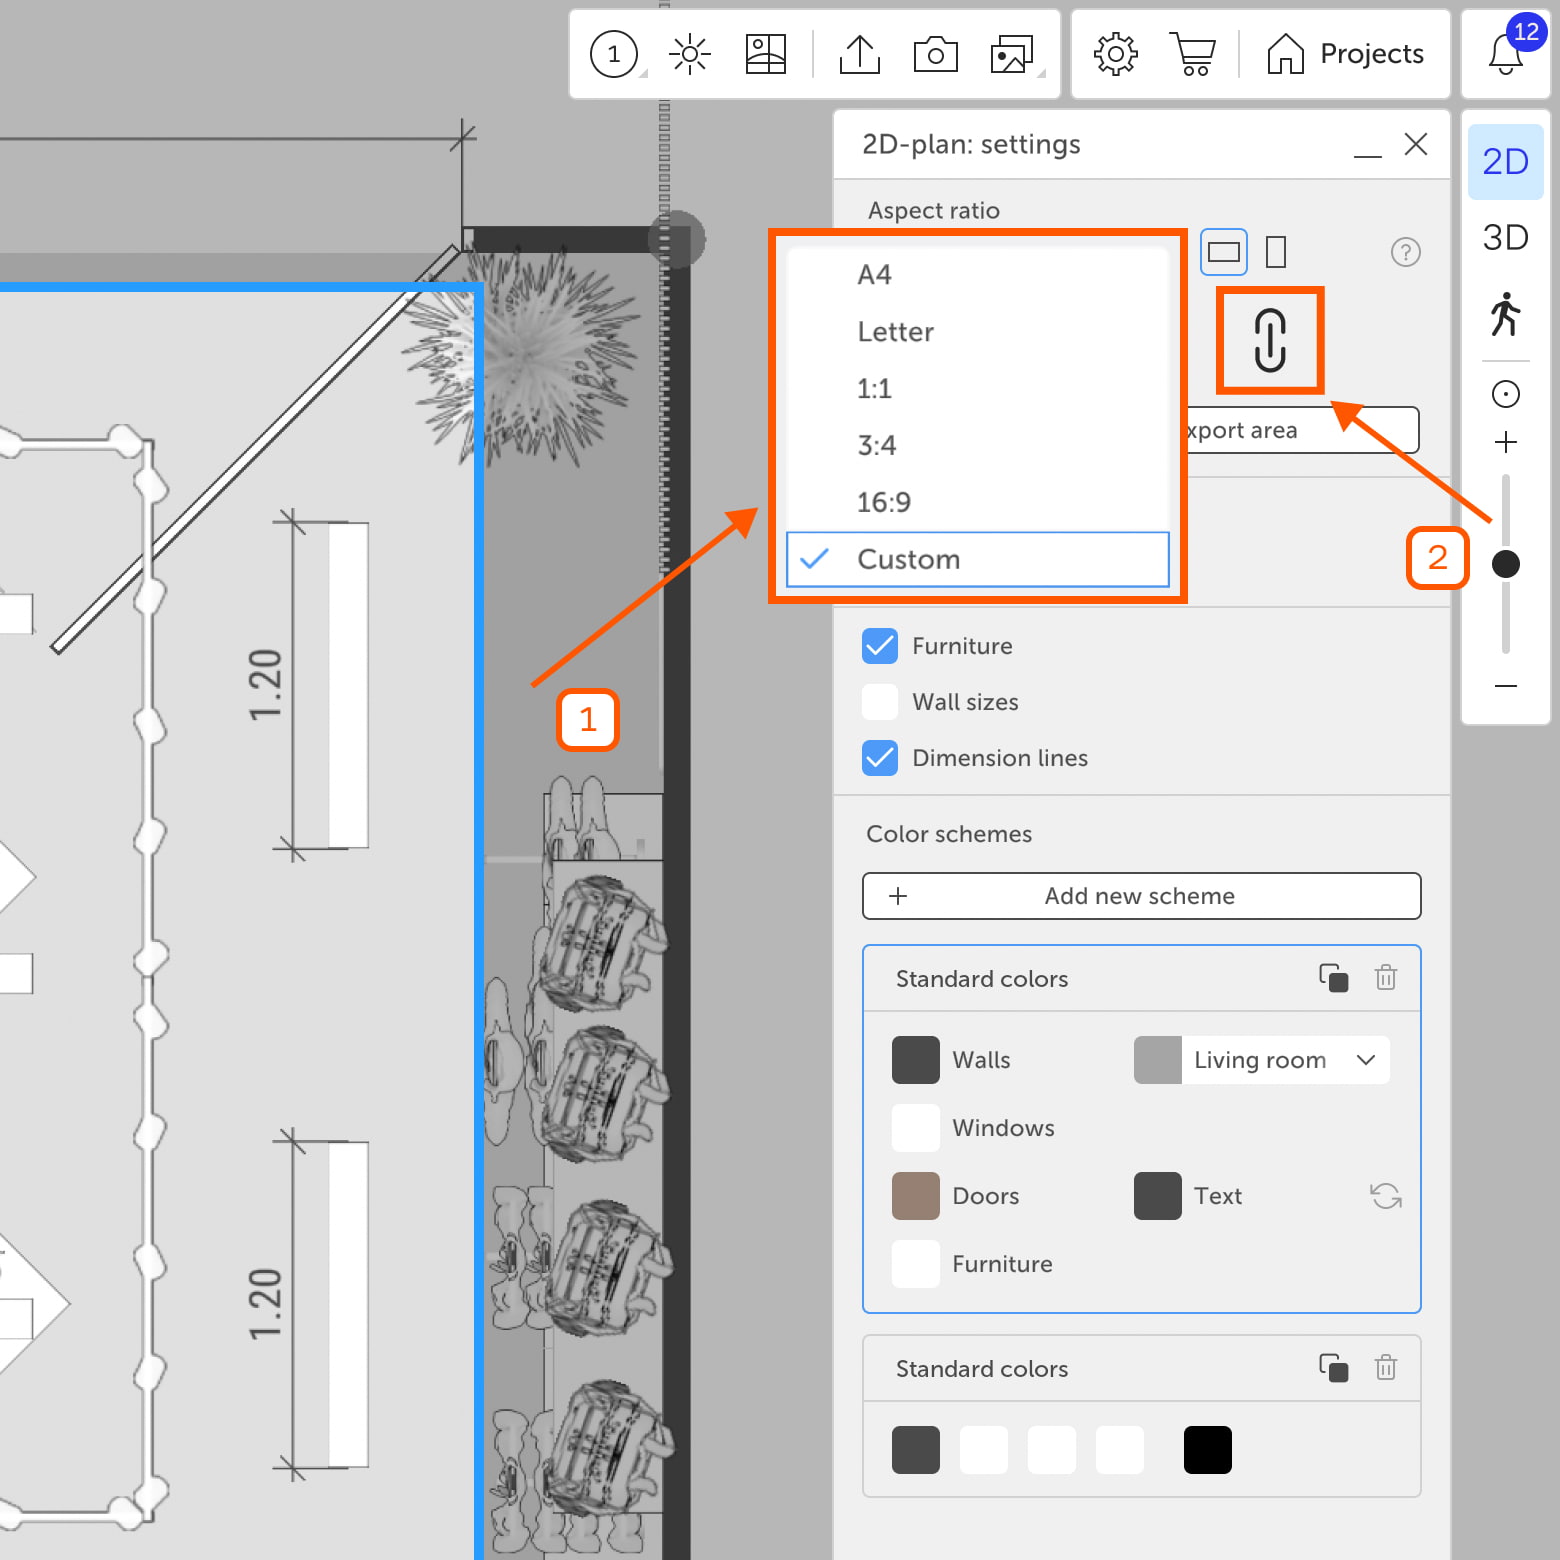
Here you can set the image size and proportions:
Aspect ratio — choose from presets:
- A4 (2480×3508 px)
- Letter (2551×3295 px)
- 1:1 (1000×1000 px)
- 3:4 (1500×2000 px)
- 16:9 (1080×1920 px)
- Custom — set your own values.
Frame orientation — vertical or horizontal.
Width / Height — you can:
- enter values manually;
- use ↑/↓ arrows;
- use the slider.
Proportional lock — turn it on to keep width and height proportional.
«Restore previous export area» button — applies the export settings (size and frame orientation) used in your most recent export.
2. Rotation
You can rotate the plan to a specific angle using:
- the slider;
- manual input;
- preset angle values.
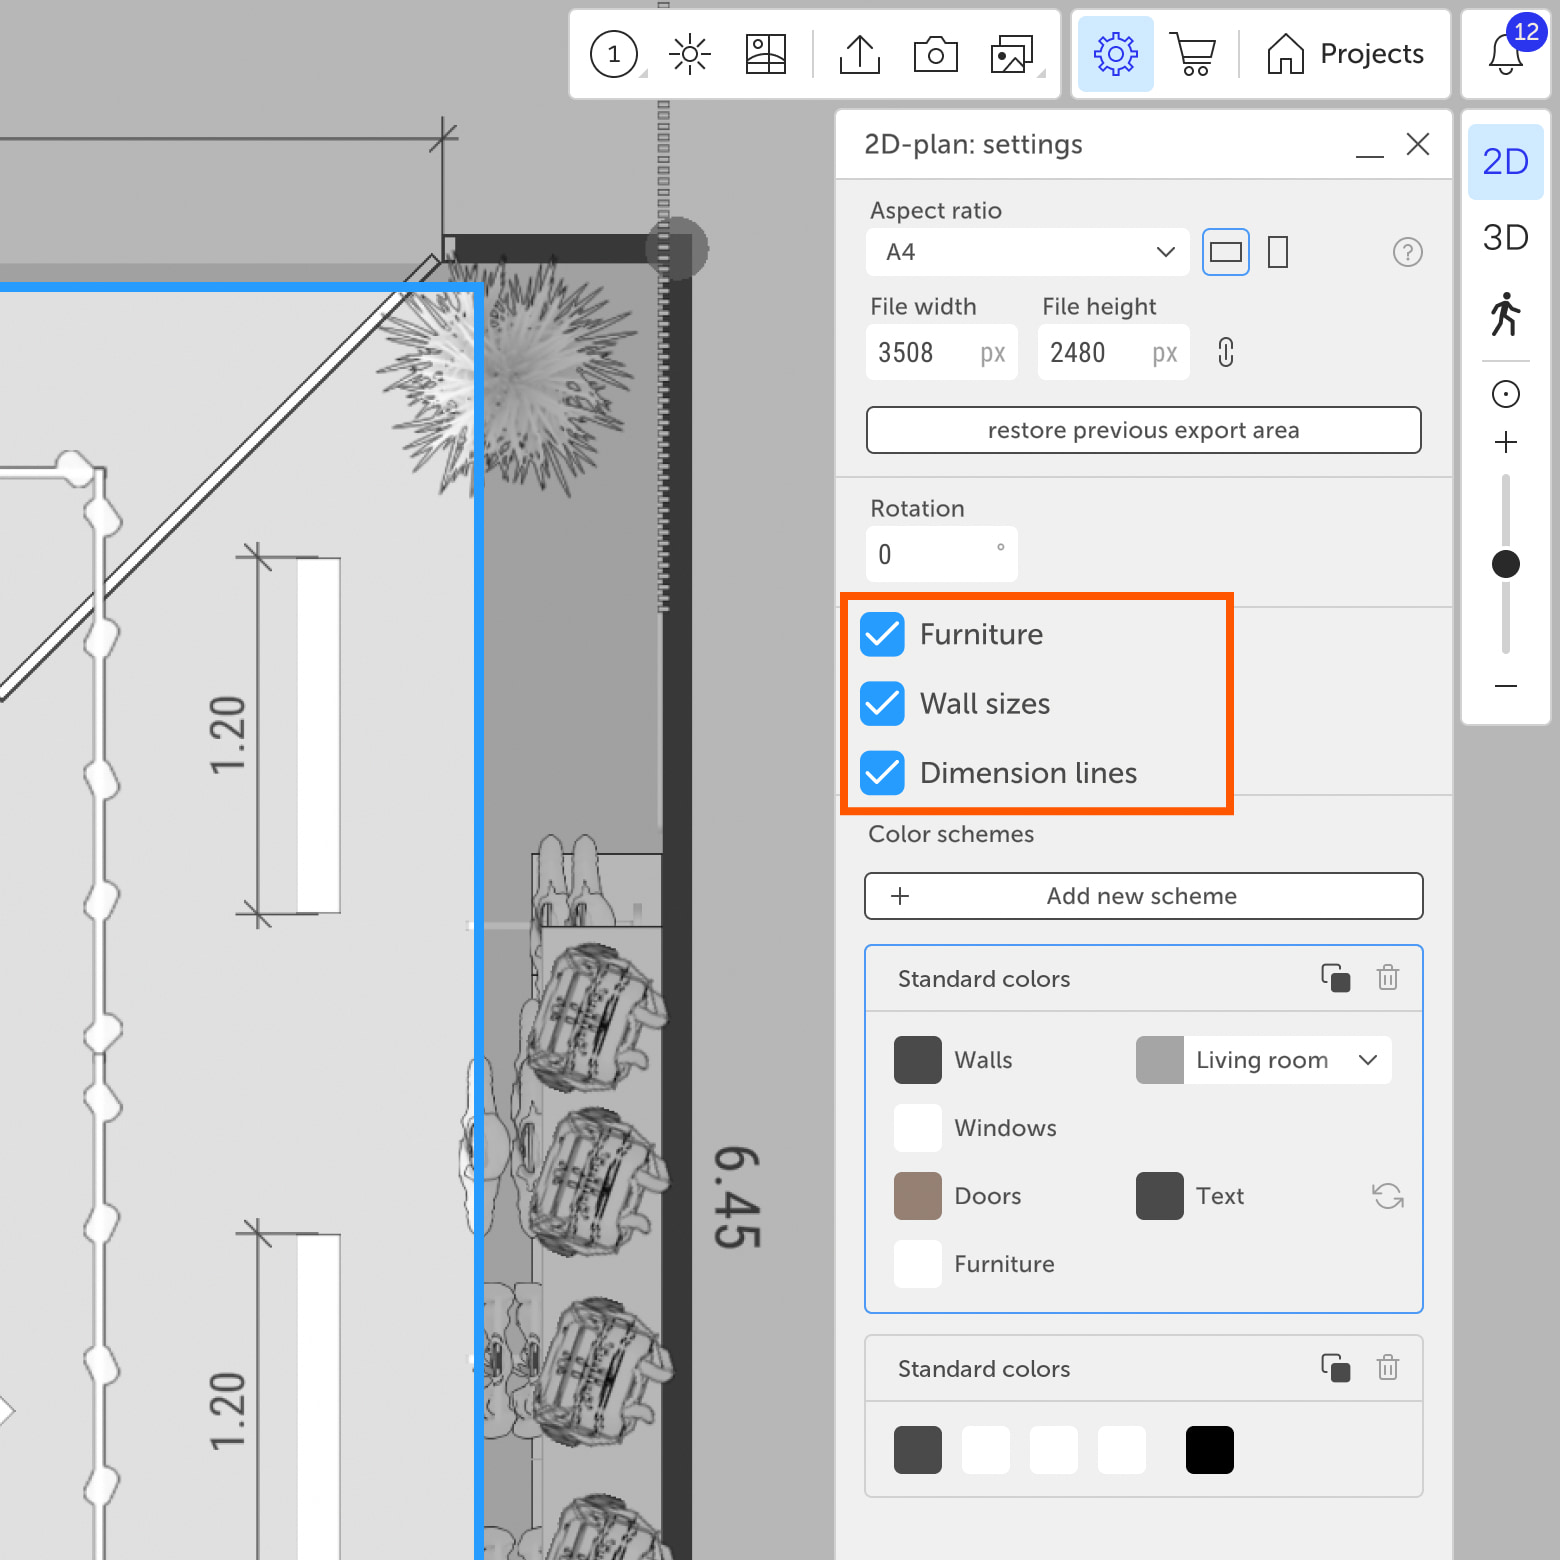
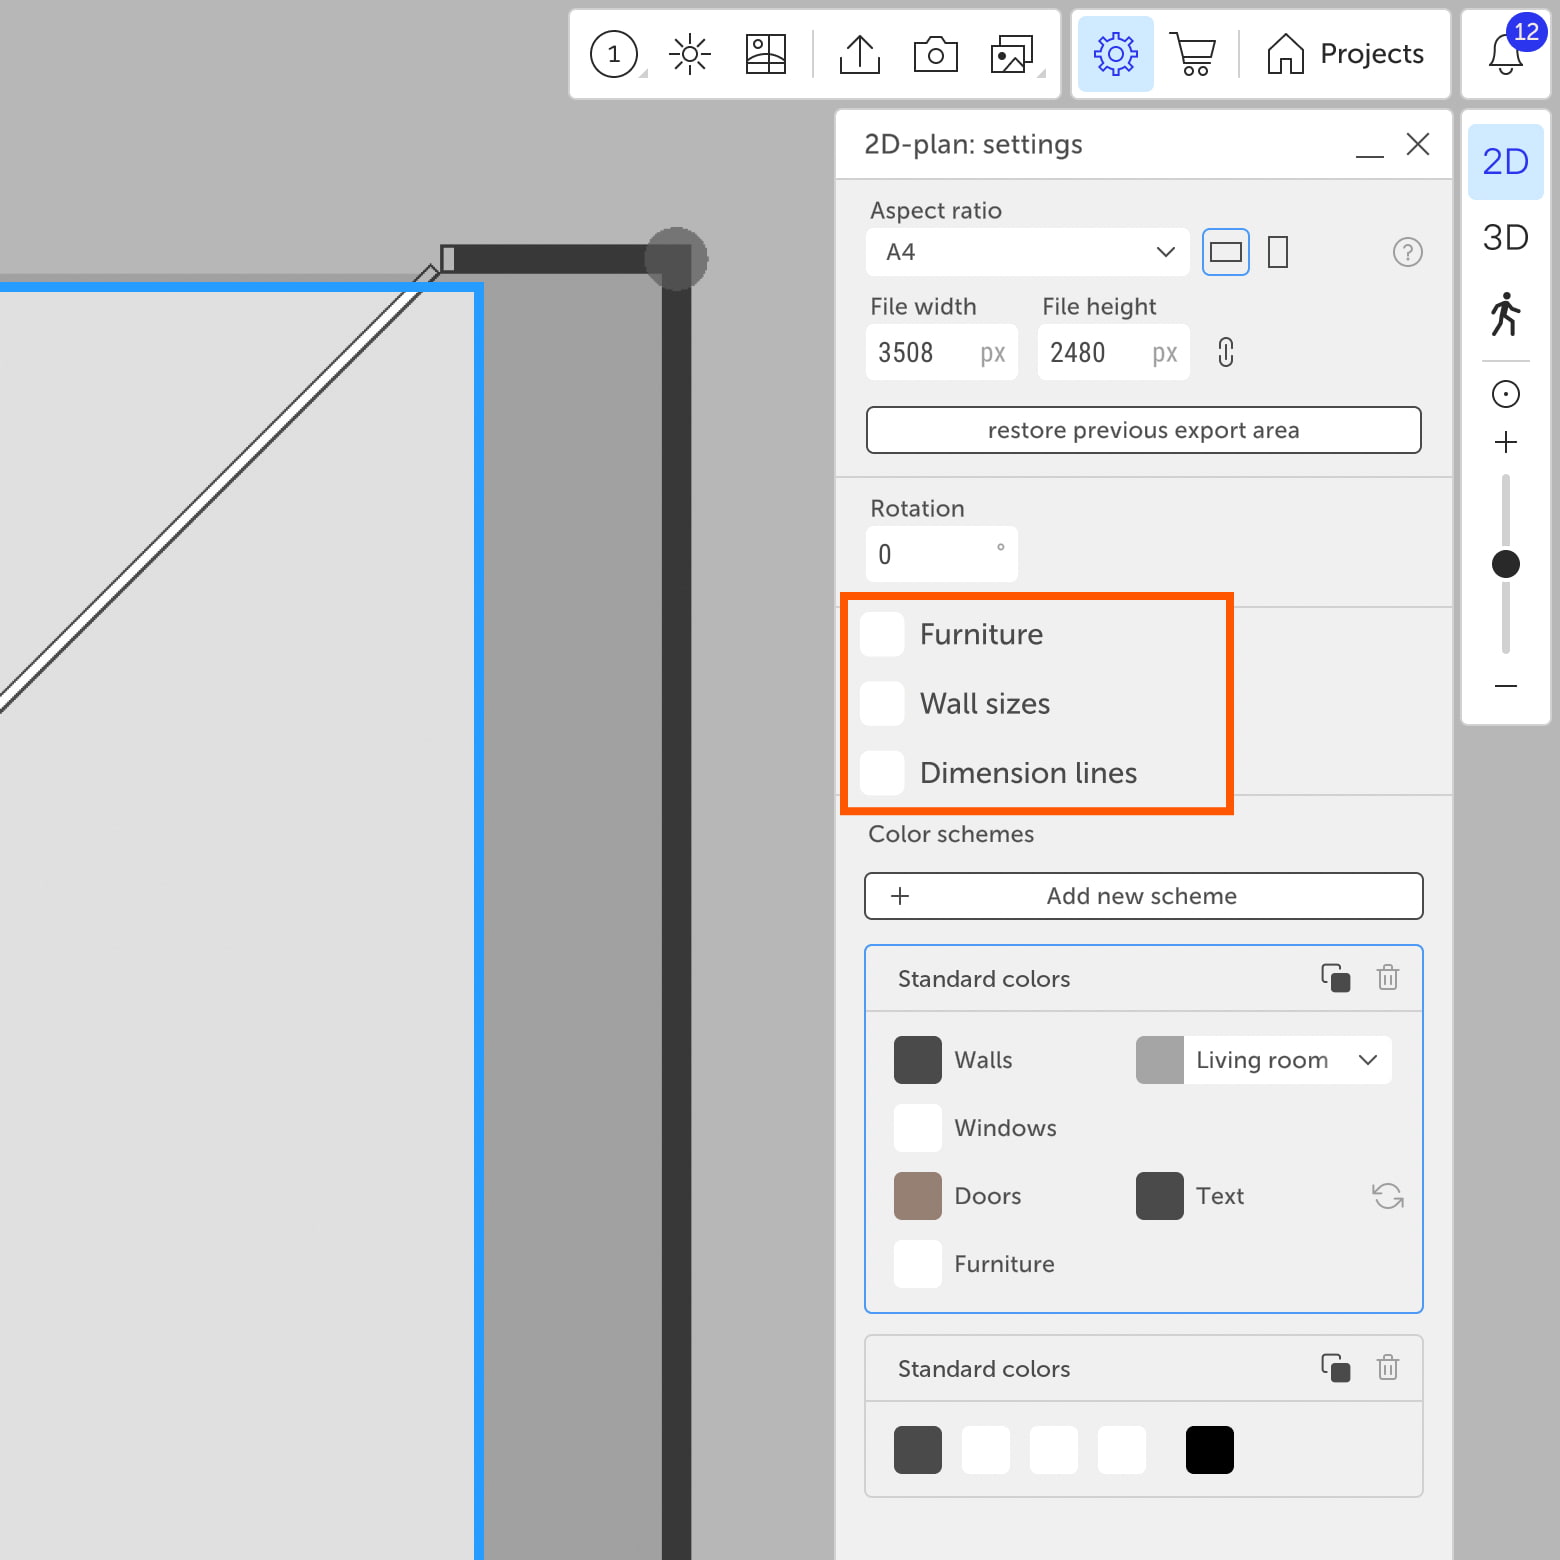
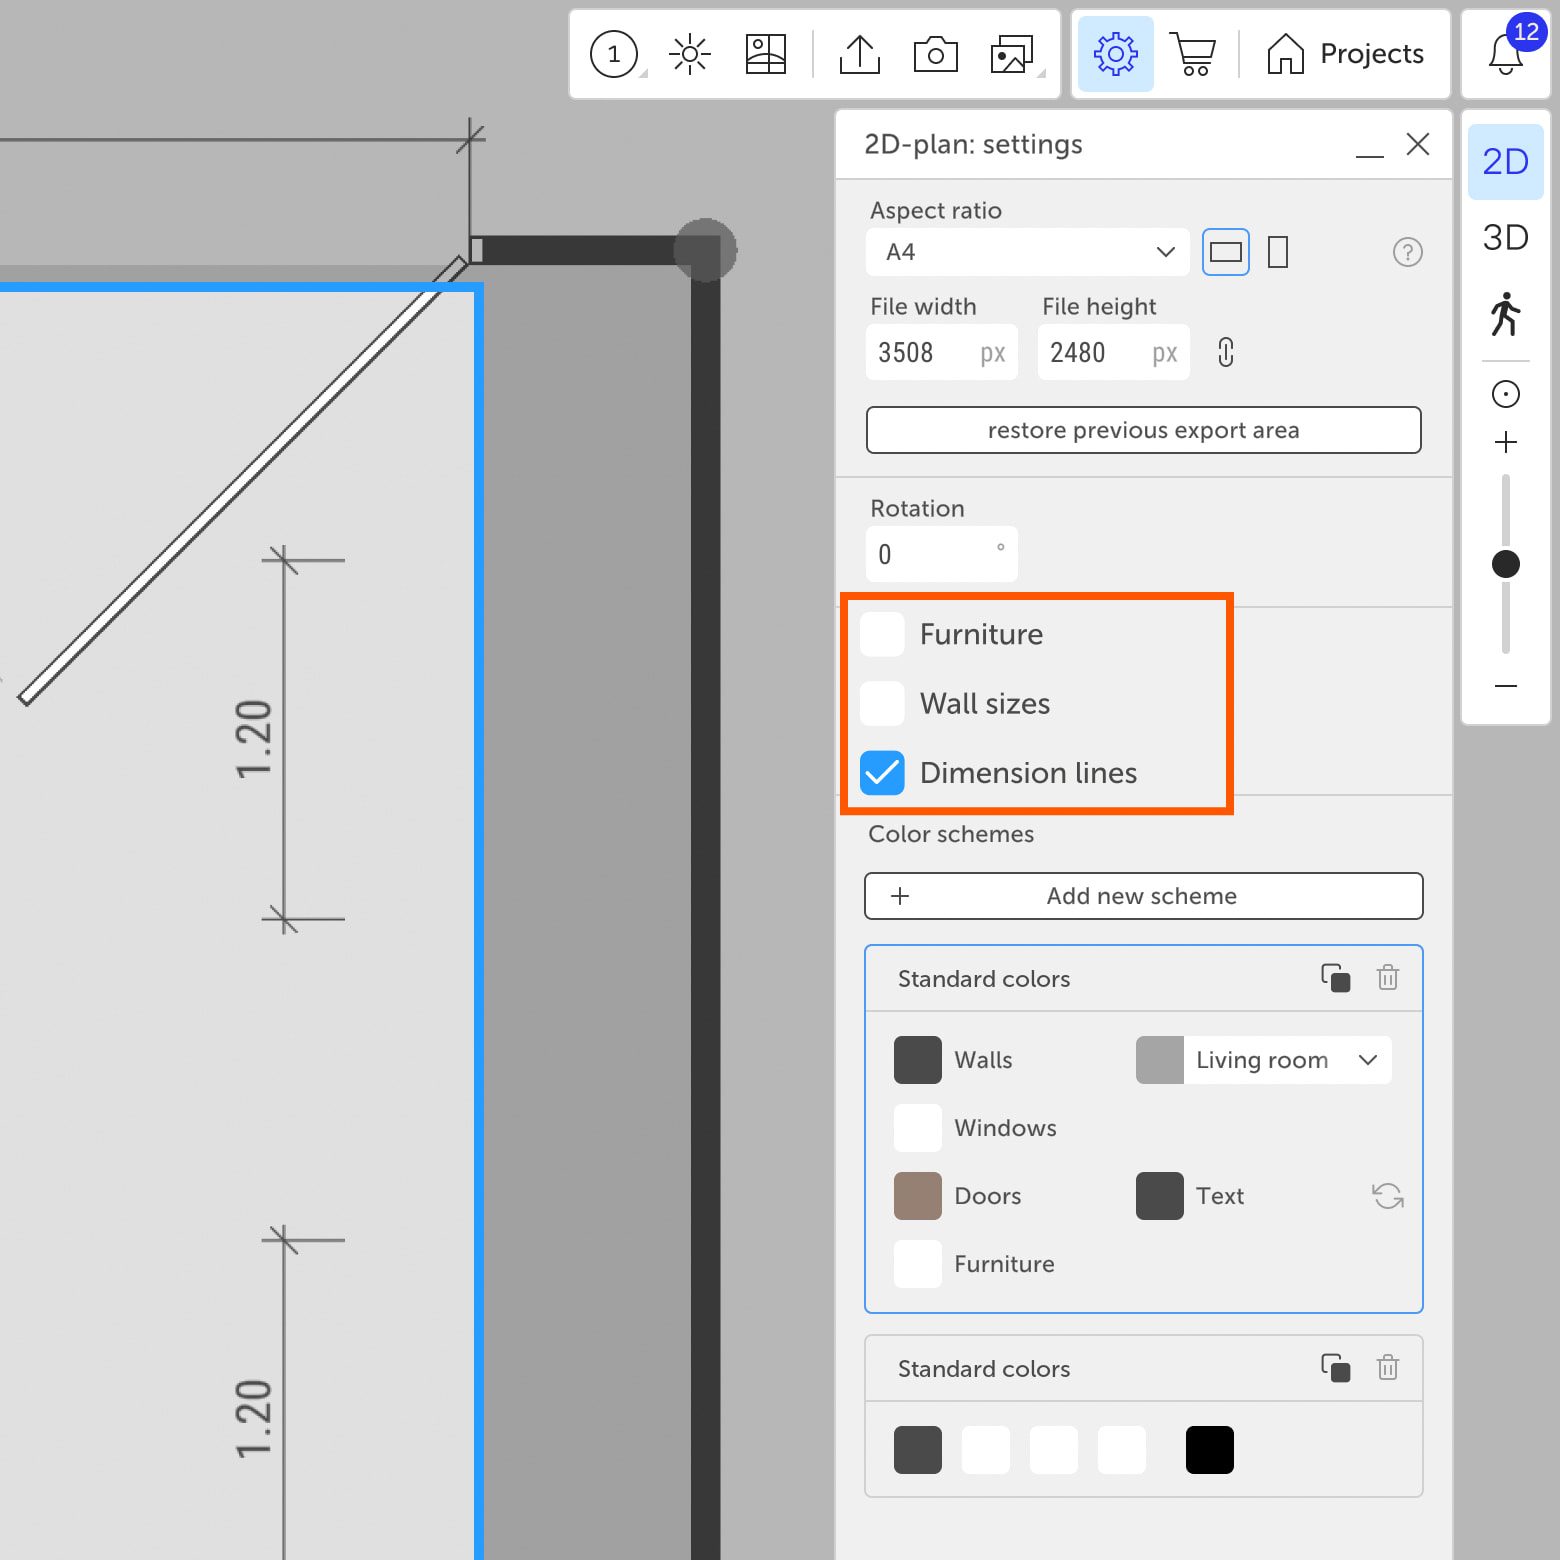
3. Content Visibility
Use checkboxes to hide specific types of content in the plan:
- Furniture — hides all objects except windows and doors, including lighting, appliances, and decor.
- Wall sizes — hides automatically displayed wall sizes.
- Dimension lines — hides all items from the «Labels» category.

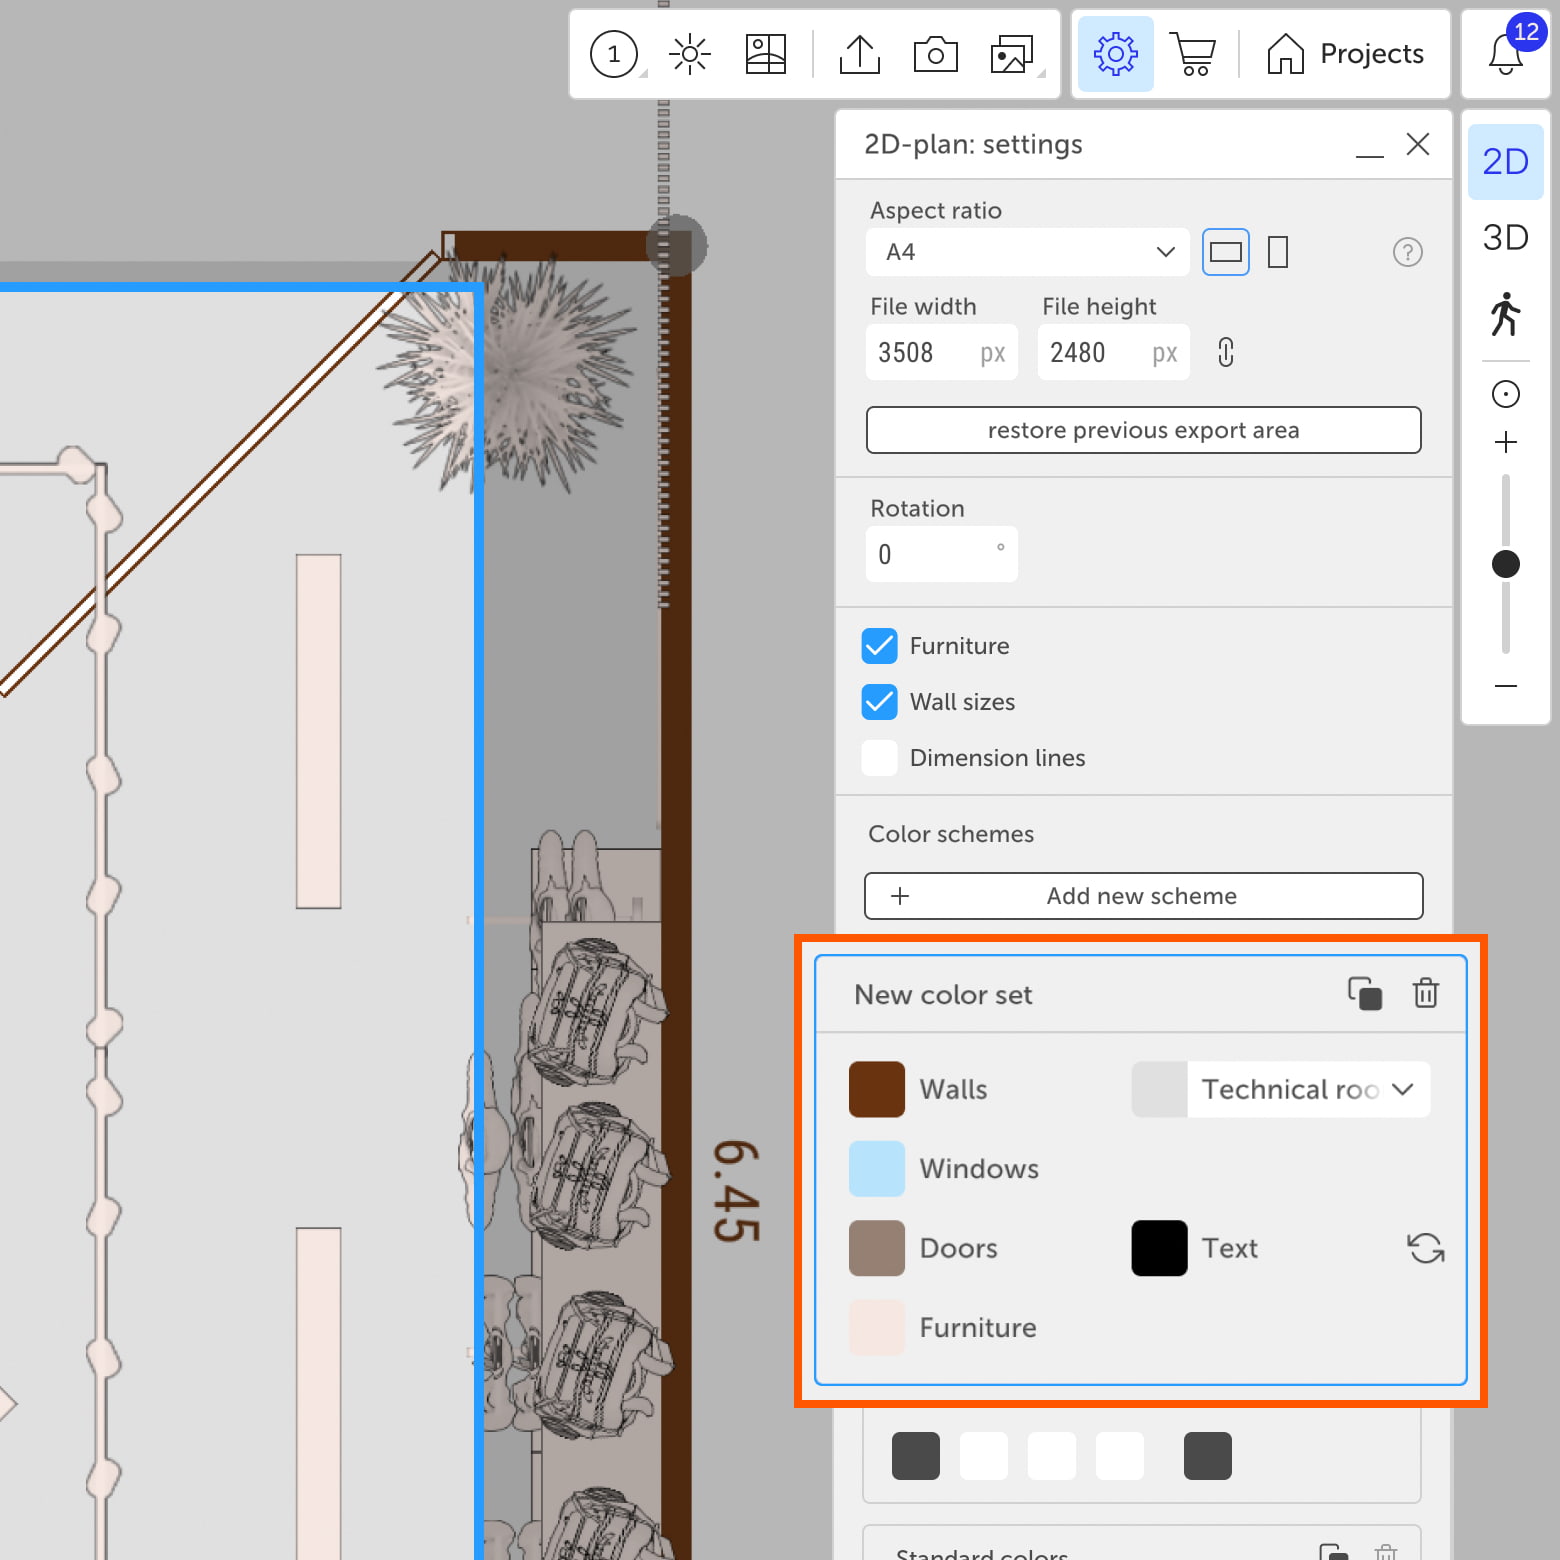
4. Color Schemes
You can use default color schemes or create your own:
Add new scheme — creates a custom scheme you can:
- rename;
- duplicate;
- delete.
You can customize the color of:
- walls;
- windows;
- doors;
- furniture;
- text;
- rooms — depending on their type.
5. ExportType
Choose the format for the exported image:
- JPG — image with a white background;
- PNG — image with a transparent background;
- SVG — vector file. This format exports the full plan, regardless of the frame.
After configuring the settings, click «Export» — the image will appear in the project gallery.
If you have any questions, found an error, or couldn't find the information you need, please contact us at support@planoplan.com, use the built-in support on the website or in th app (icon in the bottom right corner).