How to create floor plan with Planoplan
List all the steps from the first measurements to creating a 3D model of the property and show the way to create a floor plan in Planoplan.
- 19 january 2023
- 33430
In this article we will look at the need to create a floor plan, list all the steps from the first measurements to creating a 3D model of the property and show the way to create a floor plan in Planoplan.
Why do I need a floor plan?
The work of a designer involves many different processes, some of which we like but others seem boring and routine. Creating floor plans is not the most interesting part of creating a project, but it is an essential skill for any interior designer, and here's why:
- Don't rely on Bureau of Technical Planning (BTI) plans - their accuracy leaves a lot to be desired. Contrary to the expectations of many, builders are not jewellers, and the real parameters of an object can be very different from those in the project documentation.
- Only your own measurments give you a guarantee that the object will be built accurately according to the parameters of walls and ceilings, niches and columns, doors and window openings.
- A good floor plan allows you to save on the purchase of materials and avoid risks associated with inaccurate design
- Use the visit to know the client and clarify needs, sign documents and get an advance payment. It is always better to discuss and agree on everything important than in email
What do I need for drawing up a floor plan?
To get a plan of measurement, you will need to arrange a visit and make measurements.
- Check with the client what their needs are and what they want to use each room for.
- Use a laser or tape measure. We do not recommend the use of measuring applications, as their interfaces and settings are not obvious to novice designers and therefore dimensions can be inaccurate.
- Record all the measurements on the sketch
How do I make a flooor plan? 6 steps
Take measurements of the length, width and height of each wall in each room.
Note window and door openings. Record the height from the floor.
Draw all accessories, niches, columns and other architectural features.
Mark the type of wall (load-bearing, non-bearing, partition).
Mark the output of communications (gas, water, electricity).
Photograph each room and its significant elements.
When the floor plan is ready it can be transferred to Planoplan. There are several scenarios to choose from:
Loading the drawing as a "background".
Drawing with lines (walls). We recommend choosing the default method of drawing walls - along the edge of the wall.
We know that Planoplan is often compared to Sims because of its ease of use and some "gamification" of the interior design process. However, do not forget that Planoplan is a professional tool and uses a construction algorithm that is as close to reality as possible. So be careful and consider wall thicknesses for accurate drawing.
Loading the drawing as a background
Take a photo or scan the drawings created on site.
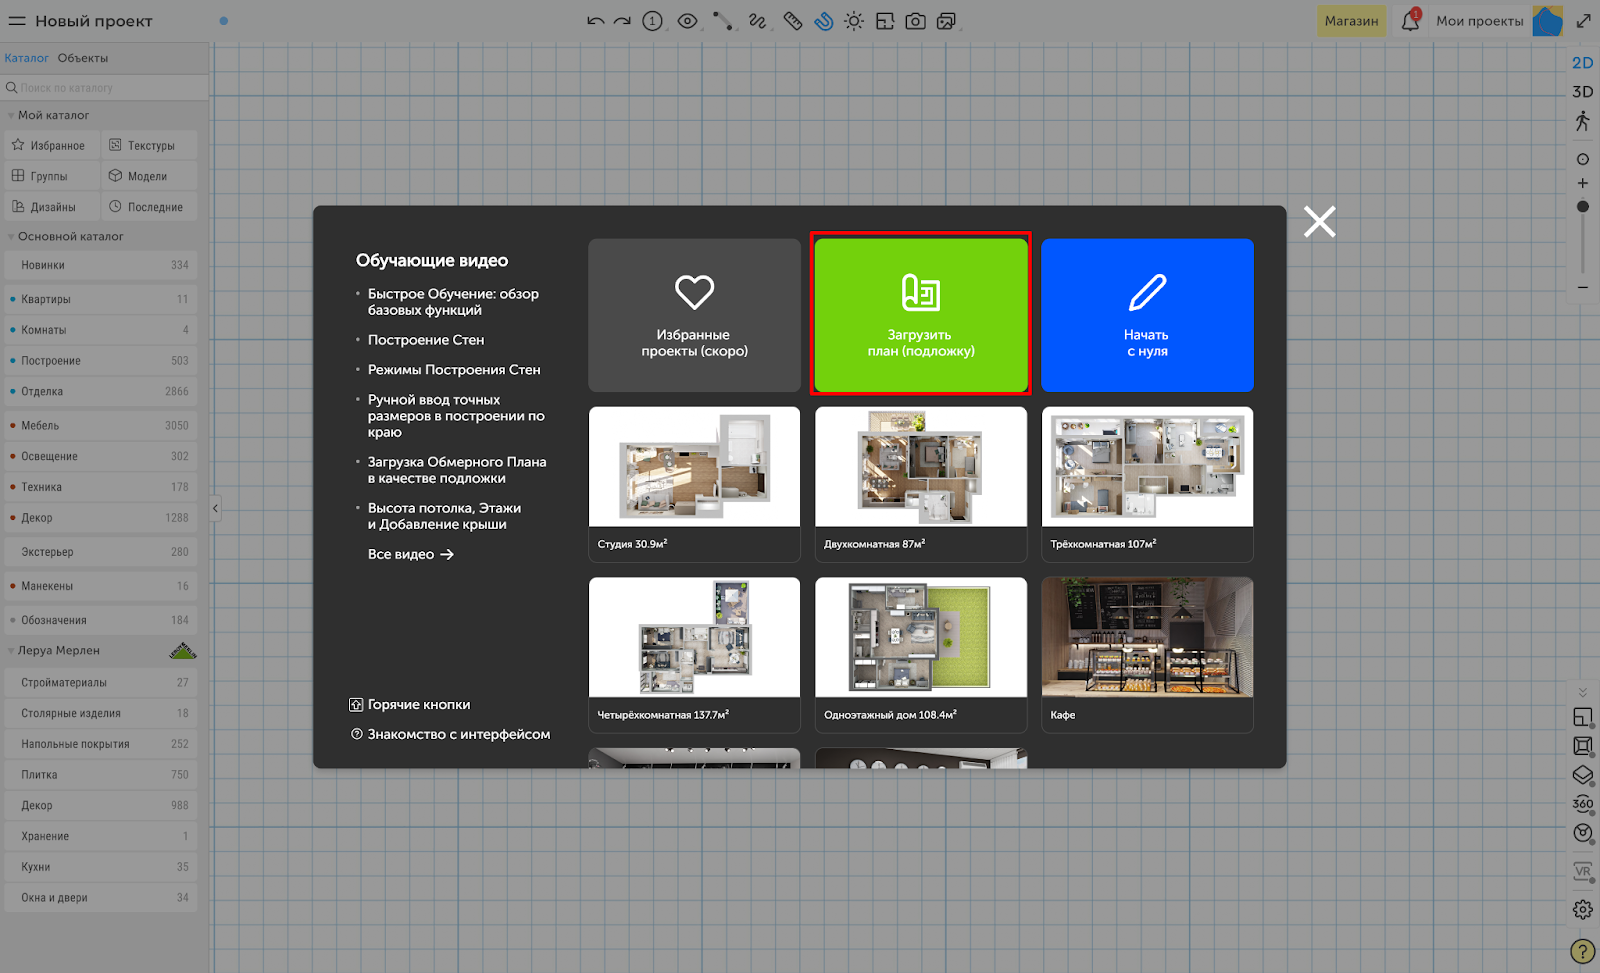
On the project creation page in Planoplan select "Load plan (background)".
Select the "Upload image" icon and upload in JPG, JPEG, or PNG format, with a maximum file size of 10 MB.

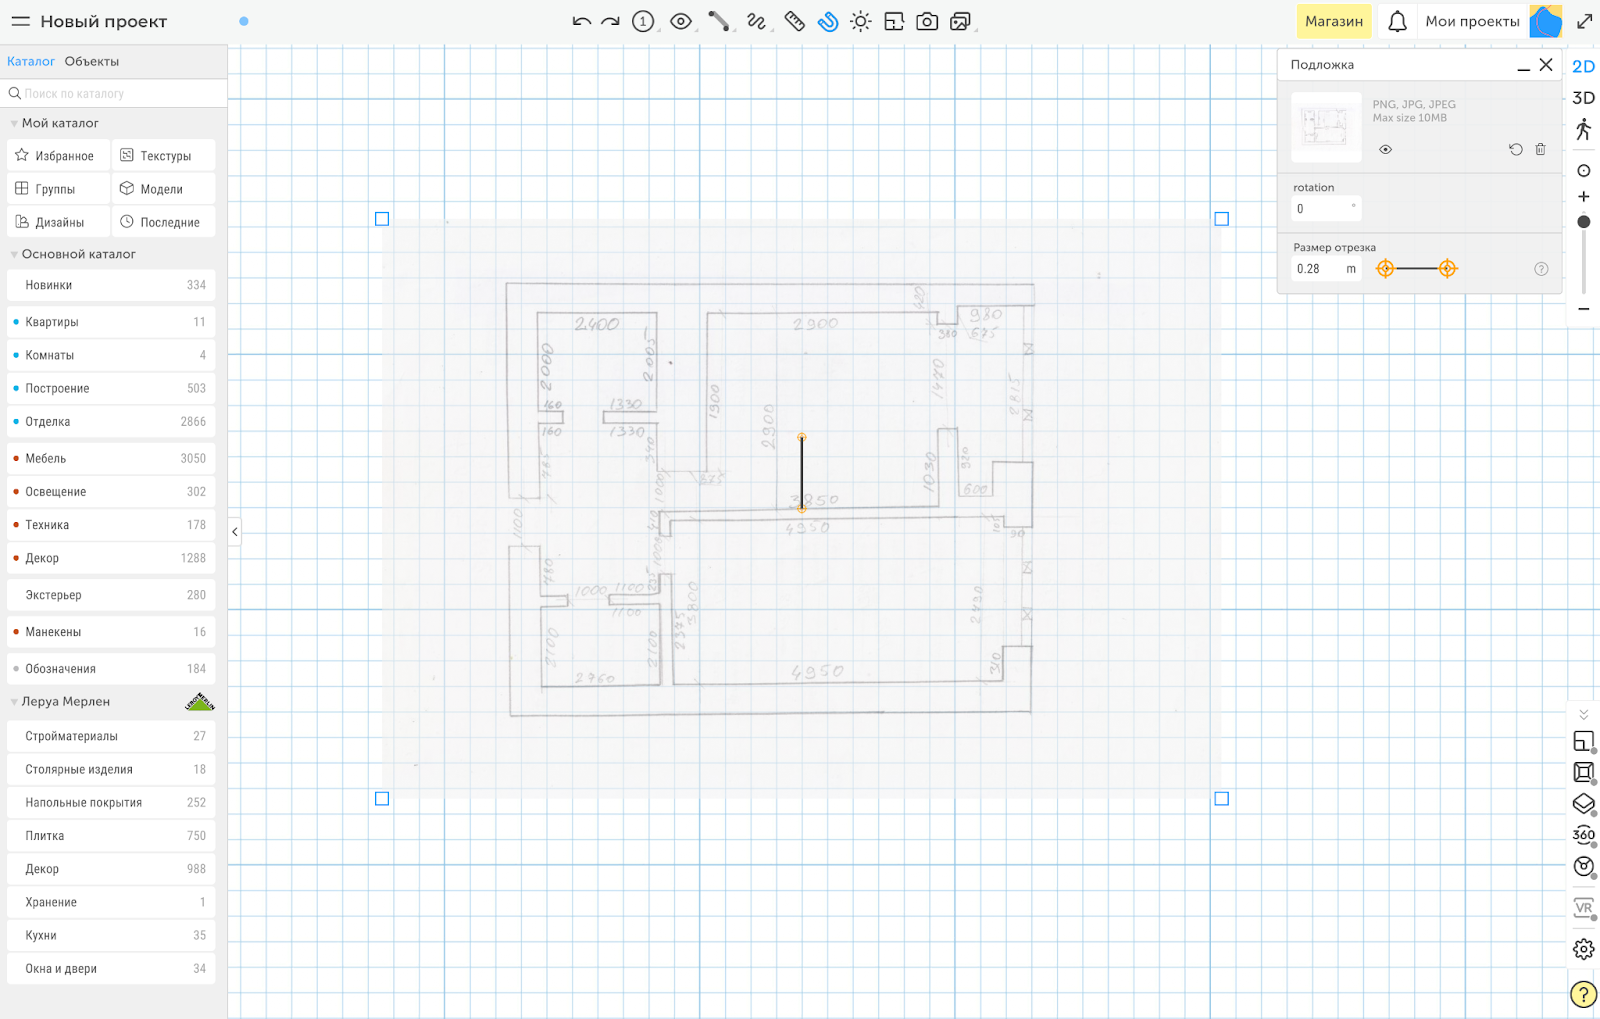
Great, the plan has been uploaded. Now set the scale.
4. Choose the segment size tool.
5. Choose one of the walls, the size of which is easy to read
6. If necessary, adjust the scale of the whole image with the scroll wheel
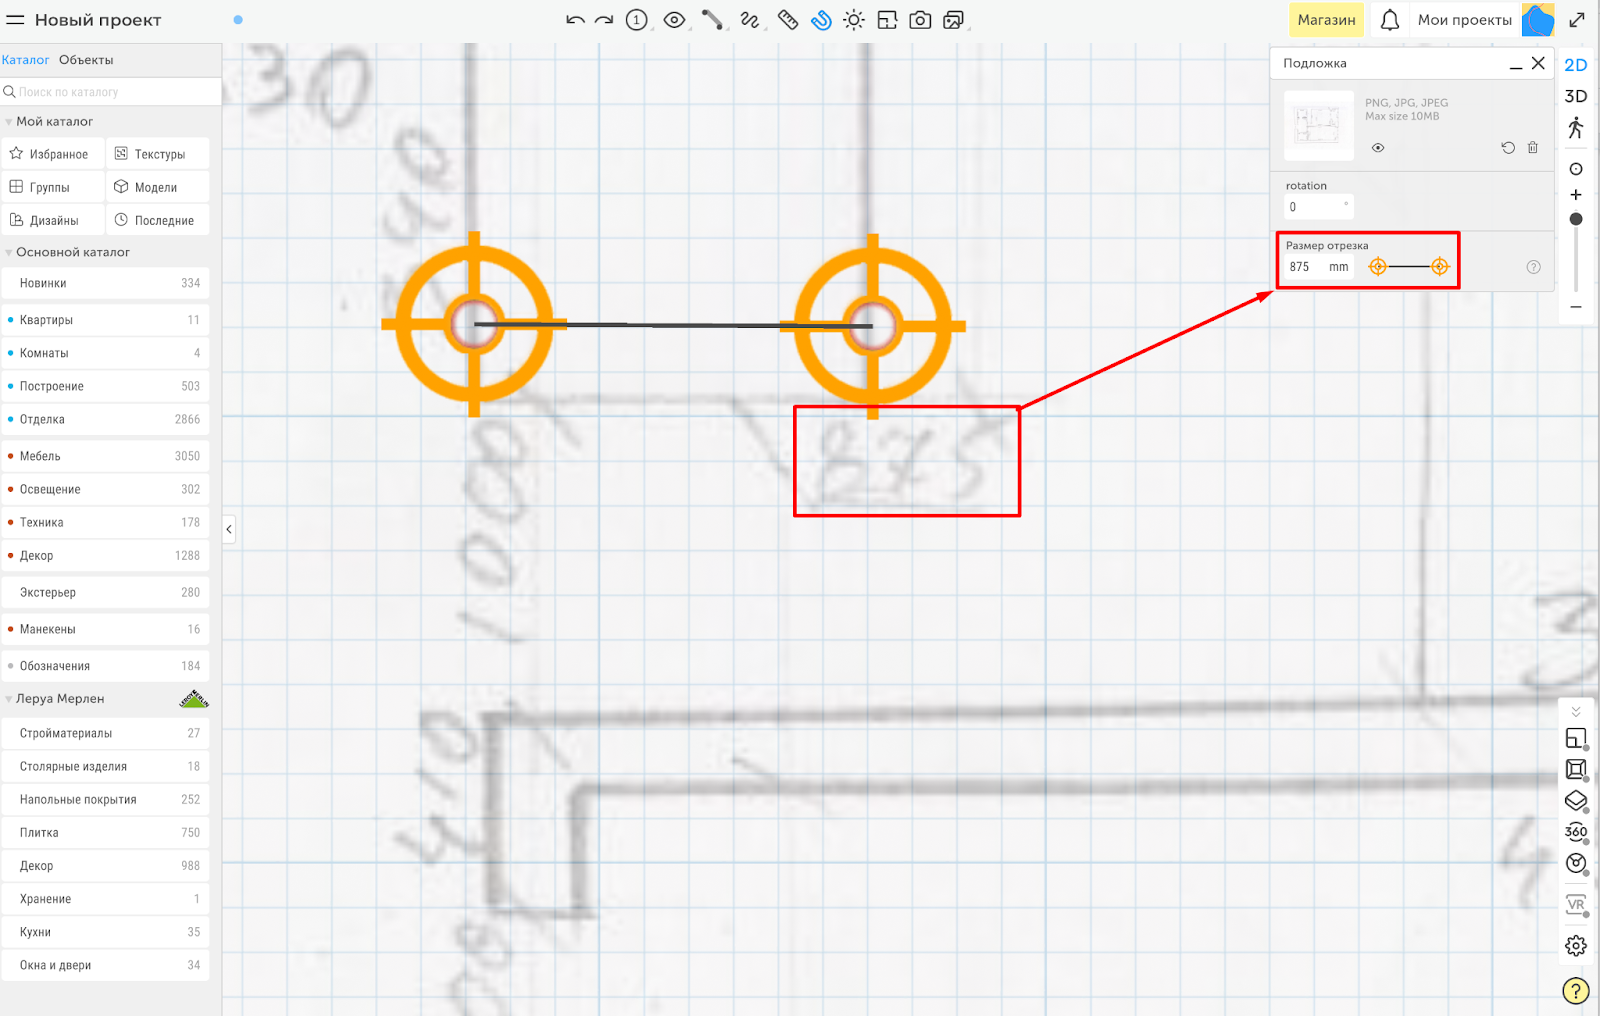
7. Set the end points of the segment to the start and end points of the wall
8. Enter data from the object drawing in the "Segment size" field and press Enter.
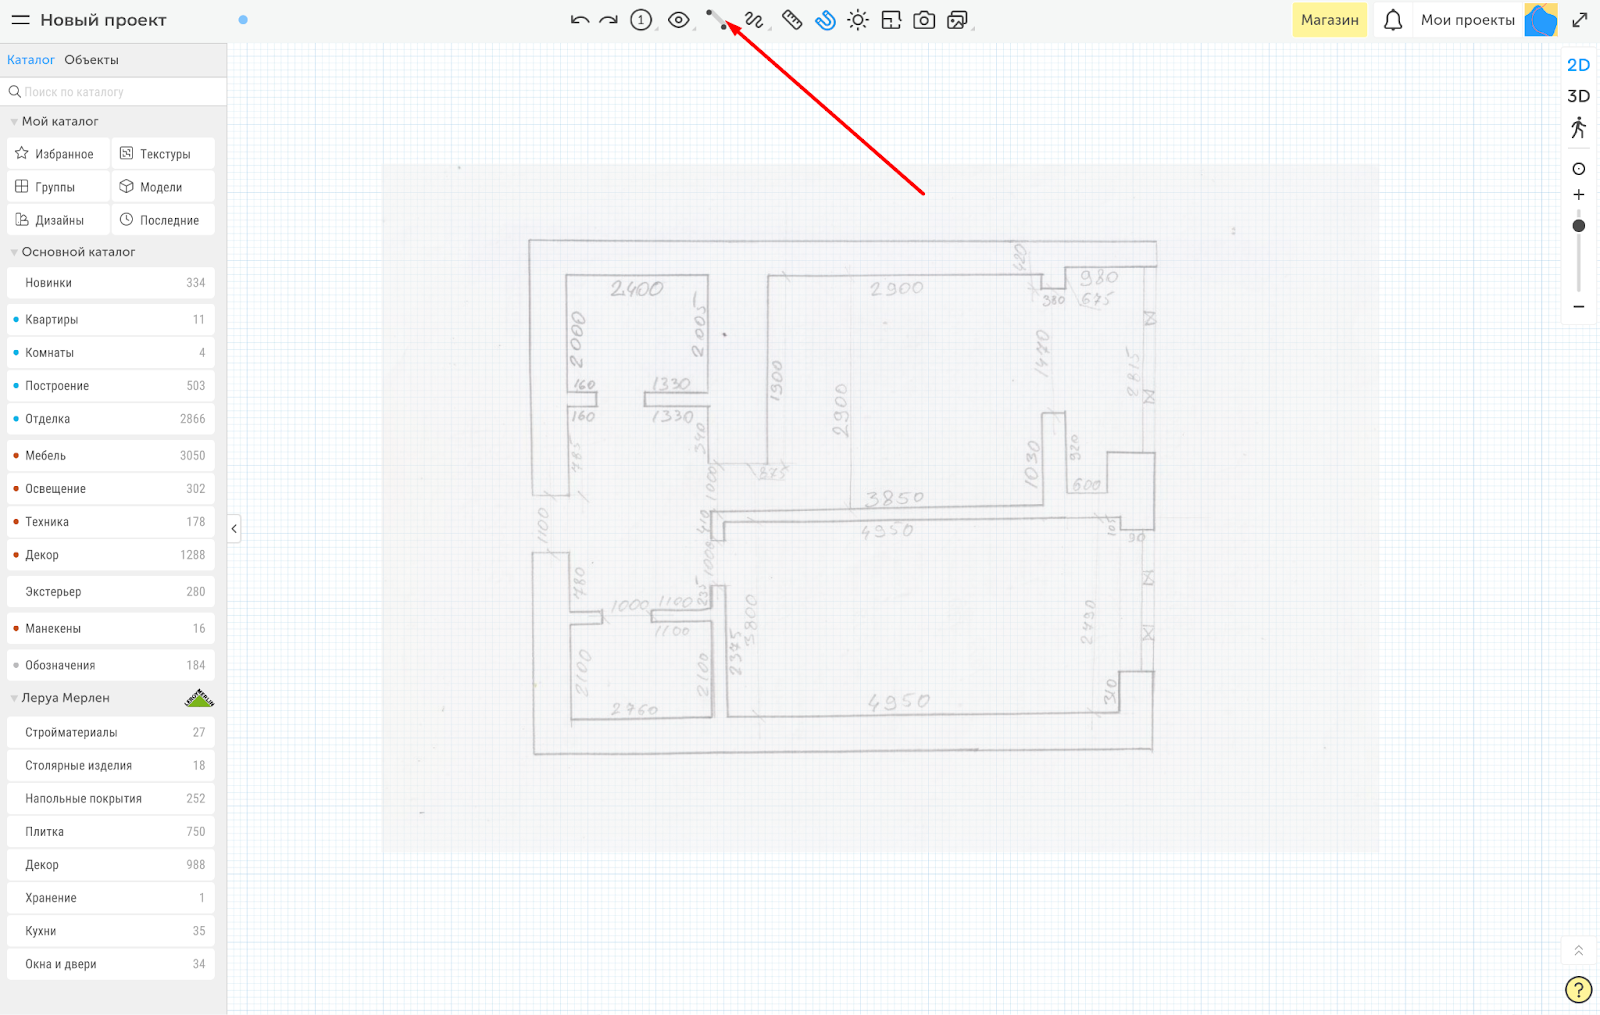
Now you can close the load menu and start drawing the wall using different wall construction methods. By default the drawing mode is "By edge", but you can select any other way.
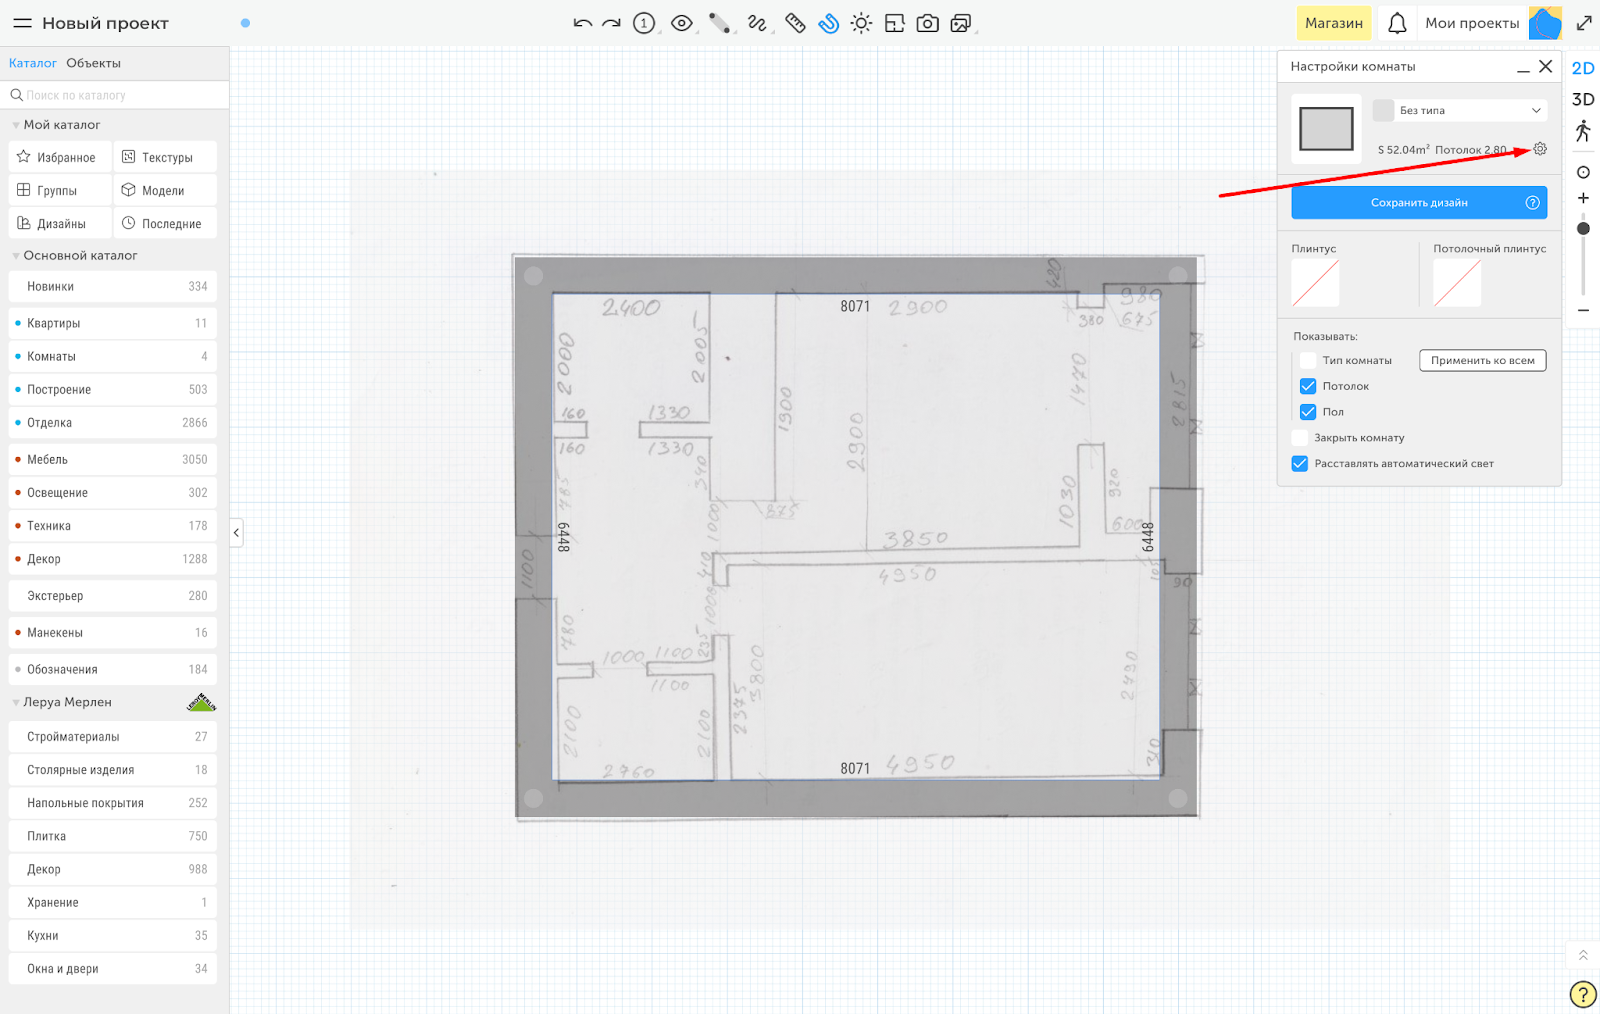
After closing the general contour, the room will be "filled" in colour, which will indicate that the drawing contour is closed and we have got one room.
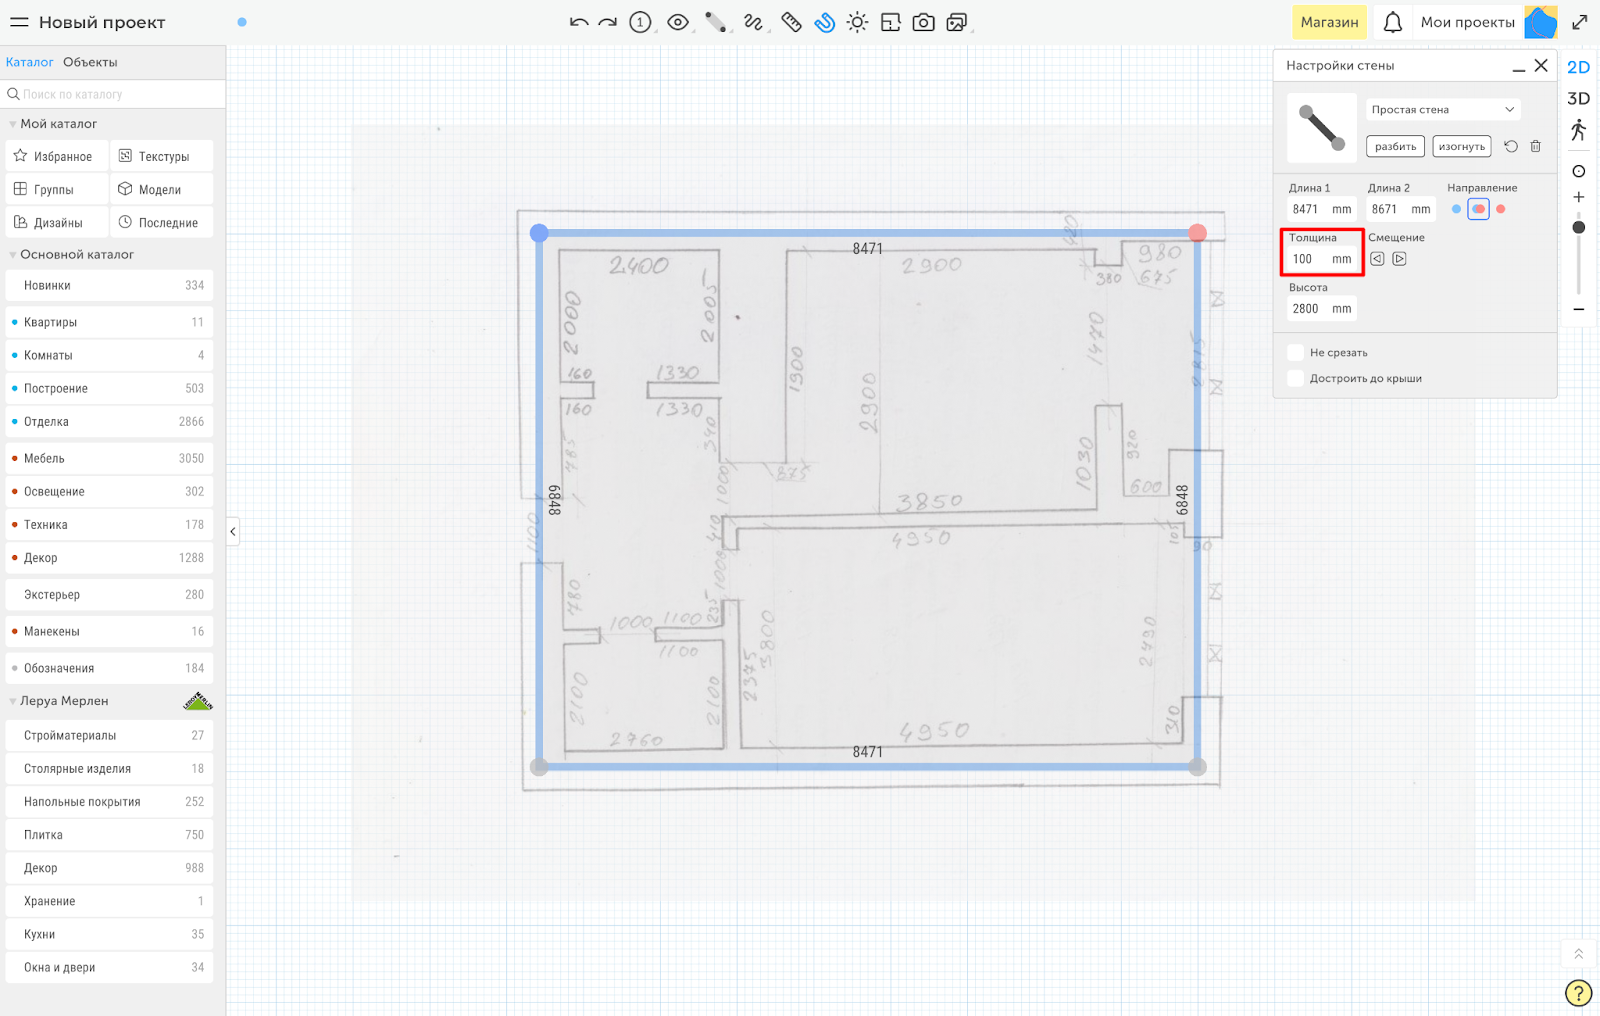
Then we can select all walls and in opened properties specify their thickness.
In Planoplan we can change the height of individual wall as well as of the whole project. In this menu only height of single walls can be changed
The same principle is applied to all changeable value fields in Planoplan.
Clicking on a room opens the room control menu. Here you can adjust the ceiling height of the entire project and many other functions that we will cover in other reviews.
Once the general settings have been made, proceed to outlining the interior walls and partitions.
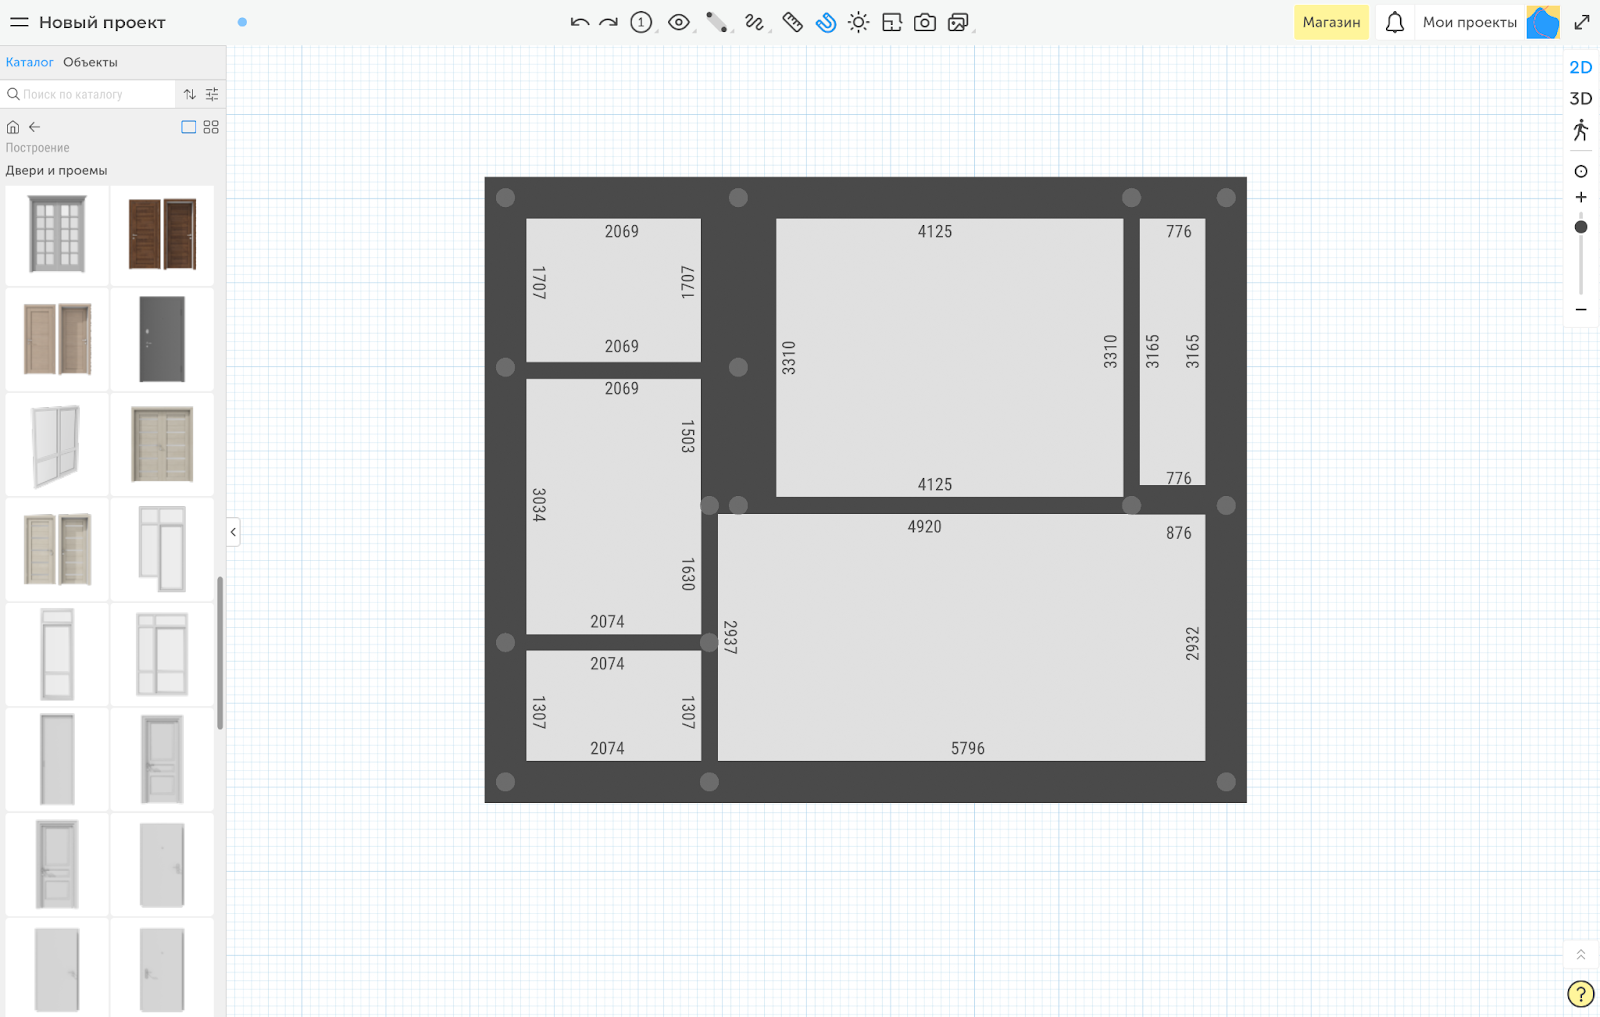
Then in the main catalogue we select Construction, inside which the catalogue of Doors and openings and Windows is located.
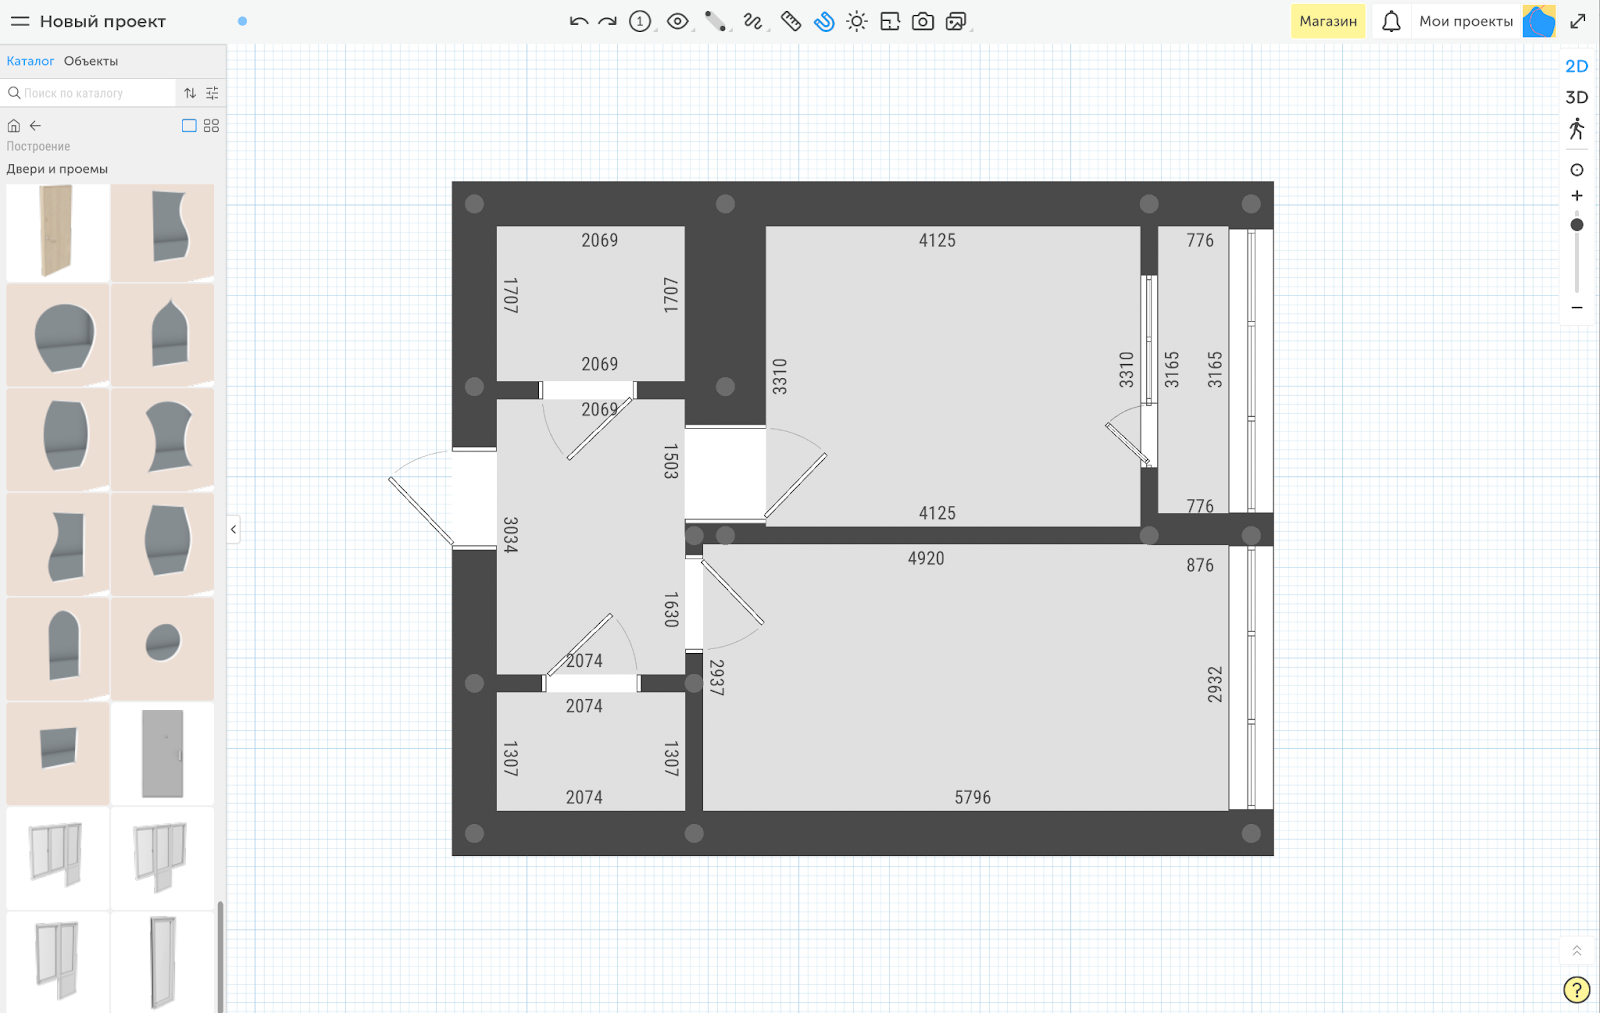
To see the resulting flat in 3D mode or walk around - use the icons in the top right corner of the window

The most difficult and important step is now complete. You now have a complete 3D digital model of the object. What you can do with it now, we will tell you in the next reviews.